Applying video filters in Movie Studio Suite
– here's how!
Want to apply color filters and filter effects to your videos? Keep reading to learn how!
- Open Movie Studio Suite and import the video files you want to use.
- Select a video filter. To do this, open the "Effects" tab and select one of the filters (e.g. under "Art filter") or open one of the video filter plug-ins. Movie looks can be found under the "Templates" tab, and lookup tables are available in the Store. Experiment with the various options available and compare the results in the preview monitor.
- Lastly, export the color-filtered video as an MP4 or HEVC file, burn it to disc or upload it directly to your Vimeo, Facebook or YouTube account.
Video filters available in Movie Studio Suite, the all-in-one video editing program:
- Hundreds of color filters and filter effects
- Movie looks and lookup tables for cinematic visuals
- Integrated third-party video filter plug-ins (e.g. from NewBlue and FXhome)
- Everything you need for creative image editing and optimization
Video filters, video filter effects, lookup tables, movie looks
– what's the difference?
Video filters and filter effects are used to creatively edit the video picture by coloring the picture and adjusting the brightness and contrast. Sometimes they are even used to distort the picture in order to achieve a special kind of aesthetic. Image optimization, on the other hand, is when the image is edited in a neutral manner, or when videos from different sources are adjusted to match each other.
Lookup tables and movie looks are collections of pre-made color filter settings that give videos a specific look. Lookup tables adjust the color and contrast settings of the picture. Movie looks do the same, but with added video effects such as vignetting.There are many different themes and genres of lookup tables and movie looks. You've probably noticed how different movies and television shows often have different visual qualities: romance movies have bright, saturated colors, while thrillers are typically cold, unsaturated, high-contrast and almost look monochrome.
The guide below will show you step by step how to achieve specific looks and how to use the video filters, video filter effects, lookup tables and movie looks in Movie Studio Suite to give your videos a special visual appeal.
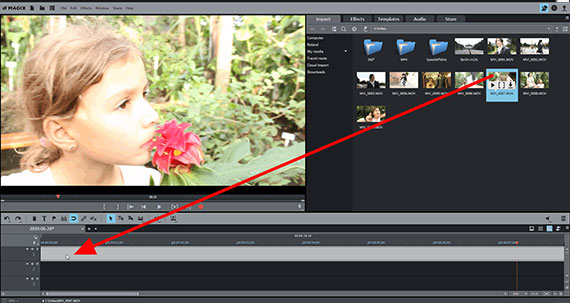
Step 1: Import video
Open Movie Studio Suite and import your video into the program
by opening the Import tab in the Media Pool and navigating to the folder containing your video. Then, simply drag and drop the video into the program.
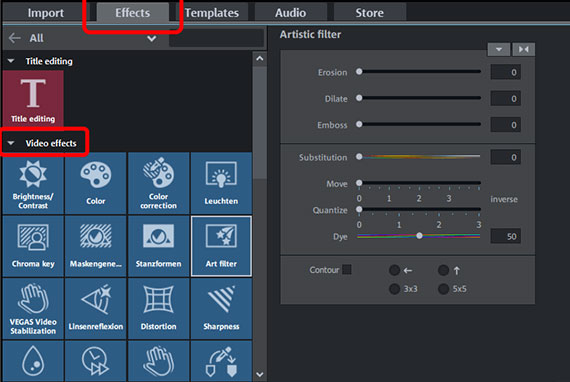
Step 2: Select video color filter
- In the Media Pool to the right, open the Effects tab. Under Video effects, you should see a wide range of video filters, including "Color Correction", "Art Filter", "Gaussian Blur" and "Glow". Select any video filter effect and use the dialog to adjust the settings.
- "Movie looks" are available under the Templates tab in the Media Pool. Select a movie look and drag it onto your video in the timeline.
- You can find additional movie looks, video filters and lookup tables in the Store.
Video color filter examples
Below are four creative examples of color filters in use. The examples are somewhat pronounced, and are intended to give you an idea of the creative image editing options available in Movie Studio.


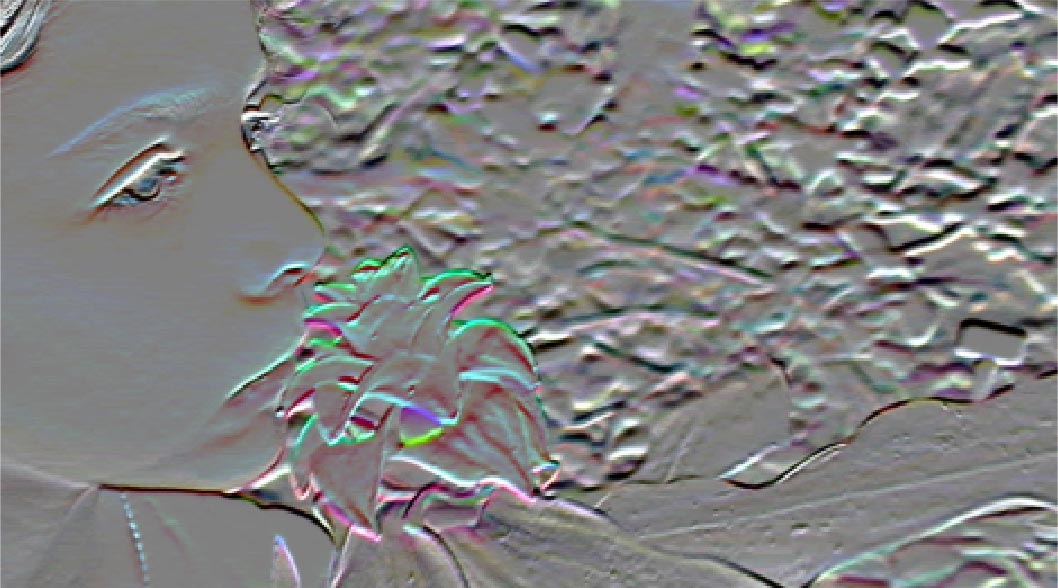

Movie look examples
Movie looks and lookup tables are designed to give videos a specific aesthetic. They are used less to apply flashy video effects and more so to achieve a well-defined, uniform look.
To open the movie looks, go to the Templates tab in the Media Pool. Lookup tables are available under the "Store" tab.
Below are four examples of movie looks.
