How can you create nice pictures?
Pour prendre de belles images, il existe des critères plus importants que la netteté, le contraste et la luminosité. En plus d'un savoir-faire technique, il est nécessaire d'avoir du talent et un sens de la photographie pointu.
How are these two images different?

Obvious poses and heavy editing together with a lack of context are the typical attributes of standard stock photos.
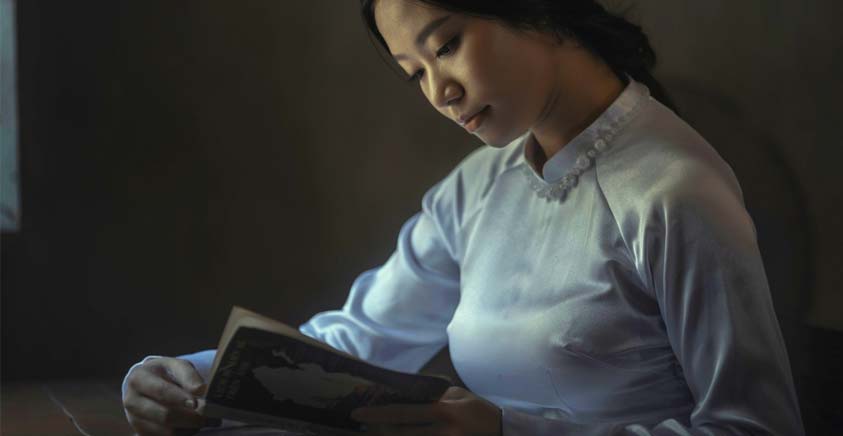
This photo is stirring, like a silent observation transformed to a piece of art through careful consideration of light conditions, composition and the poise of the woman reading.
Both photos are technically good. However, the first photo lacks a creative aspect. Clearly, it has been designed to be as universally applicable as possible for advertising material. That's why it was created in the first place.
In contrast, the second image shows how the photographer creates a feeling of connection to the person being photographed and was able to capture the moment. And that's exactly what makes a good photographer. It's someone who understands how to use composition and light correctly and knows how to affect the right balance between aperture, exposure time and focal distance.
The technically perfect image
To control the effect like in the second photo, you need to be familiar with your camera's functions. A technically good photo should look sharp and bright. Also, it most cases, it's recommended to keep the color render natural.
Sharpness means that the focus is directly on the central subject. When you're creating a portrait, it's a good idea to focus on the eyes.
Focus depth is mainly determined by transitions. Reducing the aperture makes the sharply focused area bigger. When shooting landscapes, you usually want to be able to capture a full image. On the other hand, blur is ideal in macros and portraits for making the photographed object stand out from the background.
Movement focus has a lot to do with the interplay between exposure time and the movement of the subject. The faster the movement, the shorter the exposure time should be. In wildlife photography and for images of moving cars, movement focus can be created in the background by following the subject with the camera. This design element makes the image more dynamic.

Make the subject stand out from the background by using blur in certain areas.
The sharpness in an image is independent of the quality of lens and sensor used. But also, try to keep a steady hand when you're taking a shot.
Tip! For a sharp image focus the camera on a point and select the shortest possible exposure time. 1/30 s is theoretically still possible without tripod. To play it safe, go with 1/125 s.
You should also make sure that the color render appears as natural as possible. Visual color perception is a mix of colors from within the image itself and the light which falls upon it. A good example is the variable color render beneath a fluorescent lamp in comparison to daylight. If no strong color casts are present, the human eye compensates for variance. A white surface always appears white.
On the other hand, the camera will reproduce the light as it is in reality. In the image you can see a color cast. This can only be avoided if the camera can capture that what appears white to the eye. This is known as white balance. Modern cameras can carry out this process automatically with varying degrees of success. Alternatively, you can choose between presets for standard lighting conditions or set white balance manually.
Tip! If you want to shoot spontaneously, automatic white balance with your camera is the best choice. In the age of photo editing, removing color casts after the photo is taken is not a problem.
The third and final important point for a technically pleasing image is exposure. It makes sense to illuminate the photo to the extent that all important elements can be clearly recognized. Generally, the camera works well in terms of measuring exposure. Small-scale adjustments can be made at any time using photo software on your computer.
It's always problematic when differences in brightness exceed the camera's dynamic range. This often happens when you want to capture a shaded area and the sky at the same time. If image information is available, you can highlight light and shade using software. If this does not create the desired effect because the differences are too pronounced, capturing a number of lighter images with different shades of brightness can help. These can then be made into a composite HDR image on your computer.
Getting the right light
Light is a hugely important factor in addition to exposure. In many situations, you only have limited options to influence this. Timing and a bit of luck can play a big role here.
Since color temperature changes during the course of the day, you need to figure out the right moment to press the shutter.
Vertical light at midday means you can use shorter exposure time due to the greater brightness. The color remains neutral. But in terms of image design, it's not particularly impressive.
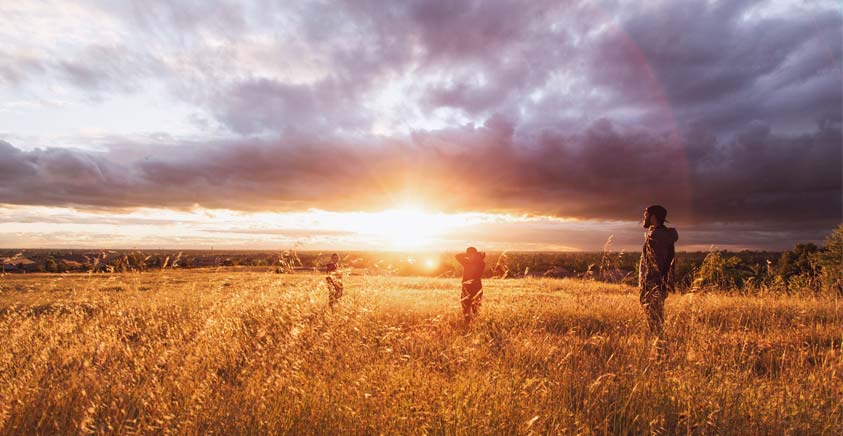
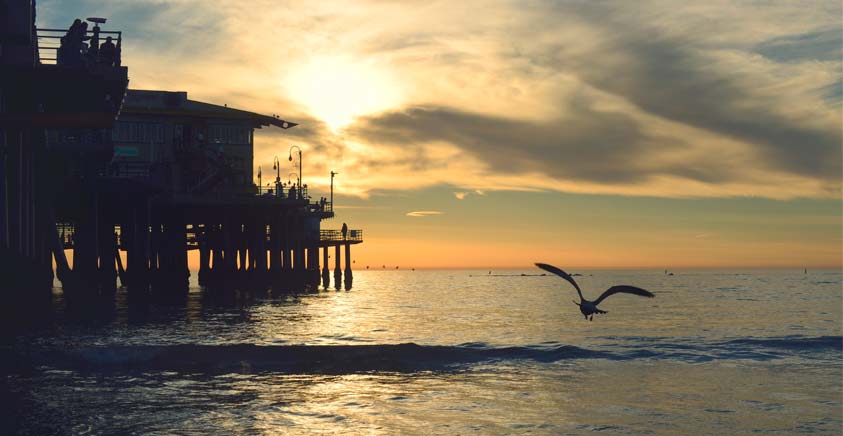
Warm, golden light at sunrise or sunset is ideal for portraits. The later it is in the evening, the more romantic a photo will turn out.
Photography in the dusky twilight hours after sunset. The red glow is still visible on the horizon. The rest of the image has a cooler color temperature. You can notice immediately how it freshens up.
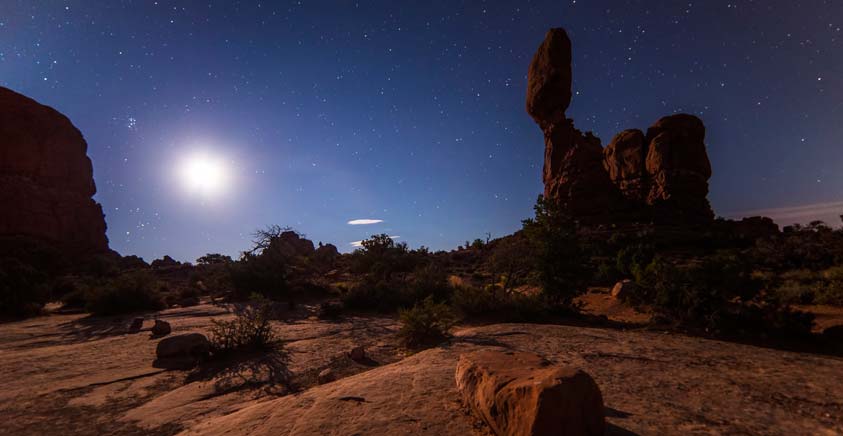
Nighttime images taken in residual light or moonlight are particularly fascinating. You can create really interesting photo effects in these.
As well as time, weather is also a decisive factor. There is in principle no such thing as bad weather for photography.

Shadows in sunshine give buildings clear contours, creating stark contrasts in black & white images in particular.

Diffused light from an overcast sky is particularly well suited for portraits. Everything looks softer and there are no harsh shadows that highlight wrinkles and other details.
Stormy weather: The dramatic sky before a storm forming a backdrop to a subject in sunlight is often more exciting than a photo with blue sky. Raindrops and puddles are all interesting elements too.
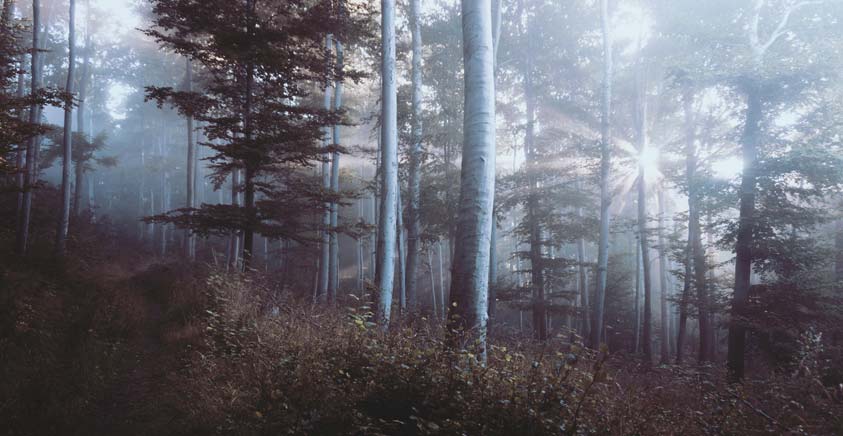
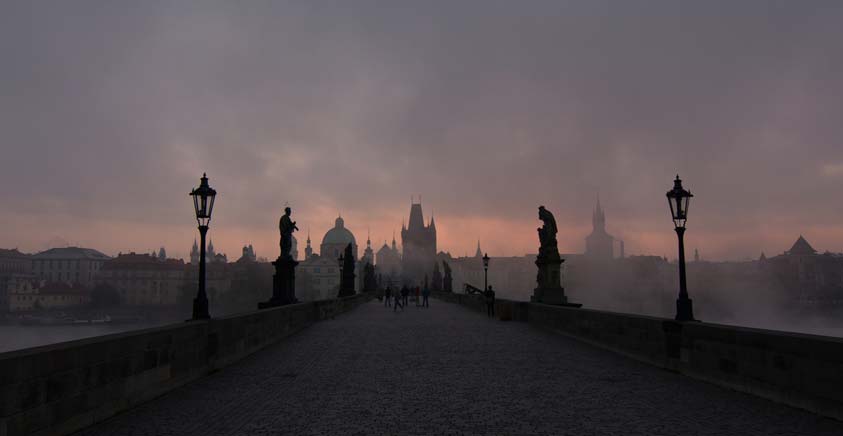
Mist broken through with rays of sunlight holds a mysterious atmosphere.
Backlighting brings out the subject's outline.
Lights rays are influenced by the season as well as the time of day and weather. In landscapes in particular, there is less haze in winter than in summer.
Sophisticated image composition
Now that we have explained the best way to take photos, let's have a look at how to create a good image structure.
First of all, you need to select the correct aspect ratio for the image. The standard aspect ratio for smaller cameras is 3:4. The 2:3 aspect ratio for SLR cameras is more exciting as it's not uniform.
However quadratic images work well in certain circumstances. To make sure a square is evenly balanced, it requires a lot of structure to break through the calm and create a sense of drama.
As well as the aspect ratio, arranging all elements in the photo is necessary for a good composition. Transform your composition by changing location or perspective, moving objects within the space and adjusting timing.
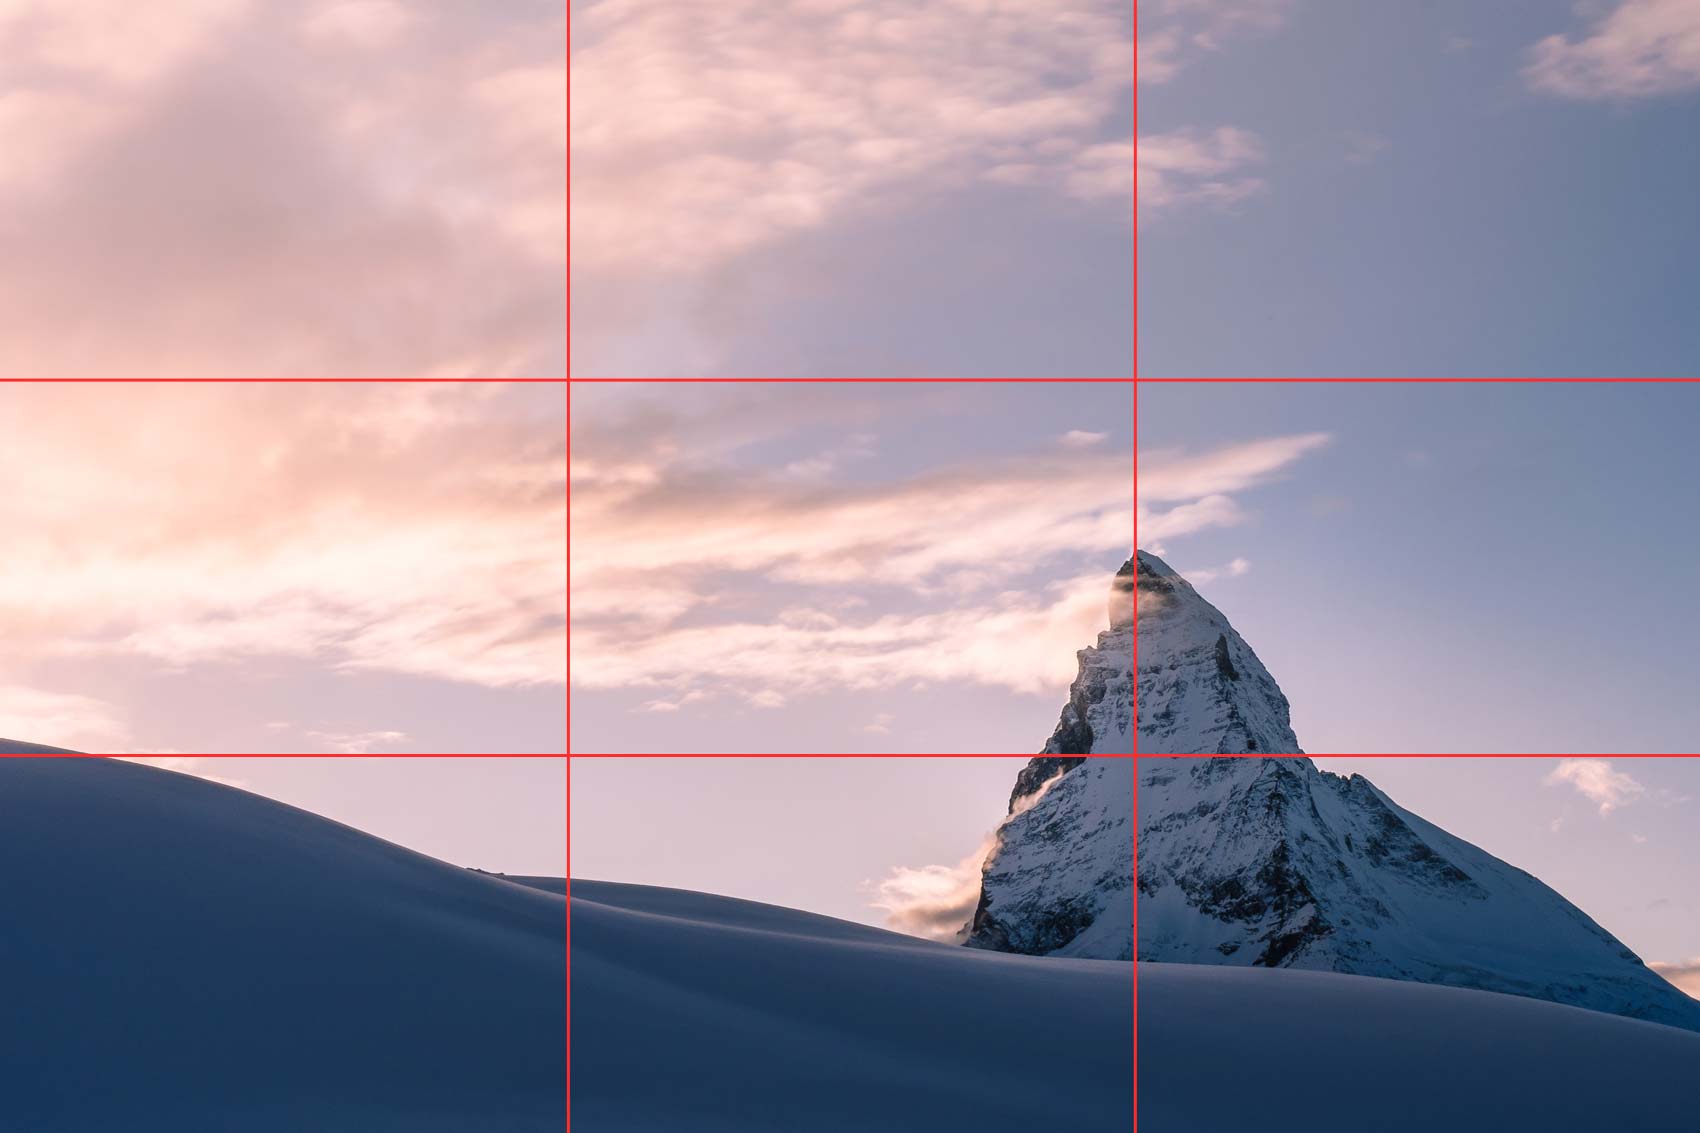
Applying the rule of thirds to image design
The rule of thirds guideline is useful for creating a sense of drama in your picture. The image is divided both horizontally and vertically by two equally spaced lines, each divided into three. The compositional element should be placed at the intersections of the lines.
In addition to positioning of the eye catcher correctly, perspective is important:
- Bird's eye view: The image from an elevated position or from directly above makes an object appear smaller, stretched and insignificant.
- Normal perspective: On eye level the view is usually of the object. The camera can be held as normal for landscapes but sometimes you need to kneel when taking pictures of children or animals. This perspective feels much more "up close and personal" than an image taken from above.
- Frog perspective: The view from a very low-down point makes objects appear bigger and more powerful.
- Over the shoulder: This image angle creates a sense of distance for the viewer. You feel more powerful, like a secret observer.
- Frames: Windows, trees and many other objects can be used to frame a subject to create a more lasting impression and yet achieve a more intimate effect.
Another aspect that beginners might not be aware of is focal length. Focal length is affected by physical effects and changes the relationship between objects.
- Wide angle: Shorter focal length increases the optical distance of all elements in an image. Smaller spaces and landscapes appear larger.
- Normal focal length: 50mm is the normal focal length for standard images. Objects are not physically distorted.
- Telephoto lens: Greater focal length decreases distance between objects, making paths appear shorter, for instance.
The photographic eye
In addition to a detailed knowledge of the settings options for your camera and how they affect your content, a photographic eye is necessary for good photos. When you've developed the elusive photographic eye, you notice the photogenic properties of a subject quickly. Traits of the photographic eye include simplicity, clarity and organization.
Beginners tend to create many images in a long shot because they're worried about missing something. But that's a boring method of doing things. Too many details are captured and it can get a bit chaotic. Instead, it's better to focus on a single detail. You can do this by using focus depth, for instance.

Here the camera focuses on a single detail in the forest.
But tidying up can also be a good idea - you can do this before capturing the image or by retouching later on the PC.
The following factors are not photogenic:
Dullness: Gray in gray makes images boring, because there is nothing to draw the eye.
Wrong background: Beginner photographers often forget about the background to their subjects. You might see a lantern sticking out behind someone's head, or there's simply too much going on in the background.
Internal camera flash: The integrated flash integrated creates harsh shadows and glossy spots. The thicker the lens, the more likely it will lead to red eye. Any kind of lighting can also affect flash.
Obvious posing: These images appear unnatural and interchangeable, plus the viewer can't bond with the subject.
Using pointless tricks: Even if they are still popular these days, photo filters are a fad that are unlikely to interest people in a few years' time.
As a photographer you should ask: "What is unique about this situation?" There are wide spaces in every city. What makes this space special - is it the lines and patterns, or the facial expressions of the figures? Once you have recognized what is special, you need to make it come through in the image itself.
Customizing image content by editing
The ability to immortalize an event in a photo is a real skill. Sometimes, despite careful image composition and technical accuracy, your image doesn't turn out the way you want.
When this happens it's best to turn to photo editing on your PC. Using computer software such as MAGIX Photostory deluxe , you can adjust colors and focus by shading image areas and using the blur function.
A keen photographic eye is much more important than having a perfect technical setup. You can develop this by studying images taken by renowned photographers and then heading out and about with your camera and finding out what you like best.
