Editing videos for YouTube
– here's how!
Follow these steps to edit your videos for YouTube:
- Open the video editing software Movie Studio and import your video files.
- Cut out any footage you don't need by placing the playback marker on the part you want to remove and clicking the Cut button. Delete the part you don't need and shift the part that comes after it forward to fill in the gap left behind.
- Go to the Media Pool and add captions and transitions, or apply color and sound corrections, as needed. To apply templates, simply drag them onto the videos.
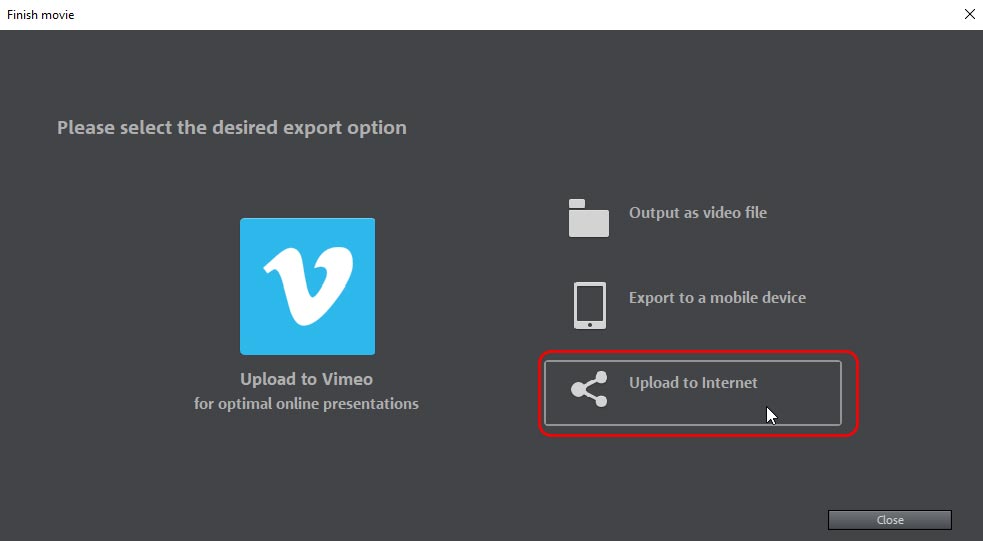
- Select "Finish movie" > "Upload to Internet" > "YouTube", sign in to your Google account and upload your video.
Edit videos for YouTube with Movie Studio Suite, the all-in-one video editing program:
- Quick and easy cut features
- Intuitive templates for intros, outros, captions and subtitles, transitions, opening credits and much more
- Professional image and sound optimization
- 1-Click upload to YouTube
- Supports all essential YouTube formats
Video editing software for YouTube
Start downloadHow do YouTubers edit their videos?
YouTube is home to every kind of video out there, from shaky handheld footage to ambitious video masterpieces. But many YouTubers don't actually upload their videos directly from their smartphone or camera. Rather, they transfer their footage to their PC first so that they can use the video editing software Movie Studio to add cuts, optimize picture and sound, add titles, transitions and effects.
Although YouTube provides a free video editor which you can use to make simple cuts and edits, it is highly recommended to use the all-in-one video editing software Movie Studio to enhance the quality of your videos before uploading them. Why? Because the better your videos are, the more likely people will be to subscribe to your channel.
YouTubers edit their videos by first cutting out any footage they don't need. Usually there is some footage before the actual video starts that needs to be removed. YouTubers that place value on branding also include pre-produced intros and outros at the beginning and end of each video to increase their recognizability. Some also include captions and subtitles on longer YouTube videos to split them into easily understandable sections or to add information or comments on what is happening. It's also important to enhance the picture and sound quality by filtering out noise on the audio track, editing the sound to make spoken parts easier to understand, and improving the colors and brightness/contrast of the video picture.
Lastly, the video is converted to a format supported by YouTube. Worth knowing: All videos are automatically converted by YouTube before being posted. This conversion process may reduce the image and sound quality in your videos, so we suggest converting them yourself before uploading to avoid this issue. Movie Studio can automatically convert your videos to the right formats.
Editing videos for YouTube
in Movie Studio
Step 1: Import videos for YouTube
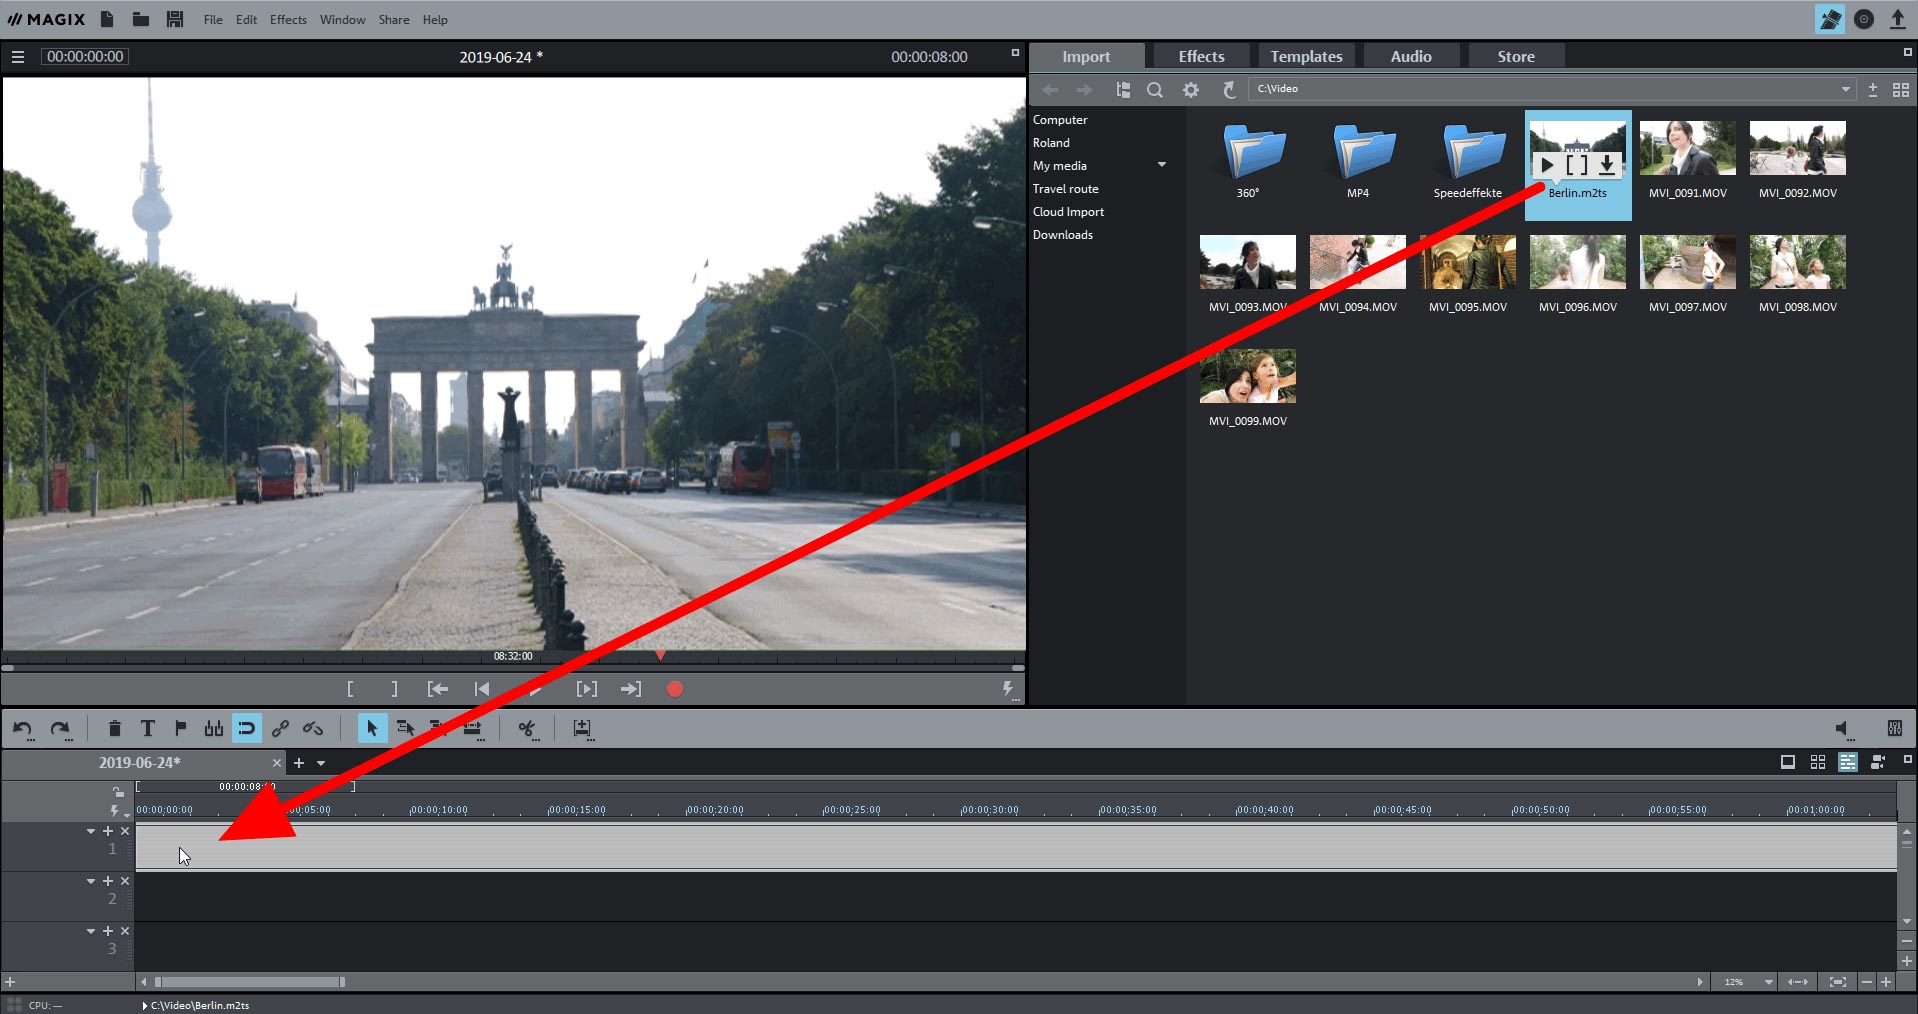
- Open Movie Studio and import your video into the program by opening the Import tab in the Media Pool and navigating to the folder containing your video. Then, drag and drop the video into the program.
- To combine multiple videos into a single YouTube video, sort all of the videos you want to use on the first track, one after the other.
Step 2: Cut your YouTube video
- Play the video material you imported and look for parts that need to be cut out.
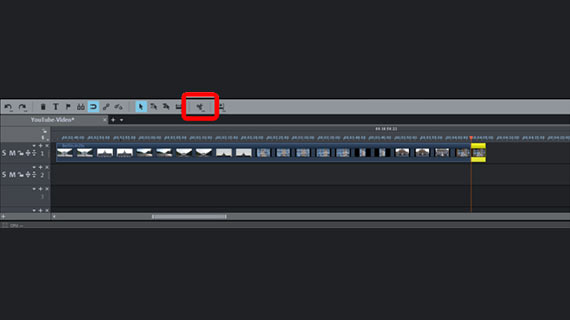
- To remove a part, place the playback marker on it and click the Cut button.
- The video will be split into two parts.
- Click the part you want to delete and press the Del key on your keyboard.
- Move the footage on the right forward to fill the gap left behind by the part you deleted.
Step 3: Add captions and transitions or make color and sound corrections to your YouTube video
This step is entirely optional (you could also upload directly to YouTube if you wanted).
- To add captions, open the "Templates" in the Media Pool and look for a suitable title template to use. There is a preview available for each template. Drag the template onto track 2 and position it where you want the titles to appear. Then, enter the text for the titles.
- Transitions can be found under the "Transitions" section of the Media Pool. All transitions can be previewed as well. To apply a transition, drag it directly onto a cut between two videos.
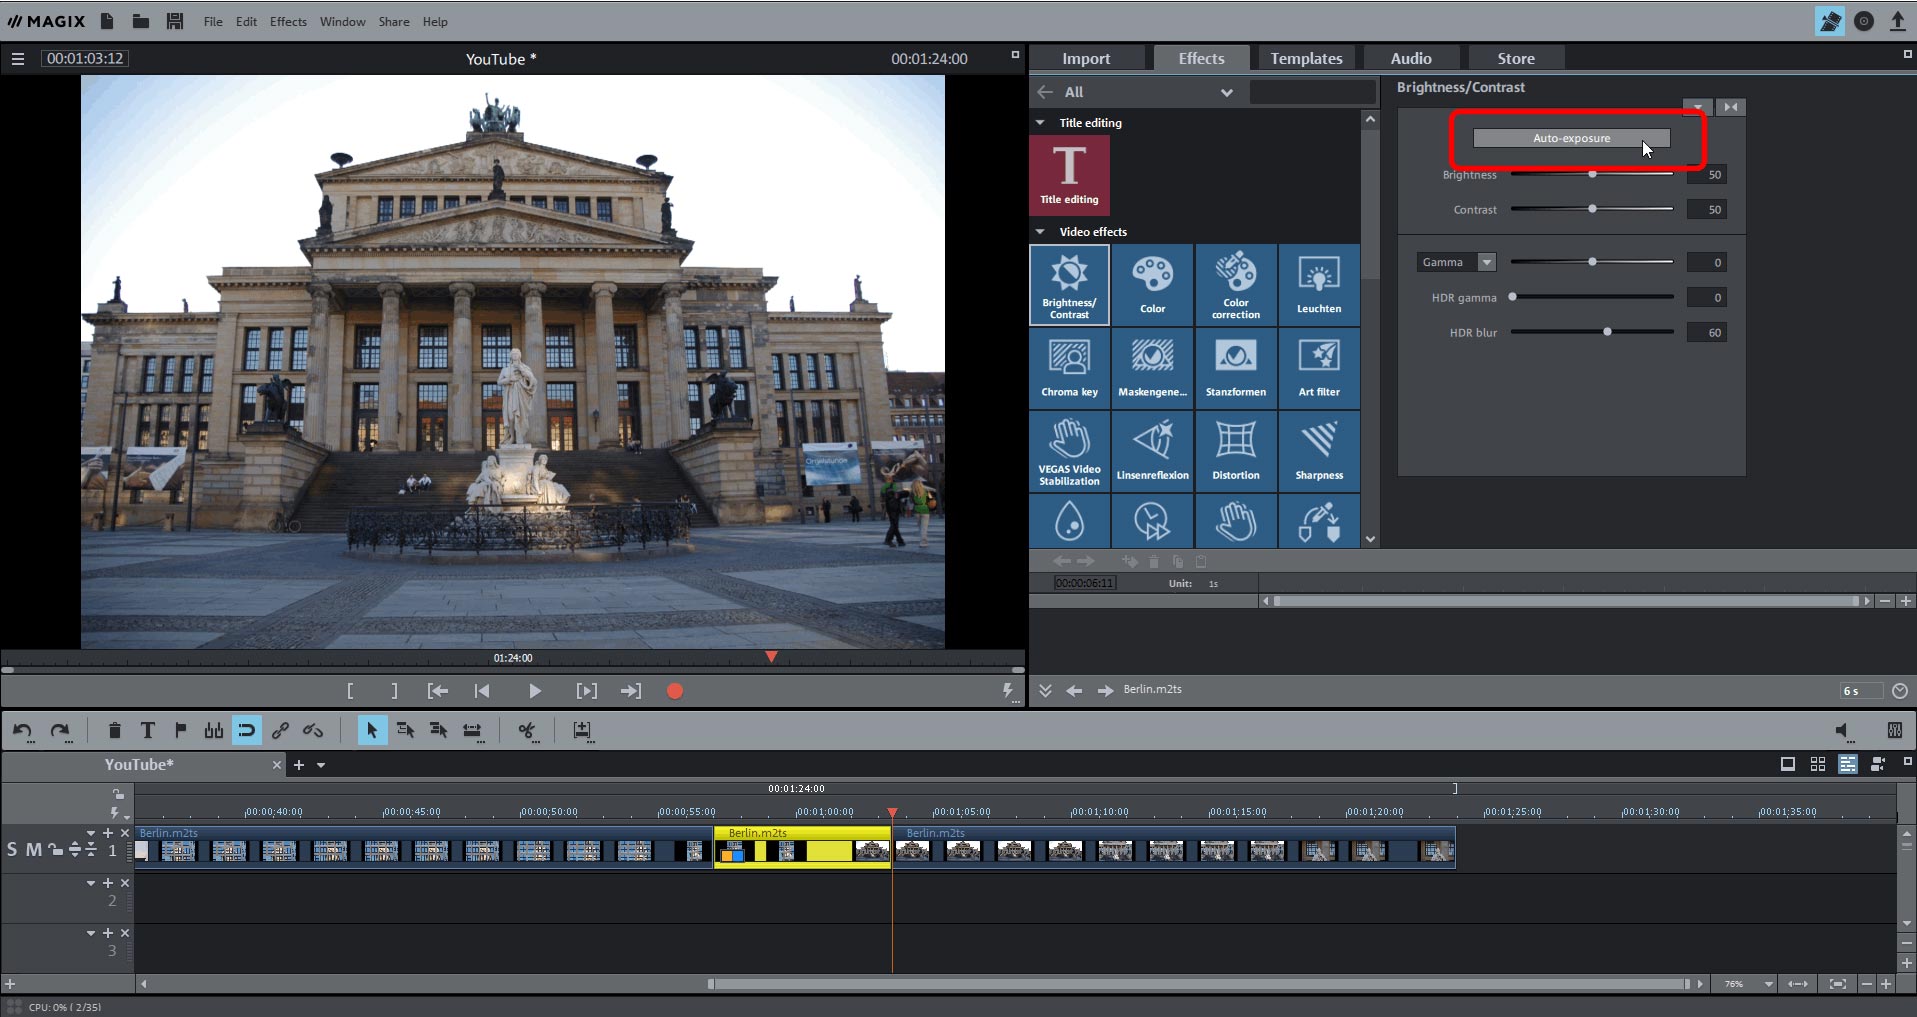
- To apply image and sound corrections, open the "Effects" tab. Click on the video in the track that you want to edit and select the effect you want to apply. The effect "Brightness/Contrast" contains an auto exposure feature which can be used to improve the image quality on most videos. To optimize the audio track, we recommend using the "Audio Cleaning" feature to filter out noise, or using the equalizer and compressor to increase the comprehensibility of spoken parts.
Step 4: Upload to YouTube
- To combine all of the video material in the timeline into a single video and upload it to YouTube all at once, open the "Finish Movie" dialog in the upper right corner of the program screen and select "Upload to Internet". Under Community, select "YouTube". Enter your login information for Google and upload your video. All of the video files, transitions and captions in the timeline will be automatically combined into a single video file and converted to the right format.
- Alternatively, you can go to "File" > "Export movie". Here you should see a list of available video formats. For YouTube, the best export format to use is the MP4 container with the H.264 video codec and the AAC audio codec. There are a range of more specific codec settings available in the Export dialog.
Movie Studio Suite: One of a kind – just like your movies.
- Smooth proxy editing in up to 4K
- Up to 1500 effects and music
- Automatic wizards
- Premium effects package and effect plug-ins
- Burn your movies to DVD, AVCHD or Blu-ray
- Direct upload to YouTube and Vimeo
Video editing software for YouTube
Start download


