13 October 2021
Enhance your movies
with these 5 hidden features in Movie Studio

Movie Studio contains a number of functions for making video editing easier and faster that are not covered in the manual. Here, we describe the five most useful ones: Secondary color correction, chroma keying, editing templates, shot match and track handling.
1. Secondary color correction
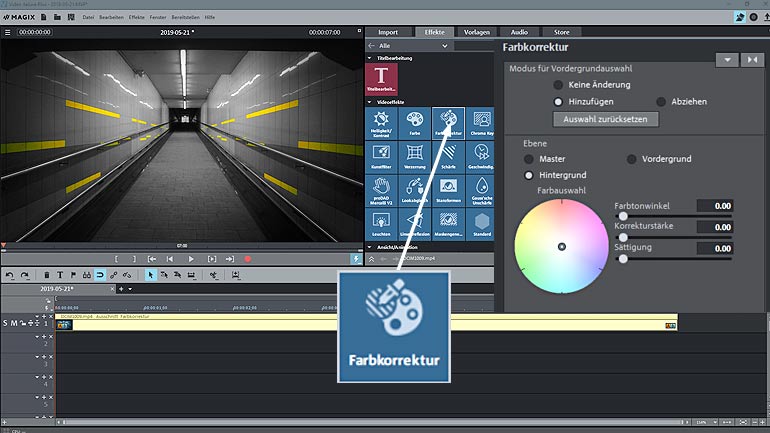
To edit individual color ranges in your video, use the color correction function. This also lets you easily fix incorrectly displayed colors. What's more, this function offers different color schemes for foreground and background, which enable you to conjure up creative color effects.
It's pretty simple: After clicking on "Video Effects" > "Color Correction" under "Foreground selection mode", choose "Add" to select a color range.
Then click on an area in the video displayed in the video monitor that contains the color that you would like to edit. The highlighted range will appear on a gray background. The selected range is your image foreground. You can click on additional image areas to expand the image foreground. Click on other areas in the image to add to the foreground. To remove a selected color range from the foreground, choose "Extract" and then click on the color range. Use "Reset selection" to cancel the entire selection.
To edit the selected color ranges, under "Layer", select "Foreground".
To edit the rest of the image, select "Background". When you select this option, the color selection becomes a mask that protects the selected range from editing changes. The "Master" option changes the color of the entire image. The color you choose is not important here.
2. Chroma keying
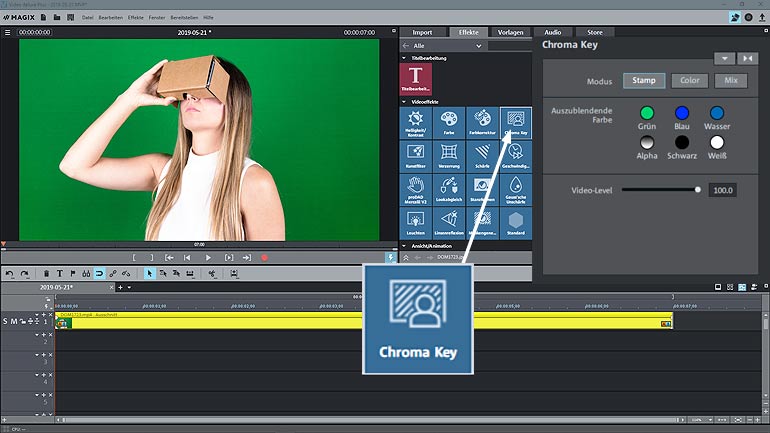
If you want to replace an image with another on, and not just replace a certain color, this is a compositing effect known as "chroma key". Better known as blue or green screen, you're sure to be familiar with this effect from movies and videos. The weather forecast on TV, too, is also recorded in front of a green or blue screen. A chroma key filter is then applied using a computer to replace the green or blue background with another image – the weather map. Blue and green are particularly suitable for the process because in contrast to red, these colors do not appear in human skin, which is an essential factor for keying people.
Because the chroma key effect mixes two video shots together, the respective tracks in the project must be positioned exactly on top of each other. First you need to drag the video that you want to use as background to the above track, and the video where you want certain areas to appear – in other words, the foreground – to the below track. Only the video on the below track is visible. If you make a color transparent through keying, the video on the above track will appear in the places with that color. So, for example, all green areas will be replaced with the video above. Use the "Threshold value" and "Transition area" sliders to fine-tune the range of colors you want to replace.
Color mode allows you to specify color range directly in the image by dragging out a frame. This way, you can use any color or color combination for keying. The colors you've selected then also become transparent.
Stamp mode disables keying and shows the complete image.
3. Shot match
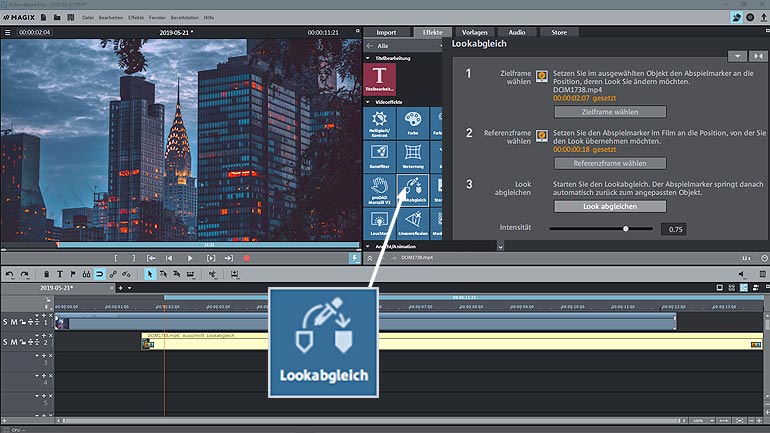
If you want the same color scheme, brightness, and contrasts for all the clips in your video, the easiest thing to do is use the shot match function.
1. First select the objects whose look you want to adjust and make sure that these objects remain selected throughout the entire shot match process.
2. Open the "shot match" dialog. Position the playback marker over a selected object at a part with the original footage's image properties, and click on "Select target frame".
3. Place the playback marker over another object whose image properties you want to apply to the objects already selected, and click on "Select reference frame".
Then click on "Shot match". You'll now see that all the objects you selected will have changed.
4. Editing templates
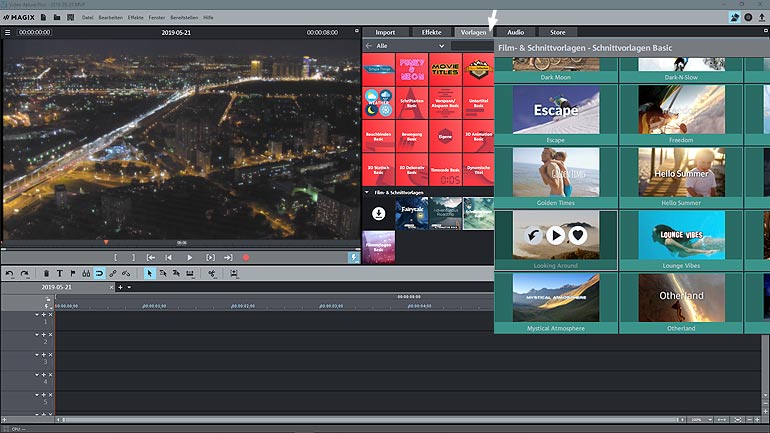
Editing templates are opened just like a standalone film; unlike effects, they are not dragged on to the existing material in the project window. They contain placeholders that you fill with your own material. Use the preview arrow to play each template and view a short video clip with sample material. Opening a template will provide a more detailed idea of how it works.
In the lower section, you can see the vertically arranged structure of the template, which is arranged into several scenes. You can find additional info in the window on the right. Replace the placeholders with your own videos by dragging your footage from the Media Pool down into the project window.
You can drag your material onto the tray that appears at the bottom of the screen. Use the info field below right if you need to adjust titles or captions.
5. Track handling
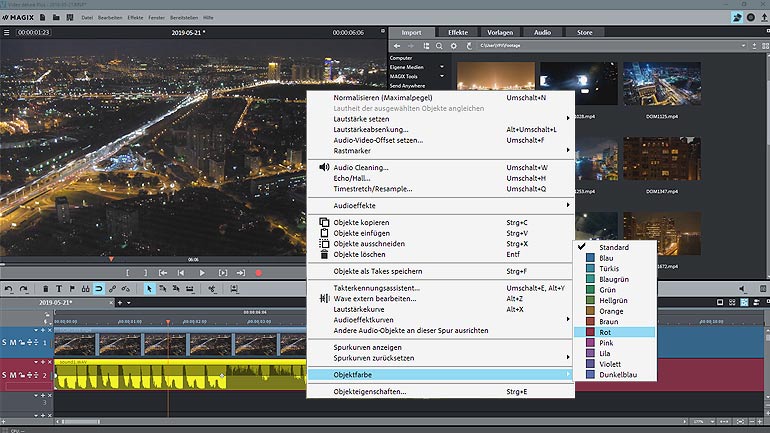
During post-production, the number of tracks and objects can pile up fast. For example, tracks 1 and 2 might be occupied by the two takes of the main movie. Then the intro could be on track 3, the outro track on 4 and shorts on tracks 5-9. To ensure a clear overview at all times, related objects should not all be grouped on the same tracks. It's also best to give each track and object a specific color. To do so, simply click on the down arrow in the respective track menu and select a color from the menu that appears under the item "Track color". That's all there is to it.
Next article >
Artist Interview: Pawel Piatek
< Previous article
Interview with Eckhard Stoll - the man behind multicam mode
Other articles that might interest you
Legal issues when filming: Shooting permits, copyright & more
Shooting permits and copyright – everything you need to know about legal issues on set you can read in this article.
The man behind the multicam: Eckhard Stoll
Movie Studio is a complete video editing solution that combines professional features with intuitive operation.

