NEW
Make vocals sound fatter using the Split Harmonizer effect

Just follow these easy optimization steps to learn how to make vocal recordings sound fuller and how to use them as an effect for different types of vocals, such as rap. A Split Harmonizer plugin is often used to double a vocal track and make it sound fuller. This produces a stereo effect, giving vocals a fatter sound. Because this kind of plugin can be expensive and hard to find, this tutorial is geared toward people who want to create this kind of vocal effect and want to get great results without delay.
We’ll describe two methods of doing this. Bear in mind that there’s no perfect way to optimize vocals. You should just keep playing around until you’re happy with the results.
This tutorial uses Music Maker, but it is also compatible with more advanced programs such as Samplitude Music Studio, Samplitude Pro X or ACID Pro.
Required tools:
1 DAW (e.g. Music Maker, Samplitude Pro X or ACID Pro)
1 Pitch-Shifting-Function
1 Vocal take (optional 3 takes)
Method 1
The first method is suitable for creating rap sections or music where you want to give vocals a slightly synthetic sound.
Have a listen to some original material:
Step 1 – Copy vocal track
First, duplicate your vocal stakes twice and place them one track below, as shown in the sample photo. You can do this by left-clicking on the object and copying it with the keyboard shortcut "Ctrl + C" and inserting it with "Ctrl + V".
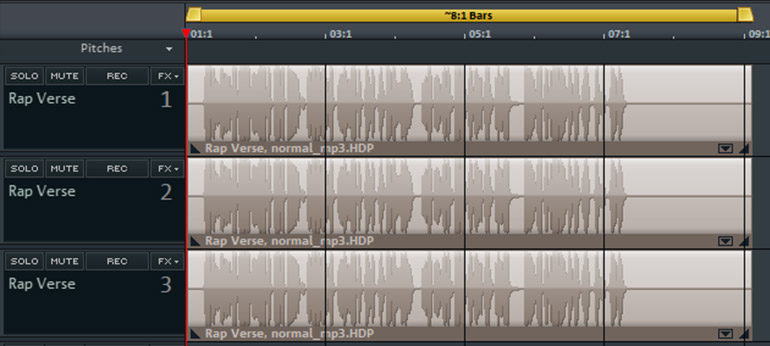
Step 2 – Down pitching (Track 2)
Right-click the object on the copied track. In the dialog, select “Pitch & Tempo” and then “Time Stretch & Pitch Shift”. The time stretch and pitch shift features will now open below.
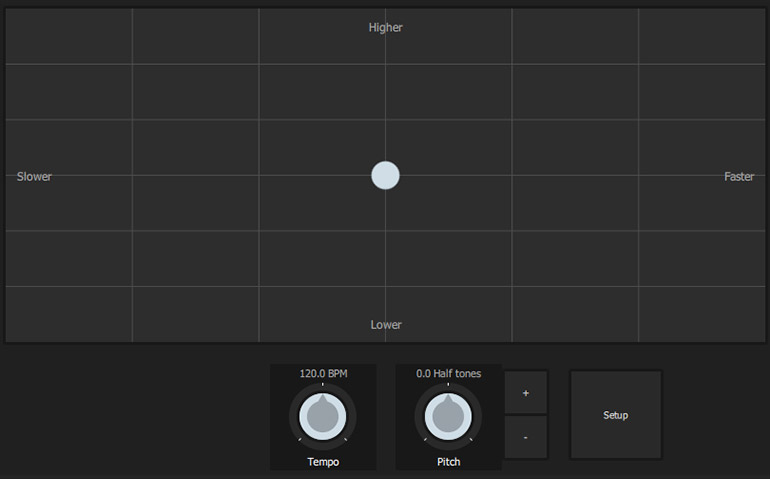
You can look at our example (see photo) in order to set the pitch to -1.0.
This track is now a semitone lower than the original.
Set track 2 to “solo” so you can hear the changes.
Step 3 – Up pitching (Track 3)
Right-click the object on track 3 once again and open “Time stretch & pitch shift”. Now set the pitch to +1.0 so that the track is now a semitone higher.
So now what you’ve got is:
– The unaltered original track.
– A take that’s at a lower pitch.
– A take that’s at a higher pitch.
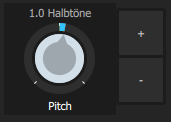
Setzt die Spur 3 auf „Solo“ damit ihr die Veränderungen hört.
Step 4 – Adding the effect you’ve created to the mix
And now here’s how to make those vocals fuller – the lower and higher pitched vocal takes are lightly mixed into the original track and distributed in stereo panorama.
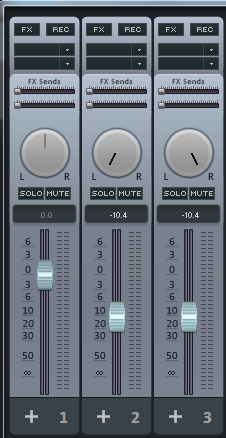
Use the “M” shortcut to open the mixer and turn the level for tracks 2 and 3 down completely. Don’t forget to switch all tracks to active. Since you’re raising the volume level for both takes 2 and 3, you’ll need to stick the faders together temporarily. You can do this by clicking the track 2 fader with the left mouse button, then holding down CTRL and clicking the track 3 fader again with the left mouse button. Drag the fader up slowly until you find the best result. In our example, we’ve set the fader to -10.4 DB (see photo). Also, you can split the two tracks in panorama. Drag track 2 fully to the left and track 3 fully to the right.
The more you mix in, the more synthetic the sound you’ll achieve. Listen to our sample track here:
The vocal recording now sounds fuller, but with a slightly synthetic touch that would sound great in a hip hop track. This effect is ideal if you want to highlight specific sections and punchlines in your track. Cut all the parts of tracks 2 and 3 that you don’t want to stand out. It might sound like this:
Here’s another example to show you the different soundscapes you can create once you start to experiment. Set pitch to -3.0 and 3.0 to create the illusion of backing singers:
Remember that the effect you’ve put together is likely to sound a bit mechanical and static. If that’s the style you’re going for, then Method 1 above is the one to use. Also, make sure to pitch the accompanying tracks at no more than 0.5 semitones higher or lower, to keep the effect subtle. We’ve gone really in-depth in this tutorial on purpose to show you exactly how to achieve the effect.
Method 2
The second method sounds more natural and is more suitable for classic pop songs where songs in the chorus need to be made fuller to stand out more against the instrumental. This approach uses three vocal takes, so the singer need to sing “tightly”. When you’re using this method to create rap vocals in particular, it’s really important to keep all three raps aligned as precisely as possible.
Step 1 – Three vocal takes
Record the vocal part three times and pick the one you like best to use as the main take. Use the other two takes as the accompaniment.
Step 2 – Panorama
Like method 1, you distribute takes 2 and 3 in stereo panorama (left and right) and mix both tracks into the main take until you get the result you’re looking for. Experiment with the sound when moving tracks 2 and 3 into the stereo image. Sometimes it’s best not to move the accompanying tracks fully to the left or the right, but move them a bit closer to the middle.
Have a listen to an example with highlighted punchlines and a beat to get an idea of what method 2 sounds like:
Tips:
- When using method 1, take care not to mix in too much of the effect you’ve created. Your ears will quickly get used to the effect. The more of it you add, the less natural the sound will be. For this reason, you should come back to it a day later and listen again with fresh ears.
- Try playing around with all settings until you reach the result you want. Each voice has unique sound properties and requires customized settings.
- When listening to the vocals with different settings, always listen to them together with the full instrumental.
Now it’s your turn! Try out this subtle effect in your next recording session – it’s easy.
Next Post >
How to record a guitar
< Previous Post
Which microphone for which purpose?
Related Posts
From Music Maker to Samplitude Music Studio
Use your Music Maker skills in Samplitude Music Studio. Here we tell all why you won’t regret an upgrade!
Samplitude Elements – Quickstart Guide
This tutorial will help you get started using Samplitude and provide you with efficient workflows for common application scenarios.
Brand new: SOUND FORGE Pro 12
Learn about the new features, improvements and highlights in the latest version of the sophisticated audio editor SOUND FORGE Pro.
The new SOUND FORGE Audio Studio 12
An overview of all the new features and optimizations!

