Audio dubbing is an essential part of video and move post-production. In this article, we explain exactly what is meant by audio dubbing and provide tips to help you dub your own videos and movies.
What is audio dubbing?
Audio dubbing means that extra audio material is added to the audio track of a video during post-production and its audio track is optimized. This can be done in a number of ways:
- Audio dubbing with background music Most video recordings focus on what the viewer can see; the audio track is often not as interesting or important. There may be long periods of silence or background noise. If this is the case, it's advisable to add background music that matches the action on screen.
- Dubbing video using sounds: Many recordings can be enhanced by adding sounds from a library, especially when the "real" noise on the audio track, in other words the original sound, is garbled, too quiet or doesn't create much of an impact.
- Dubbing video using voice-over: Spoken commentary added after the recording was made can link separate scenes and explain the context and meaning of the on-screen action. Footage where speakers can't be understood due to poor sound quality can also be made more comprehensible through post-production speech recordings. Dubbing is also a form of voice-over that is recorded after filming so that the film can be shown in other languages.
- Dubbing video by removing noise or the entire audio track: Sometimes the audio track is distorted and contains noise. The original recording simply does not sound clear or concise enough. In many cases, this can be improved during post-production by using audio cleaning effects to remove sound from the video. These effects filter out noises and clean and amplify signal components. This kind of audio optimization also falls within the scope of audio dubbing.
Dubbing, voice-over and subtitles – the differences
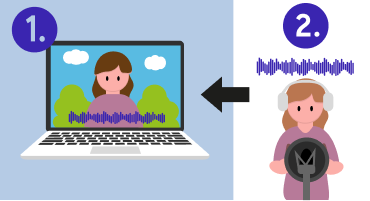
A voice-over is a dubbing technique that uses the voice of an additional speaker who does not appear in the video recording. Their voice is recorded during post-production and then added to the original film recording using a computer.
A voice-over can be thought of as an off-screen or "off-stage" voice that narrates the action and provides more information for viewers. For instance, it might describe events leading up to a certain scene. A voice-over can also be subjective in order to reflect the thoughts of the actor on screen. Even if the spoken words are dubbed into another language, this still counts as a voice-over.

Subtitles are a simpler, easier-to-produce alternative. They can also display information about what's happening in the video, or translate what is being said. In contrast to voice-overs, they are shorter in length. Viewers find it difficult to read long lengths of text on screen and concentrate on the action at the same time. For this reason, subtitles should be as brief as possible. Using longer titles on screen only really makes sense for the opening credits – Star Wars is a well-known example.
So while subtitles are less suitable for expressing the thoughts of the actor, they are more suitable for additional information such as place, time and the name of the person speaking. Creating subtitles is also part of post-production process, since these are created at a later point using a computer – just like the voice-over itself. Subtitles are not part of the dubbing, since they are used only on the visual level.

The different types of dubbing
If you want to create a voice-over during the audio dubbing process, decide which kind to do in advance. There are several techniques for creating voice-overs and dubbing for video.
Witha UN-style voice-over, you first hear the speaker on screen talking, then after a few seconds the audio track volume level is lowered and the voice-over is faded in. This type of voice-over is particularly useful for presenting interviews in other languages or in dialects that may be difficult for viewers to understand. The UN-style technique is more suitable for documentaries and factual shows rather than fictional television, where the acting and characters should be as believable as possible.
Withtimed-sync dubbing, the speaker's voice matches the action of the people talking in the video, but it isn't lip-synched. Viewers can tell that someone else is speaking, but the way of speaking is adapted to the the spoken video content and the overall impression is more homogeneous.
Lip-synced dubbing is a technique that creates the illusion that the dialogue is spoken by the same person who is currently seen speaking in the video. This dubbing technique is used in most movies or series. Usually, professional actors are hired for lip-sync dubbing, as the voice must not only match the lip movements of the speakers in the video, but also express the same emotions and tonality through the language in a convincing way.

Easily dub video recordings at home
Video dubbing takes place takes place during post-production, which means after the film recordings have already been made.
Equipment for audio dubbing
To remove sound from your videos at home, you need the following equipment:
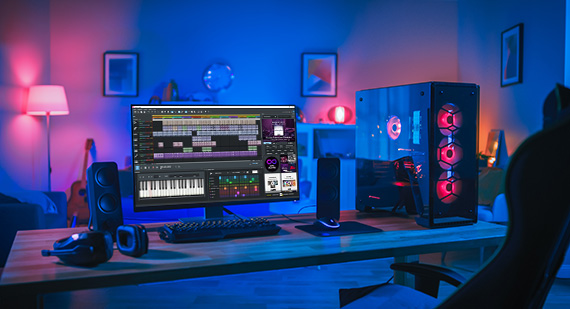
Computer/laptop with audio dubbing software
You can work with your own computer or laptop. Playing and editing videos requires high performance, especially in terms of your processor and your graphics card and/or video card. Fortunately, most modern computers and laptops are up to the task. Since your hard drive is used as storage for videos, it needs to be large, with enough free space to store all the files you need. We also recommend a backup option for your files, such as cloud storage or an external storage device such as a USB flash drive. You also need the right software – we'll get to that in a moment.
Microphone
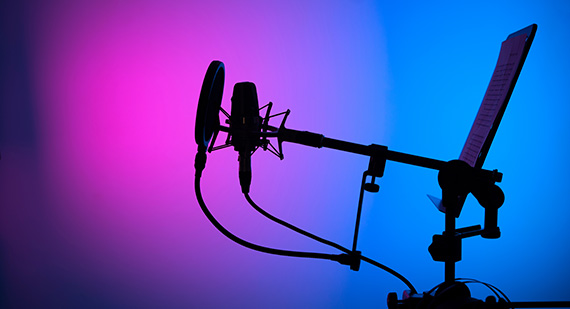
The built-in microphone on most camcorders is often not very high quality; device manufacturers usually invest more in other functions. Often, these microphones can only capture ambient sound. So when it comes to voice recordings for videos, we recommend using a high-quality external microphone.
Condenser microphones are superior to most dynamic microphones in terms of sound quality. On the other hand, they are also less robust in general and not really suitable for use outdoors or on the road. For audio dubbing, quality is more important over robustness – you want to ensure that the voice recording is clear and intelligible. Furthermore, the condenser microphone is said to generate less background noise. If you really want to create high-quality recordings, it's a good idea to consult a dealer for specialized advice on using microphones.
Headphones
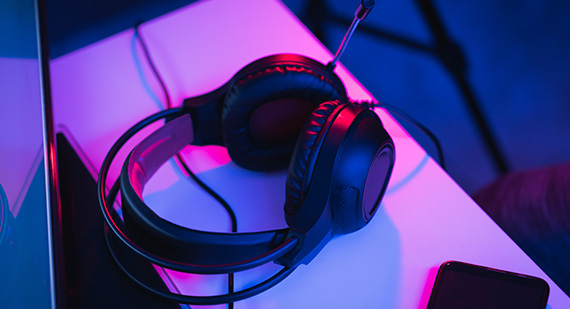
You also need headphones to be able to hear the audio track during voice-over work and to avoid the audio track being recorded. Choose good quality headphones that are comfortable to wear, since you may well spend hours using them.
Optional: Audio interface and pop shield
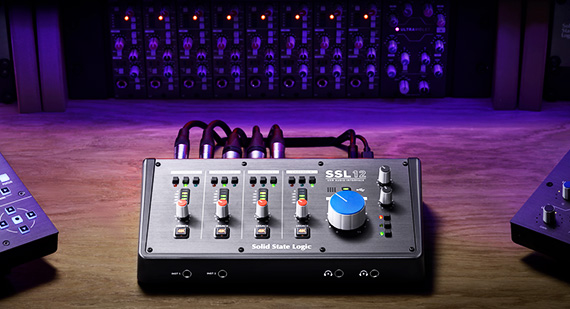
To create high quality recordings at the highest professional standard, consider using an additional audio interface. The audio interface is used to connect the microphone to the computer and convert the electrical signals from the microphone into high-quality digital data. With a USB microphone, you don't need an additional audio interface – simply plug the microphone into a free USB jack. For beginners, using USB microphone is easiest, especially if you're on a small budget.
A pop shield or pop filter is a round, meshed tool that is placed in front of the microphone to minimize the typical pop noises that occur during voice recording.
The best software for audio dubbing
For dubbing video, you need suitable software that can edit both image and sound. Many software solutions for video editing also offer a range of features for audio editing. However, their tools and features for audio editing are usually limited or at least not as well equipped as those for video. When dubbing video, you need to be able to optimize the sound of your original footage and combine it with additional audio files or voice-overs. The program you use for post production sound should include high-quality functions for optimizing audio.
You also need to be able to arrange sound and video files on several tracks. This way, you can see where in the movie you can add the additional material. Most video editing programs offer multiple tracks – 99 tracks are not uncommon. However, about 10 tracks are usually enough for audio dubbing purposes:
- Two tracks for image and sound for the video recording
- Two additional tracks to cut the image and sound of the original recording and to fade into parts of it
- One track for sound effects
- One music track
- One track for voice-overs
- One track for subtitles
- Other optional tracks e.g. for opening credits, effect transitions or additional music tracks
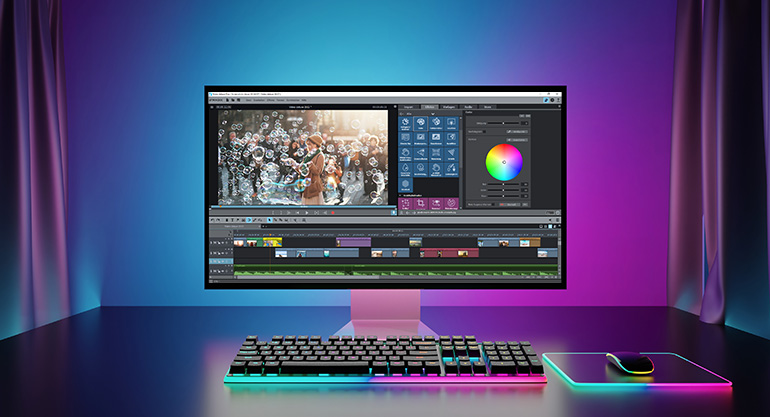
Below, we'll show you how to easily remove sound from video using Video deluxe.
We recommend MAGIX Video deluxe, a highly intuitive video editing program that offers a massive range of tools and functions for all audio dubbing processes.
Video deluxe includes a complete virtual audio mixer with effects section for editing and combining multiple audio tracks into a master audio track, as well as powerful functions for removing noise and improving speech intelligibility, such as DeHisser, DeNoiser, equalizer and compressor. Video deluxe Plus additionally includes SoundCloner, auto-mastering and a multi-band compressor. Most of these powerful audio tools come from the professional audio program Samplitude, also developed by MAGIX.
Audio dubbing with music
If long passages of a video's audio track are unusable or boring, you can remove them and replace them with music as part of the audio dubbing process. The following tips will help you with this:
- Don't aim to just use music that you really like. Instead, your goal should be to find music that suits the tone of the movie or the events on screen. The songs you use should convey the emotions and mood of the film or scene. As a rule of thumb, the more emotional the scene, the slower the music should be.
- If you want to add sound during post production, first select a section of your video to which you'd like to add music, then pick songs or music to match.
- If the audio track not only contains noise, but is in fact totally unusable, don't remove the entire audio track. This could make the film appear a bit lifeless. It's better to mix the original sound of the audio track with the background music.
- Which sounds from the original recording should you keep in? Keep all the sounds that are relevant to what the viewer sees. So if an object in the foreground falls, there should be a corresponding sound for it.
- Even silent scenes should never be actually noise-free, since the viewer may think that there's a gap in the movie or a technical issue. It's best to maintain the impression created by quiet passages rather than change their acoustics. But if in doubt, copy a snippet of a quiet soundtrack into the blank space.
- If you are only planning to share your video with family and friends, you can use any music you wish. But you'll need a different approach if you're presenting it online or in any other public way, such as at a short film festival. In this case, there are legal implications when you use copyrighted music – you need to get the owner's permission. To be on the safe side, you can just use free music and sounds that are royalty-free. Video deluxe includes a ton of songs that are royalty-free. And hundreds more song collections can be found in the Store, which is integrated in-app.
Here are a few tips and examples for the perfect audio:
- Quick scene changes: Techno, dubstep, indie rock
- Emotional scenes (e.g. wedding videos): Songs with strings, violins, violas, piano
- Action: Distorted electric guitars, fast rock music, trap beats, hip-hop
- Recordings from the 80s: Synthesizer-heavy songs, 808 drums
- Recordings from the 70s: Funk and soul music
- Vacations in sunny climes: Fast flamenco rhythms, percussion, acoustic guitars
Dubbing video using sounds
You can also record your own noises too. No matter which direction you take, timing is crucial. Viewers will quickly notice when sounds are out of sync with the video. That's why it is especially important to play the scene back several times and experiment with different positions for the audio object in the timeline. Sometimes even shifting it by milliseconds will produce the result you're looking for.
Dubbing video – adding a voice-over
First, establish the right distance between the speaker and the microphone. There's no universal value to go by here. Rather, it depends on the microphone, the input level and the speaker's voice. It's best to do a test recording and try out different combinations of these factors in advance. Start at around 20cm away from the mike. Once you have found the right position for the microphone, mark the spot with tape and take a note of the recording level you used.
To create a voice-over in Video deluxe, perform the following steps:
- Start Video deluxe and load your video project.
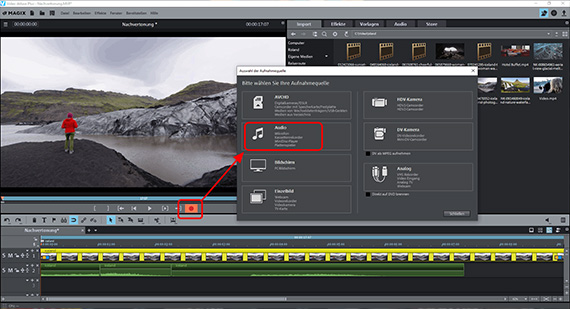
- Click on the red "Record" button underneath the video preview monitor.
- Select "Audio" from the recording dialog.
- Speak into the microphone while checking the level display in the recording dialog. For this, be sure to tick the checkbox "Show levels". If clipping occurs, reduce the input signal. You can also speak more quietly or further away from the microphone.
- Be sure that the checkbox "Playback while recording" is activated so that you can see the video track and comment on it.
- Start your recording and click on "Stop" when you're finished.
After recording, you will be asked whether you want to add the recording to your project. After making an acceptable recording, it will be inserted as an audio object onto a free track.
Dubbing videos with several audio tracks
Audio dubbing involves combining several tracks: the original audio track from the video, a music track, a track with sounds, and perhaps a fourth track with a voice-over. It's important to mix all audio sources in a way that produces a more balanced sound. Video deluxe includes a virtual mixer that offers a wide range of options for professional audio editing.
Dubbing videos with several audio tracks
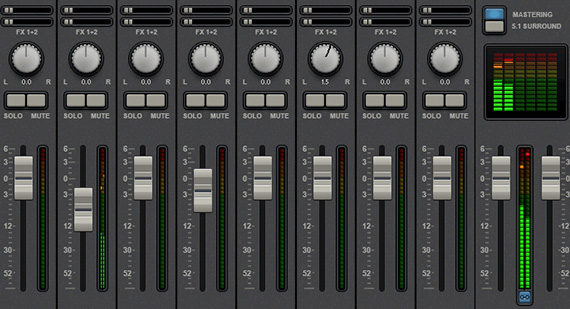
Every project track in the mixer contains its own volume fader. Master volume can be set in the "Master section" on the right. The master section includes two faders for adjusting levels for the left and the right channel of the stereo master signal separately.
- To combine several audio tracks with one another, first move all audio tracks and objects one below the other onto their own individual tracks. By holding down the shift key, you can adjust the videos horizontally so that the order doesn't get mixed up.
- During playback, follow the peak meter display in the audio mixer. You can check volume for any track and for the overall output in this way.
- The "FX" buttons are located above on the channel strip. Via these buttons you can access all the track-based editing effects – for instance, a compressor and an equalizer.
- Via "Mastering" on the right you can open the effects for the overall sound. Here, you'll find a limiter for preventing clipping. The limiter analyzes signal peaks and eliminates distortion by bringing any levels set to over 0 db down to 0 db. With the "MultiMax" multiband compressor you can split the frequency spectrum into three ranges. Use this to keep all deeper sounds uncompressed and work only on higher frequencies by using precise compression to give them higher volume and more presence.
The effects in the audio mixer offer many options for volume and sound optimization and are another great feature for audio dubbing provided by Video deluxe.
Removing sound from video or optimizing it
Sometimes the original audio track is simply unusable and you need to completely remove the sound. With Video deluxe, this is incredibly easy.
Removing sound from video or optimizing it
- Right-click on the video in the track and choose from two options from the shortcut menu:
Audio functions > Mute audio object: This mutes the audio track, but it can be reactivated at any time if you change your mind.
Audio functions > Remove audio object: This completely removes sound from the video.
In other cases, you might not need to remove the entire audio track, but only certain types of interference, such as noise, hissing, pops or crackling. You can use the audio effects in Video deluxe to do this.
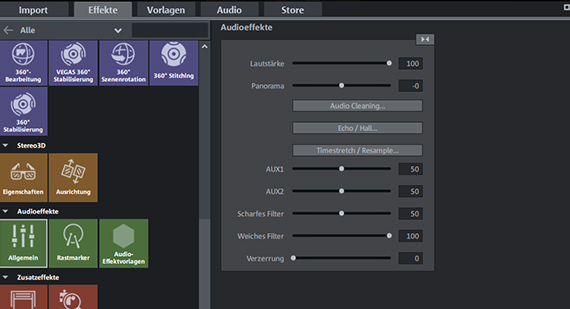
How to deal with the most common types of background noise:
- Remove noise:
The DeHisser filters constant noise from the audio track. - Filtering out wind noise, mains hum and other noise:
You can use DeNoiser for this purpose. This works best using a sample of the noise. Start by finding a specific place on the audio track where only the noise interference can be heard. The DeNoiser will then filter this noise out of the entire material. - Improve speech clarity:
The compressor will increase video sound volume as an average and enhances speech intelligibility to balance out the volume levels of quiet and loud passages. The equalizer can be used to eliminate low rumbling, for example, by cutting the low frequencies.Or it can also be used to emphasize mids and highs thereby making the sound clearer. - Removing pop sounds:
With a DeEsser, you can reduce the sharp hissing and sibilance that can occur in speech recordings. In the Mastering Suite within Video deluxe Plus, you'll find a multi-band compressor that offers several DeEsser presets. You can open the Mastering Suite from the mixer. - Remove specific noises:
To help remove individual sounds such as the noise of a passing car, a falling prop, or other interference from video sound, sometimes you simply need to cut them out.
- Right-click on the video in the track and select the option "Audio functions" > "Video/Audio on separate tracks" in the context menu.
The image and audio tracks now display on two tracks positioned on top of each other in the arranger.
- Right-click again on the audio object and select the option "Create wave form display".
The waveform representation visualizes the sound material and allows you to see exactly where in the video the loud noise is.

Image and sound are normally grouped. To cut the audio track only, you need to ungroup image and sound first.
- Click on the ungroup icon in the toolbar.
Now, you can cut out noise interference with precision.
- If necessary, you can zoom in to get a better view of the noise in the waveform display.
- Place the playback marker just before the section with noise and press "T" on your keyboard.
The material will then be cut at this position.
- Place the playback marker just after the section with noise and again press "T" on your keyboard.
This isolates the section and allows you to delete it easily.
- Click on the cut section and delete it from the track with the Del key.
- To avoid crackling, you should then fade the audio in and out for the remaining objects on the track.

