Basics of music production
in the DAW
With the help of modern DAWs (Digital Audio Workstations), creating your own songs at home from first sketch to final master is easy. Keep reading to learn about the basic functions in a DAW and how they're used, using Samplitude Pro X Suite as an example.
From the recording studio to the DAW
In order to understand the workflow when using a DAW, it makes sense to think about how recording was carried out in analog recording studios.
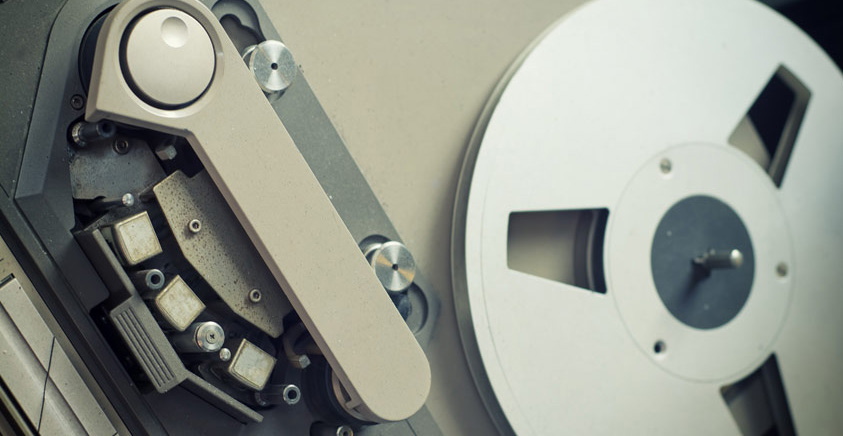
In the early days of music production, recordings were made entirely without computers, sequencers or other digital tools.
Aside from massive cupboards full of effect units and actual "reverberation chambers" for creating artificial depth and space, there was one major thing that didn't exist in analog times: non-destructive work. Changes to material recorded on tape also had to be recorded; if not, they would be lost once settings were changed on the console or effects unit.
There was no such thing as the presets, templates or save functions of today, so it was necessary to be more precise and error-free when recording. Neither was it possible to let a project just lie there after the mix was exported in order to go back and eradicate mistakes later. As soon as the sound engineer started mixing the next song in the studio, all settings, pots and faders would be reset. The only thing protecting the progress of your project was the part of a DAW called "stereo bounce".
The necessity of working with 100 % accuracy without making a mistake brought about a generation of talented sound engineers who aimed to improve these mechanisms further. With software functions such as "total recall" it was possible to save all settings and routings to the mixer and effects as the target condition, so that they could be accessed again later. This way, a sound engineer could go back to a mix in an emergency to smooth out any critical errors. The saved settings all had to be returned to the original condition by hand, a job that was both painstaking and slow.
While many similar functions became established over time, there was no such advancement in terms of making the audio editing process more efficient. It stagnated due to this laborious, time-consuming routine of splicing and sticking together tape with razor blades and adhesive tape to smooth out the timing in the track, for instance. In contrast to mixing, where you could apply effects, it wasn't possible to preview or undo changes during cutting: as soon as you spliced the tape with the razor blade, the edit was irreversible.
Then, once the first DAWs appeared, huge improvements were in store. Virtual cutting and pasting tools meant users could edit, move and re-combine digital material any way they wanted.
Principles of modern DAWs
The advantages of a modern DAW like Samplitude become clear when it comes to audio recording. You can use the same elements for recording right on your PC that once took up hundreds of square meters in analog recording studios. The production tricks, editing suites and reverb rooms of those analog days are now accessible in a few clicks, with tons of additional features and wizards to make working in your studio even easier.
The first step for editing audio material within a DAW is digitization, also known as ADC (Analog to Digital Conversion). The resolution (low or high) for natural sounds and notes is infinite, so it's necessary to assign these sounds a concrete volume level at all times. The time will be entered as sample rate in kilohertz, the volume level as bit depth in bits. The best-known combination for these values is 16 bit and 44.1 kHz - the same digital resolution as audio CDs. Other possible values in Samplitude Pro X are 24 or 32 bit and up to 384 kHz. Higher values require more computing power, but result in a finer resolution that more closely resembles original analog sound. The maximum resolution is ultimately independent on the sound card you use.
Digitization lowers the resolution of recordings. This in turn reduces quality - in a way that's non-perceptible to the human ear - so that they can be edited further within the DAW.
In addition to digitization, "non-destructive work", as discussed above, is an aspect of studio work that the market introduction of the DAW has influenced hugely. Since it's necessary to digitize all recordings in order to use them further, it's possible to make modifications without changing the original material. This can be done with modern software, in contrast to analog recordings on tape, where changes had to be recorded anew and couldn't be changed afterwards. The "playlist principle" means that changes made within the DAW are only applied to a copy of the recorded material and never to the material itself. In Samplitude, you can adjust the effect settings at any time, or disable them and restore the original sound of the recording even long after mixing has been completed.
The playlist principle has been optimized even further in Samplitude Pro X - it's now even possible to assign effects to objects without needing to write an automation or create a new track for them. So if your guitar solo needs extra reverb, it can easily be done using the object editor. This "object-oriented workflow" reassesses classical track-based mixing principles of earlier recording studios, making it faster and easier to implement creative ideas.
When directly contrasted to the beginnings of music production, it's clear to see the possibilities DAWs such as Samplitude offer and how they can bundle an entire recording studio into a number of megabytes.
Audio recording
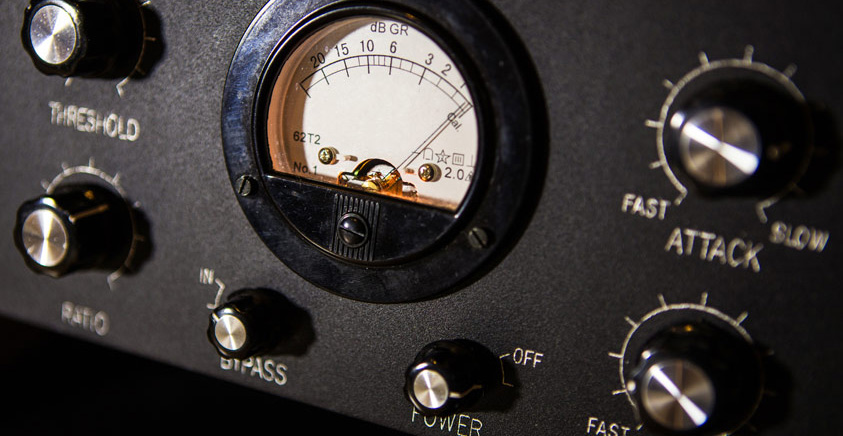
The correct microphone level is set at the beginning of every recording. Regardless of which interface (sound card) and sample rate you use, you can't make changes here. The recording level means the amplification level of the mike amp, which is normally located in your sound card. This can be adjusted using the gain controller. The optimal recording level should be capable of capturing the total dynamics - i.e. the range from the quietest to the loudest points in a recording - without any overdrive. The loudest point in a recording should lie just below 0 dBFS. dBfs stands for "decibels (relative for) full scale" and ensures that the highest possible volume level, literally the top end of the scale, can be reached at 0 dBFS. Any value higher than this cannot be processed by your computer and results in distortion.
In contrast to analog tapes, in which clipping was used to positively influence sound quality during recording, clipping is one of the worst case scenarios when it comes to digital recording. Any kind of digital distortion renders a recording unusable and it's very difficult to repair or correct it. In order to find the optimal recording level in Samplitude, you need to allow yourself some time. Achieving the right level will have a positive impact at later stages of mixing and enables you to create a better mix faster.
After setting the recording level, it's necessary to select the right recording mode. Samplitude Pro X includes standard, punch and loop recording modes. You can record using any of these modes, which differ mainly in terms of playback and how a recording is initiated.

In standard mode you start and stop a recording by pressing the record and stop buttons. This mode is particularly useful when you're beginning a recording from scratch and have no other audio material to hand.
Punch recording is used to correct erroneous passages in a recording without having to record everything again. You can jump either manually or use preset markers during playback in record mode. During playback, the musician listens to the part that has just been recorded. As soon as the recording begins (Punch In), he or she will not be able to hear this and will hear the input signal for the instrument instead. The musician can then re-record his or her part. As soon as the recording has ended (Punch Out), the first recorded part is audible again and the recording can be saved.
Loop recording can be done using the Revolver Tracks feature in Samplitude and is a powerful tool for editing the perfect take quickly. This selects an area in which a loop is played after the recording is started. This enables you to create lots of takes or variations one after the other in next to no time. After stopping the recording, you can have the recorded takes displayed in separate tracks. Use Revolver Tracks and the Take Composer to select the best parts in your recording and combine them in what's known as a comping track.
Audio editing
In contrast to analog editing desks, modern workstations offer users the ability to make cuts or undo them in seconds – thanks to digitization. The playlist principle applies in this case, where the cuts are actually made to a copy of the file and not the original file itself. In addition to manual editing with scissors and sticking tools, modern DAWs provide a range of wizards to speed up the editing process further.
Quantization make it easy to correct timing mistakes in your material. The term quantization refers to the fixing of a note to a pre-determined grid. In terms of the DAW, this means that a random audio event is aligned to this grid in the timeline. BPM (Beats per Minute) and time signature play a central role here.
A popular example is drum recording edits. With just a few clicks, you can split an entire recording into single events and assign them to the time grid. While some drums can be quantized in post production, the opposite is also true. Professional drummers often become accustomed to playing a "groove" over the years of their career that reflects their playing style and can be recognized by others in the industry. Too much quantization can destroy this completely and even ruin a recording.
To prevent this, some sequencers include an option for applying the feel of an instrument to the entire project. This is known as groove extraction and fits the grid to the drum, rather than vice versa. Meter and BPM adjust to the drumbeat so that the feel is still present without affecting the timing of the project.
Once you lay down a solid rhythm to the song, similar correction can be made to other instruments. Vocals, however, are a special case. In contrast to many "regular"instruments, vocals are susceptible to irregularities in timing and pitch. Using the "Elastic Audio" feature in Samplitude Pro X you can balance any unsteadiness in tone. Single vocals can be "dragged" to the right pitch using one of the figures similar to the piano roll. Creating a gentle transition between edited and unedited parts of the song is extremely important when you're doing this. Just like the quantization of the drum, a pitch adjustment that's theoretically perfect can negatively affect the character of a recording and make it sound unnatural and lifeless to the human ear. Small-scale imperfections help you retain the authentic vocal performance in the song without losing much in the way of quality.
MIDI recording
MIDI stands for Musical Instruments Digital Interface and was originally created as a transfer protocol for controlling synthesizers. There is no musical content per se, and the controller sends commands to the DAW which are then interpreted and turned into music. This means that a MIDI signal does not contain sound, but information: for instance, play note X at volume Y for length Z. The sound is formed within the software and can be heard through the speakers.
Distortion won't lead problems in straight MIDI recordings, in contrast to audio recordings. Another big advantage of MIDIs is their flexibility. Imagine being able to being able to change finger positioning or the amplifier after recording your guitar, without having to record your guitar all over again. You can change various parameters later in a sequencer or in a DAW.
You can record the MIDI live using a USB MIDI controller, for example, or using a mouse in the piano roll. The piano roll is a display in Samplitude that displays a keyboard and the played MIDI commands in relation to time and pitch. In this view, you can also manually "draw" notes onto the piano roll.
In order to make MIDI commands audible as described, a synthesizer is needed. Within a DAW, synthesizers are also called VSTi (Virtual Studio Technology Instruments) or VST instruments.
MIDI editing
As previously mentioned, the big advantage of MIDI recordings are the diverse editing possibilities after recording. Like with audio recordings, MIDI events can be aligned to the set grid in the sequencer in order to correct inaccuracies. It is normally not possible to achieve the groove described above during MIDI recording. For this reason, Samplitude offers you the option of humanizing audio. This sets all selected events selected in different directions (forwards and behind) to a low value, in order to create an imperfect i.e. natural timing. Even individual false notes can easily be individually corrected, which means that the recording doesn't need to be started from the beginning again after every mistake. What's more, you're complete free to choose an instrument to play the recorded notes, since the MIDI data remain unchanged within the DAW. Only the VSTi needs to be changed. If you want to have another instrument play the same melody or chord, you can move or copy the MIDI object to a new instrument track. Individual track elements as well as MIDI files from entire projects can be swapped. To do this, MIDI objects in a project must be exported - Samplitude offers different variants for doing this:
- Export various MIDI objects to a file as a track
- Export various MIDI objects to a file with several tracks
- Export all marked MIDI objects as individual MIDI files (one file per object)
If you select one of the two possibilities, you also have the option to write information about the tempo of the current project into the MIDI file This makes sharing entire MIDI projects a lot easier, as you then won't have to set the tempo settings when importing into a new DAW. This is because the software can automatically read information about tempo and tempo changes and transfer them into the program. Another advantage of the option to export entire MIDI projects is that instruments can be very easily swapped without having to record again, for example when another producer has a VST that is not available in your own library.
It is also possible to convert recorded audio material into MIDI events. Samplitude can replace drums with virtual drums. To do this, the object that is to be replaced with MIDI notes must be selected: Then select the item "Quantization" in the object menu, and then Audio Quantization Wizard. This Wizard displays different parameters for you to to choose from. You can use these to determine the sensitivity of the software to the drum amplitude, i.e. how many transient markers should be set. As soon as the Audio Quantization Wizard is open, you can mark any audio object as you like and then using the Wizard set exactly how Samplitude should work. After you've finished with this step, click on Object → Quantization → Advanced Audio Quantization → Create MIDI trigger from transients. A new MIDI track will now be created, which contains a MIDI note for every transient marker. With this, you can carry over the groove from the audio material directly over to the MIDI track, and you only need to select a suitable replacement drumkit. You can of course use the virtual drum kit to layer, in order to give a richer sound to the drums that you've already recorded.
In the piano roll, modern workstations offer the possibility to display the recorded data as an actual note. This is then helpful when you want to re-play your own compositions on a real instrument but don't remember the notes. You'll also get a general better understanding of notes, which isn't essential for using a DAW.
Mixing
Once you have edited all the instruments in the mix and have set all fades and adjusted the timing, you can start mixing.
The mixing process mirrors what happened during the original recording. The recorded instruments are positioned using effects in stereo image and depth in order to convey spatiality. This definition has been relaxed due to the more advanced technical options that enable more creative adjustments to the audio during mixing. Such creative adjustments are made to amplify existing elements or to add new ones. The expression "fix it in the mix" can lead people to mistakenly believe that if a recording sounds lackluster, this can be put right at the mix stage. That's far from the case. If you are not happy with the sound of a recording, you can save yourself a lot of time and energy by recording the part again. Any fixes you make in the mix are often makeshift and can compromise results a great deal.
The effects that can be applied in the mix can be divided in two main categories: Serial and parallel effects. Serial effects such as compressors and equalizers are incorporated in a row. This means that they lie on the same channel strip as the current audio material, so an effect will pass through and modify all audio material in the channel strip. For sound and dynamics manipulation, it makes sense to apply serial effects.
Parallel effects are loaded via a cross connection in the mixer that's known as an aux bus. The effect will lie on a separate track so that the unchanged signal lies on the original channel, while the signal to which the effect is applied can be mixed in bit by bit on the second track. Examples of parallel effects are reverb, delay and modulation effects such as chorus and flanger. The effects allow you to send just parts of the audio material through the effect. In contrast to serial effects, the material itself is not modified, but rather added to.
Mastering
Mastering is divided into two areas – creative mastering (also called pre-mastering) and technical mastering.
The term mastering originally described the recording of tape to vinyl. Due to various technical limitations, for instance bass volume or phase correlation for channels, it was necessary to prepare a recording in an special way for vinyl production.
Until now, mastering engineers make more and more modifications so that mastering was actually divided into two aspects: creative and technical. Through the technological advancements in modern DAWs, modifications for a recording for CD pressing are a minor part of the process. When people talk about mastering today, they're usually referring to creative mastering.
As soon as the mixing process is complete in that the loudness ratios and editing of the individual tracks has been finalized and headroom is accounted for, a recording is ready for the final touches in a mastering studio.
While you can use effects with rough settings in the mixing process to achieve the results you need, mastering requires a more refined approach. Nuances measuring 0.5 dB are nothing out of the ordinary. Also, mastering engineers do not used anywhere near as many effects as during mixing.
To create a creative (pre-) master the compressor and equalizer are all that's needed. This is by and large due to the fact that in contrast to mixing, the entire stereo mix is edited, not the individual tracks. A change to the EQ envelope, for example, will influence the entire mix (exceptions such as stems or vocal up/down aside).
The main rule of thumb in pre-mastering is: The perfect mix doesn't require (creative) mastering.
Imagine a mix where the guitar isn't coming through. One possible solution is to increase frequency to around 1.5 kHz. The kick for parts of the snare, vocals, bass and attack may also lie in this frequency range. All these signal components are also increased using this EQ setting, which can change the sound image significantly - thus working against a mix engineer's goals. Through many, small-scale adjustments to the equalizer, mastering attempts to manipulate individual signal components, without a major change to the rest of the mix.
Technical mastering creates a master for the CD manufacturer, so no other changes are made to the existing audio material as it is being prepared for reproduction. At this stage, it's important to ensure that that beginnings, ends (fade in/out) and general arrangement of the title all match. This stage of checking and, where necessary, correction of phasing and removal of noise belong to the technical side of mastering, but affect the entire material. This illustrates how the border between creative and technical mastering is not always clear.
Export
At the end of a music production, a session file needs to be converted to a standard audio format. There are differences between lossless and lossy formats. Your average music consumer will go for compressed formats such as mp3, wmv or Ogg Vorbis, especially when they want to listen to the exported files via their smartphone. There is no difference between this and lossless audio material, as long as the kilobyte rate does not exceed three figures. But when listened to on high-quality systems, speakers or headphones, you can hear a clear difference between the formats mentioned above and lossless formats like WAV or AIFF. At the end of the day, the type of format you choose comes down to personal interest. Consider whether you would rather have more memory available on your computer or your smartphone, or whether you would forego extra disk space to benefit from better sound quality. If audio material will be sent for CD pressing, it needs to be exported in lossless quality in order to ensure the highest-possible audio quality.
People rarely think about how complex the music production software they're working with is. And it's easy to forget how little space is needed to recreate the features of a massive, analog recording studio on your computer. But at the same time, each DAW is different. Not all offer the same features and editing options. Samplitude Pro X Suite lets you accomplish every step necessary for the music production workflow from start to finish. It includes a huge range of tools for tasks from songwriting to recording and editing to the final mix and master, plus enables sophisticated workflows to make working with the DAW even more efficient.