
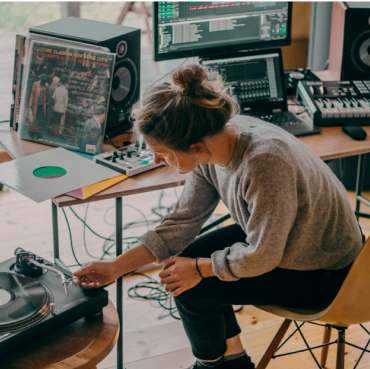
Original music comprised your own songs – for many people this is an unfulfilled dream. But getting started in music production is easier than you might think. All you need to make music is your computer and MUSIC MAKER. This software has everything you need to get started: Sample loops, VST instruments, effects, a virtual mixing console, and 8 tracks.
Then, you can decide if the program is sufficient as so, or if your needs increase and you need more features. MUSIC MAKER can be expanded step-by-step into a complete music production suite with additional Soundpools spanning every genre, drum machines, synthesizers, professional effects, and much more. MUSIC MAKER can grow with you and your needs. The In-App Store is only a mouse click away.
Whether hip hop, electronic music, pop, or rock – MUSIC MAKER can be used to produce any genre. DJs can even use it as DJ software to compile playlists or create their own remixes.
MUSIC MAKER is the perfect introduction to the world of music production. Nothing stands in the way of your ideas and creativity. Find out all the steps you need to know for a successful start in the world of music production.
Create your first song in just six steps
Step 1: Tips for ideas and songwriting
The first step is developing a musical idea. You're sure to have heard a track before that you couldn't get out of your head – whether a melody, bassline, or beat. That's the kind of fundamental element you are need for your first song.
You can look at existing pieces of music and analyze them to help you find it. This is how to learn the inner workings of musical composition and emotion to use your own songs. Once you learn the structure of different pieces of music, creating your own song is easier and quicker.
Or you start with song lyrics that you work on until they become rhythmic and start to jive, so to say.
When you make your own music, there's always a bit of trial and error, as well as rewriting. Play around with your ideas: No matter whether it's a melody, bass line, rhythm, and lyrics. To begin, simply run with your imagination. Let an idea run through your head until it feels coherent.

Step 2: Essentials necessary for making music
Next, spend some time thinking about the equipment you'll need to make music.
Hardware
Computer: A standard, modern laptop or PC is completely sufficient. It should have a conventional sound card, 2 GB RAM, 2 GB graphics card, 2 GB of hard disk space, 1280 x 768 screen resolution, and Windows 10 or 11.
Speakers: Headphones and computer speakers do not offer a realistic version of the sound. That's why a good pair of loudspeakers is recommended. In studios, "near-field monitors" are commonly used, but they are expensive. If you don't want to invest extra money, just use your hi-fi speakers.
Headphones: Good headphones are important for mixing. For example, wearing headphones allows you to hear the stereo balance of a track much more accurately. Make sure they are sufficiently comfortable for long mixing sessions. Closed or semi-open headphones are considered better for mic recording because they completely isolate all other sources of sound. However, many singers swear by the sound characteristics of open headphones. Some good examples are Yamaha HPH-MT8 (closed), beyerdynamic DT 880 PRO (semi-open), or AKG K-612 Pro (open-back) headphones.
Audio interface: To send the microphone signal to the computer, use the input jack of your sound card. However, this input signal is often not very high-quality. This means that the recordings will likely be a bit noisy and sound comparatively dull. For better quality, get an audio interface. This device usually connects to the computer via USB and converts the electrical microphone signal into high-quality digital data that can then be stored by the computer in a WAV file.
Microphone: MUSIC MAKER enables you to make recordings of vocals, instruments, and any number of sounds. To begin, you can use your computer's internal microphone. For better quality, get an external microphone. Condenser microphones are particularly responsive and capture not only the voice or instrument, but all ambient noise as well. This makes them less suitable on stage for live performances, but they are a good choice for your home studio. Dynamic microphones are a suitable alternative. Tip: Good microphones are expensive, but you can rent or borrow them, if necessary. And be sure to take the acoustics of your surroundings into consideration. Use a small room for vocal recordings, which contains a lot of sound-dampening furniture and produces as little reverb as possible.
Instruments, mixer & effects units: If you have instruments you want to work with, you can of use them – naturally, MUSIC MAKER has a recording feature. But you don't have to buy expensive acoustic or electronic instruments. Real instruments are ideal for stage performances, but for music productions they can be substituted with software emulation. This is also true for other expensive equipment like mixers and effects units. In the past, it was necessary to spend large amounts of money for a recording studio equipped with instruments, a mixing board, and effect racks. Today, the PC and MUSIC MAKER take care of all that by providing the instruments, a virtual mixer, and numerous virtual effect racks.
Software
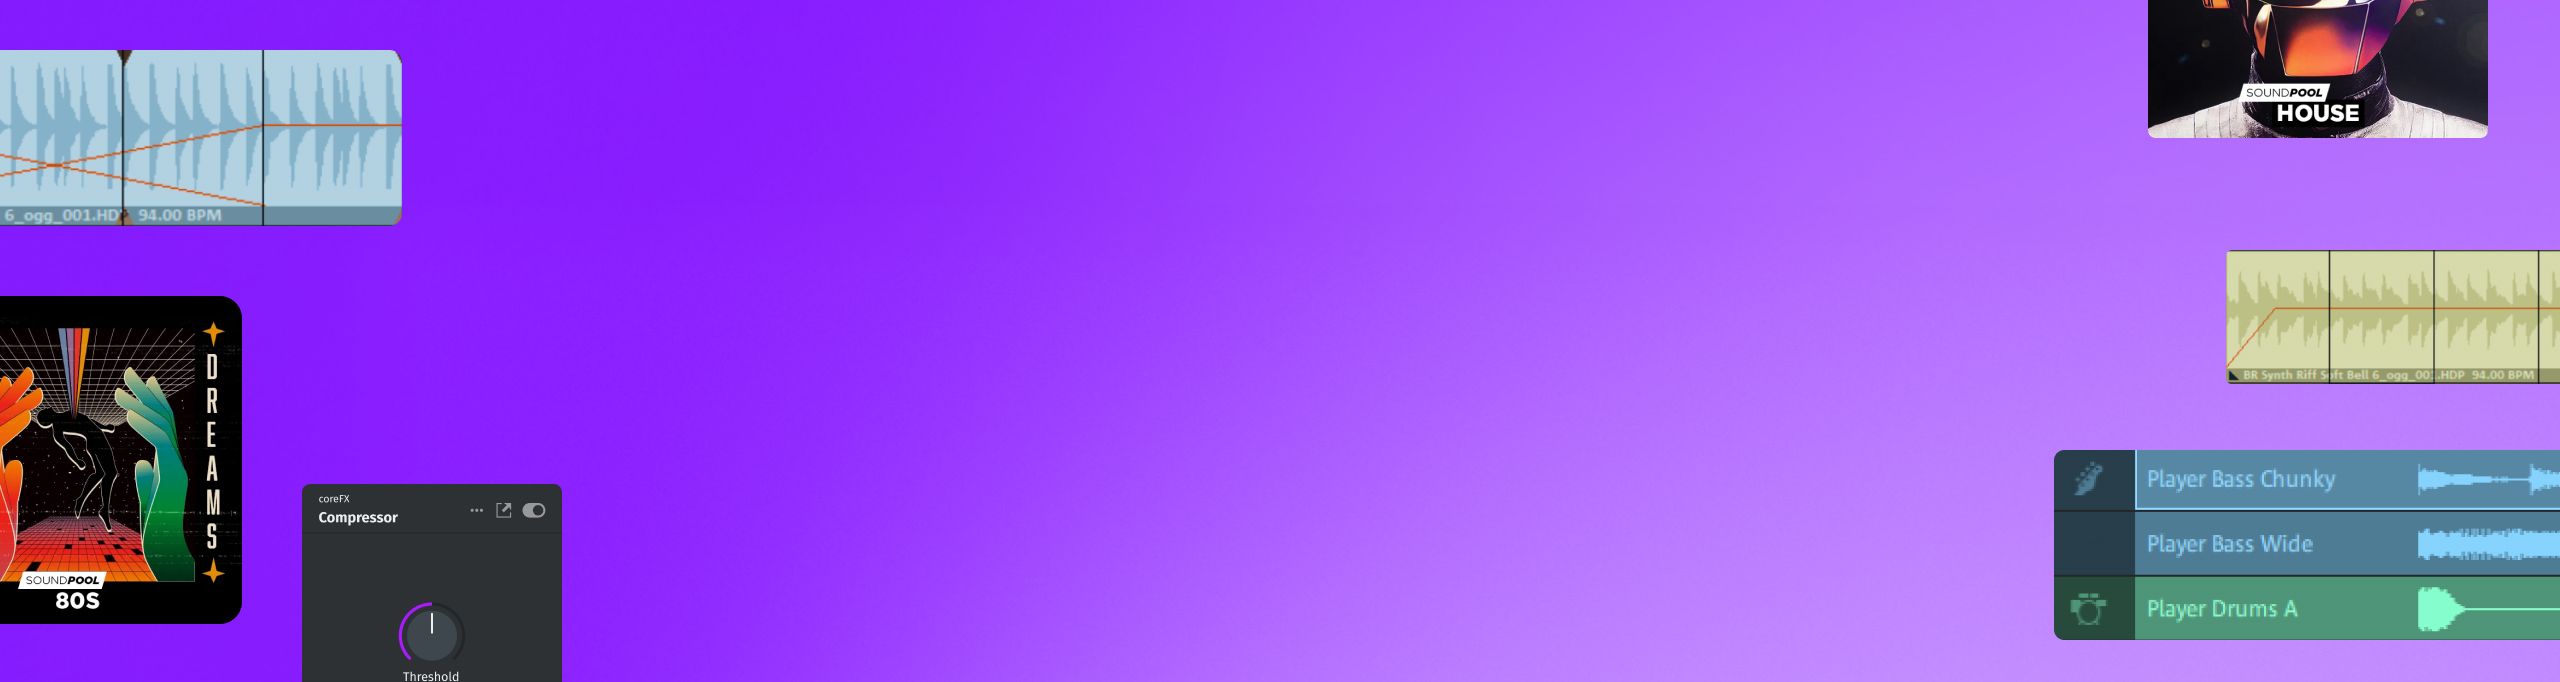
MUSIC MAKER: This music software is the main tool for your music production. You can use it to record or program VST instruments, record vocals or instruments with a microphone, or arrange the supplied samples like building blocks to create your own songs.
VST instruments: Almost all "real" instruments can be replaced by VST software today. This means that you don't have to invest any money or learn any playing techniques required to produce the sound of a particular instrument. A VST instrument is software that "emulates" (recreates) the sound of an instrument. The resulting sounds are deceptively real and almost indistinguishable from original instrumental recordings. In MUSIC MAKER, you play the VST instrument using either your keyboard or a connected MIDI keyboard. You can also use the MIDI Editor to program melodies note by note. In the MUSIC MAKER Store, you will find a wide range of other VST instruments, not only virtual synthesizers, but also many acoustic instruments, including pianos, organs, as well as wind, string, and percussion instruments.
Step 3: Recording
If you want to make quality recordings, here are a few tips:
- Eliminate reverb: The sound in a home studio should sound thin and dry. This is desirable: If you want to create an atmospheric room sound, you can simply add it later. Conversely, however, it isn't possible to filter out reverb from a finished recording.
- Record in a small room: It's best to use a small room for vocal recordings, which contains a lot of furniture, for example, a bedroom. This helps you minimize reverb of a room. The vocal recording can still be profoundly changed later during post production on the PC, with reverb algorithms that vividly recreate the sound of a large studio, stage at a concert venue, or cathedral. But to get the best possible source material, it is better to record vocals in a "dry", close and natural environment as possible.
- Maintain the appropriate distance from the microphone: Before recording, run a few tests with the microphone to find the right distance. About 30 centimeters is a good reference point. Pay attention to sibilants and plosives on consonants. Sometimes these types of sounds are exaggerated on recordings. If this is the case, change your angle, i.e. don't sing directly (on-axis) into the microphone, but turn the microphone (or the direction of your singing) slightly to one side (off-axis).
- Relax: To sing well, you should be relaxed and comfortable. Try to create the right atmosphere in advance. In general, it's best to try not to think that much about your equipment. The performance is more important. A bad-quality recording of a great vocal performance is still better than tonally and technically perfect recording quality of boring or tense vocals.

But you can also make music without making any recordings and skip this step. This is the most cost-effective option, because you only need your computer and MUSIC MAKER to make professional music. Electronic music, for example, often doesn't involve any microphone recording at all.
Step 4: Editing
Making music doesn't end with arranging tracks with Soundpool loops or VST instruments and recording a vocal performance on top of them. This is where the music producer's work actually begins. Individual tracks in the arrangement can be improved, distorted, as well as cut and rearranged (if necessary) using many different tools.

Editing: Once you have made your recordings, listen to everything carefully and cut out any unnecessary parts at the beginning or end of a take. You can also cut out any unwanted noise, for example, if you accidentally bumped into the microphone. Often, it's a good idea to also delete any "pauses" in-between vocal lines, i.e. silent passages between the lyrics you sing, and replace them with true silence. In MUSIC MAKER, editing is exceptionally easy:
- To cut away the beginning and end of a recording, simply push the object's edge inward at its beginning or end on the track.
- You can create fades (fade-ins and fade-outs) by moving the upper object handles inward.
- To cut out a passage or noise in the middle of an object, position the playback marker at the desired cut and press the "T" key. This cuts the object in the track into two separate objects.

Correct tempo and pitch: Every note won't always turn out right. With professional effects, it's possible to correct both pitch and length without anyone noticing. In MUSIC MAKER, use the add-on module Vocal Tune to do this. It allows you to correct pitch errors in the shortest time possible. This professional effect is not included in the basic version Music Maker Trial. You need to purchase the "Plus FX" add-on module or an edition to do this. The time processor is included in the "Plus FX" add-on module. This allows you to perform professional time stretching as well as pitch correction. This means that the duration of your recording or the sample can be stretched (or shrunk) without any changes in pitch like a Mickey Mouse voice. This enables you to easily incorporate rhythmic material that has a different BPM into your song, for example.

Equalizer: An equalizer processes the frequency spectrum to amplify certain ranges and reduce or completely remove others. This means that you change the sound to make it more punchy or brighter. In MUSIC MAKER, you have access to a 10-band equalizer that can be applied to individual recordings and loops. Equalizers are also available for entire tracks or for the overall mix.

Compressor: A compressor is essentially an automatic volume control. This makes audio louder and more present. The included Soundpool loops have already been processed with compressors and do not require any further compression. But a compressor is often useful for your own recordings. In MUSIC MAKER, you have access to a compressor for each recording, track, and the mix.

Reverb and echo: With a little reverb, your recordings will seem more alive, and reverb will lend them spatial depth. You can choose between different types of reverb, for example, a slight reverb or the massive sound of a cathedral. Echo is a similar effect that is used creatively. MUSIC MAKER includes both reverb and echo.

Filter: This effect is used for removing certain frequency ranges and creative tonal distortion. You can use it to shape your own sound. The filter is included as an effect module in MUSIC MAKER.

Arrange: There is nothing set in stone in music, everything should be free flowing. Try different combinations and feel free to do so. How about letting the bass & drums take a break for a few bars? Delete a couple of loops from the song and move others to a different position. Try different configurations. Play with the different loops. Often, you will discover several combinations that work equally well. And then, choose one you like.
Step 5: Mixing
One of the most exciting steps of the workflow is mixing. The goal here is to combine the sound of the individual tracks.
Use the mixer to do this. The final step of this process is the "mixdown", which merges all the individual tracks into one stereo file.
MUSIC MAKER's mixer is modeled on a real mixing console from a recording studio and essentially works in the same way.


For mixing, you will primarily use:
Volume and pan: Each track in the arranger has its own channel strip in the mixer. This is where you can edit the track's volume and adjust its position in the stereo panorama.
Effects: You can open the effects rack via the FX buttons. This is where you apply different effects to each track. In MUSIC MAKER, you have access to a 10-band equalizer, compressor, reverb, and echo for each track.
Spaciousness: Mixing is about differentiating the individual sources of sound by their volume, position, and spatiality and balancing their relationship to each other. Reverb is used to "place" the signal at the front or back of the room. When someone is standing next to you and speaks, you hear their voice clearly. If someone is talking in the back of a room, their voice will sound quieter and blend into the reverberation of the room. In short, a sound source with loud and short reverb gives the impression of something close and quiet; heavy, washed out reverb seems far away.
Dynamics: The compressor allows you to edit the volume characteristics of a signal. This involves very short units of time – the time that elapses between the onset of a syllable and the full vocal sound, for example. Use a compressor if some parts of a vocal track are unnaturally loud. It can also be used to bring an instrument forward or to add punch to a dull instrument.
In general, the way you mix the instruments together depends a lot on the genre. Pop and electro require different settings than classical and jazz. The louder the music is played, the less dynamic it needs to be. That's why commercials on TV seem so loud, for example. These are produced for loudness and assertiveness, so they are able to compete with other background noise. But they hardly have any dynamics, since everything is the same and as loud as possible. Conversely, classical and jazz music focuses on the subtle nuances; here, you should be especially sparing with a compressor, or perhaps do without it altogether.
Step 6: Mastering
Mastering is the final step in music production. In commercial productions, mastering is performed by hired specialists that are mastering engineers in their own recording studios.
During mastering, the mixdown of the songs is the only thing that is worked on, not the multitrack projects. The idea is to blend several songs together so that a homogeneous album is created. The album is viewed as a whole. The mastering engineer pays special attention to the balance of the frequency spectrum, increases or decreases the loudness of individual songs, sets pauses between songs, and creates fade-outs, if necessary.
In your music production, the individual steps of mixing and mastering will blur together. This is not necessarily a disadvantage; on the contrary, you can export any multitrack project in MUSIC MAKER as a stereo file and load it into a new, dedicated project for mastering. And if you encounter any major sound problems while mastering, you can simply reopen the song's multitrack project and change the mix there.

In your music production, the individual steps of mixing and mastering will blur together. This is not necessarily a disadvantage; on the contrary, you can export any multitrack project in MUSIC MAKER as a stereo file and load it into a new, dedicated project for mastering. And if you encounter any major sound problems while mastering, you can simply reopen the song's multitrack project and change the mix there.
Both mixing and mastering go hand in hand. In MUSIC MAKER's mixing console, you will find a dedicated mastering section on the right-hand side. These settings effect the overall mix. If you have purchased the aforementioned Plus FX module, you also have access to professional mastering features, such as a multiband compressor or AI auto-mastering.
There's one aspect of commercial music production you should definitely embrace: Always have another person listen to it before you finish. After a while, you'll start to hear only what you want to hear and might need feedback from an external listener. In this regard, bringing in someone who can take over the role of a mastering engineer is highly advisable.

Good to know – our helpful guides
Expand your knowledge with these helpful guides – whether you're a beginner, advanced user or a professional.
Mix music
Want to create your own remixes, but don't know how to go about it? Learn everything you need to know about mixing music here.
Create beats
Producing beats has never been easier! In this tutorial, we'll show you what you need to keep in mind.
Effects
Want your tracks to sound even better, but aren't sure which effect is best for your needs? Find the answer here.


Start your music
journey today
Create songs with loops, experiment with effects, and push
your creativity – all in MUSIC MAKER Free.