"Films are made in the cutting room." It's something you might have heard before – that it is actually the process of film editing that results in the final product. Your video footage is simply raw material that you later use to cut together a movie using various types of film editing. Or it can even be used to make several movies.
These days, the computer replaces the cutting room where film strips were physically cut in days gone by. Using your mouse to move virtual sections of video around a monitor is easier and more efficient than cutting celluloid film with a scissors and stitching it together.
Film editing is an art, and like any other form of art, there are certain rules that should be followed. Below, we'll describe these styles and techniques and show you how you can apply them when working with your PC.
Cutting & editing techniques
Let's start with some explanations of basic film editing techniques: Footage, shot, take, cut, scene... What do these terms actually mean and what's their connection to each other?
- Footage refers to unedited video files saved to the memory card of your video camera. Essentially, it's the raw material for your film.
- A shot is an uninterrupted film sequence i.e. a video clip captured from the moment the camera starts rolling until it stops. Keeping a list of all the shots you've taken during a filming session is no bad idea. This way you'll be able to keep an overview of the footage you have stored on your memory card. If you want to plan out shots, create a shooting schedule ahead of time.
- Takes are variations of shots that might show the same subject from different perspectives, or they could be shots that differ from each other in certain details (for example, with regard to lighting and background details). Takes provide you with a wealth of options when it's time to start editing. When checking your material on your PC, take care not to confuse the order of takes and shots. It should always be crystal-clear to you which is an alternative take and which is a new shot. Clapperboards are used in professional filmmaking to designate and mark shots as they are filmed, as well as the number of each take.
- The cut means the exact point in the film where one shot is split from the next. Making a cut in your footage is incredibly easy: In the video editing program Video deluxe, simply set the playback marker at the point you want and press the "T" key. Then, delete the section that you don't want to use from the track and move the remaining parts together to close the gaps. The most difficult part of film editing is finding the right place to cut.
- A scene marks a passage, a unit of meaning, in a film. It usually contains material that belongs to a single location and time continuum, which does not have to be shown in an unbroken fashion. A scene normally consists of several shots. If you are filming dialogue, most of the shots will be placed one after the other – they may alternate between showing the person speaking, the person listening, or both together, while the audio track plays alongside, uncut. The result is a dialog scene. A change of scene in a movie marks a new passage. The transition between the last shot of the current scene and the first shot of the next scene is typically different – and more noticeable – than the transitions that take place between shots within a single scene.
Shots
As already mentioned, a shot refers to an unbroken film sequence that has been recorded using a rolling camera. A rule for filming is to have each shot be at least three seconds long, unless it's part of a sports scene, or an action scene. Shorter shots create an atmosphere of energy and tension, and you can deliberately use this camera technique to build real dynamics and excitement in your film. In general, you should familiarize yourself with the three-second rule, as this is the average length of a movie shot.
Shots can be filmed using a whole variety of camera settings. The subject may be filmed from various perspectives, with different details, and these settings determine how the subject will appear on screen. The scale of the shot gives the audience an impression of how far away the subject is. The viewer can draw on their everyday experiences: a face in close-up that fills the screen or monitor seems very intimate and close, while small figures of people within a vast landscape seem distant or isolated.
Here are the basic types of movie shots, from extreme long shot to extreme close-up.
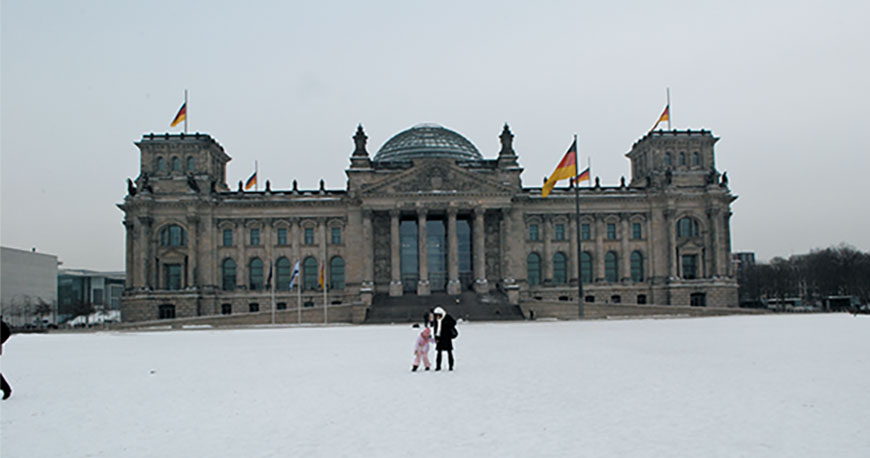
Extreme long shot
In this type of movie shot, the focus is not on the fine details. Landscapes, sunsets, skylines and so on are shown in a wide frame. This shot is commonly used to begin or end a sequence of associated scenes and works as a kind of transition between a new section of the film.
Long shot
The "long shot" film technique gives the viewer an overview of the setting and provides orientation. It usually indicates a change of scene. If for example you have a long shot of a house, followed by a shot of the interior, the two shots are connected by the cinematic sequence. The transition indicates to the viewer that the interior is part of the house in the long shot.
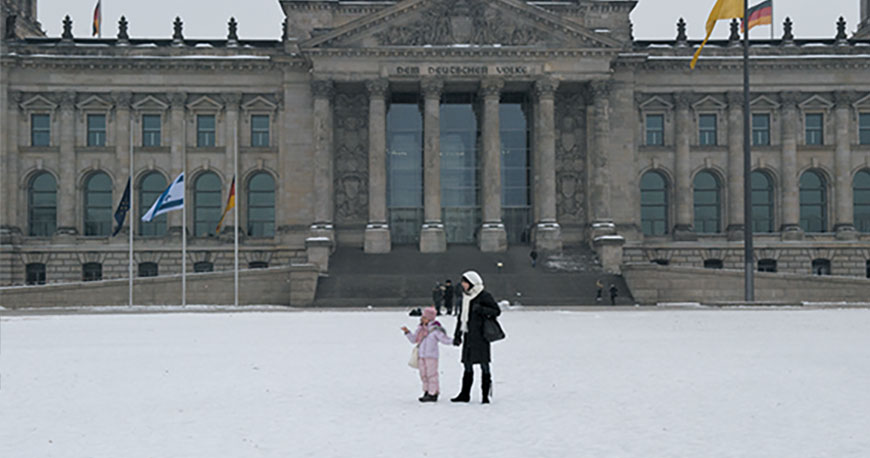
Full shot
With the full shot film technique, the distance to the subject is still relatively far and there is an emphasis on scenery. Viewers can see people from head to foot and can follow their total movement. Body language is clearly visible, although facial expression are not entirely clear.
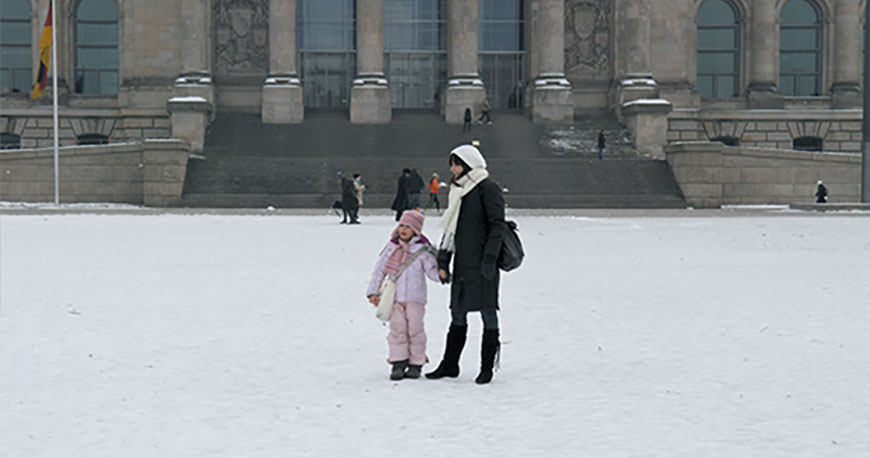
Medium shot / Medium long shot
The medium shot frames the torso of the subject from roughly the waist up. It places emphasis on your film's subjects and their relationship to each other and is useful for dialogue scenes. The medium long shot (sometimes called the "three quarters" shot) shows the actor's body from the knees up
Medium close-up
This shot frames a subject's head and cuts off around mid-chest. It is sometimes used on TV for newsreaders and moderators. In the movies, the shot is often used to draw the audience's attention to the subject.

Close-up/Extreme close-up
The filming technique of a close-up shows the head of a person to the neck or shoulders – this draw the audience's attention to the facial expressions. In a "extreme" close-up, only a small portion of a person or object is shown, which gives the impression that the observer is at close range. In other words, this type of movie shot makes them feel like they're right in the middle of the action.
Types of camera movements
Since films are seldom created from static shots, a description of the movements that the camera has made or should make is necessary in addition to the shots themselves. The camera can be used for tracking shots, pans and zooms in a whole range of speeds to create an atmosphere of calm or of frenetic activity, relaxation or drama, etc. Also, it's no longer the case that the camera should remain stable and must always rest on a tripod. Using a handheld camera has been on trend for a long time as it"s seen as a good way to create authenticity, emotion and tension.

Pan
Panning shots, or pans for short, offer an all-around, panoramic view and are used for filming landscapes and other panoramic scenes. A good panning shot starts with two to four seconds on the initial image and with two to four seconds on the final image. The camera should move slowly between the initial and final images, smoothly, and at a constant speed. The rule of thumb for panning is: Don't start too soon, end too soon, or stop panning in the middle of the shot.
You can pan horizontally and vertically, but not diagonally. Combination pans are also possible. It is recommended, however, that you only move the camera in one direction; that is, don't pan back and forth or up and then down. Use a tripod. Best practice is to plan the start and end points before panning and think about how you're going to move the camera from one point to the next. Then, try out a few versions of the panning shot.
A high-performance film editing program such as Video deluxe allows you to create virtual pans for static recordings even after the footage has been created. Working on your PC at home, you can first decide the image section to display at the start of the pan, and then the final frame. The pan between these two images will be automatically created by the program. The first image will display in fullscreen and it will then slowly pan through the video to the final image. What's more, the source material should be in high resolution so that the image detail that you zoom in on does not appear pixelated.
Zoom
Zoom is a specific simulated pan that increase or decreases the size of the subject. This creates the illusion that you are moving closer to or further away from the subject. Using the zoom function can also bring some disadvantages. Any faint camera movement will turn into an obvious shake, since movement is intensified when the image is zoomed in upon. To combat this, a tripod can be used during filming, or you can use video stabilization, which is one of the many types of film editing.
You can also create digital zoom shots after the fact, using video editing software. Using the analog zoom function on the camera is advised, since the video resolution will not be affected by this. The best way to zoom is not to remain standing in one place when using the camera, but to move forward with purpose.
An alternative to zoom is to adjust the focus. A typical example is where a person is standing in front of a billboard. At first, the focus is on the person. They speak to the camera. Once they've finished speaking, the camera changes to focus on the billboard so that it is no longer the background. If you know your way around camera techniques, you don't even need to modify the settings.
Tracking shot
Tracking shots are a familiar feature from most movies. Here, the camera is moved during the recording process to introduce movement to an otherwise static camera shot.
The idea is that the camera is constantly capturing something new while filming. Examples of this are shooting footage from an open car window or walking alongside somebody.
The more stable the camera is held, the better. In professional movie studios, a camera dolly mounted on tracks is often used. Smooth camera pans can also be created using a little trolley. Mount your camera on a tripod, the tripod on the trolley and slowly move the trolley around the subject.

If you notice during film editing on your PC that a setting is too static and that a tracking shot work better, high-quality video editing software such as Video deluxe can be used to create a virtual pan. Similar to creating a pan, you start by selecting a section of the image, which will be displayed in close-up and can be moved freely through the material. This process also works well with photos.
Scenes
Film editing assembles shots into their finished form to create scenes. Changes between shots within a scene must be subtle, so that where possible, they are not noticed by viewers. In contrast, when changing from one movie scene to another, a viewer should be made aware that there's been a change to the location or time. The cut used for this should be noticeable too.
A cut can mean a jump forward or backward in time, a location change, or a different perspective – it represents a break in the continuity of the narrative. There are a range of film techniques for making a cut so subtle that most viewers won't perceive it. This process is called "continuity editing" (or the "invisible cut"). The invisible cut is not invisible in the literal sense, of course; it means to create the illusion of a single, uninterrupted take for the viewer so that they forget they're watching a production.
You start by deciding upon shots from your video footage that you want to use. A start- and end point must be decided upon for each separate shot. Then, you have to consider the film transition to use between two shots. Where does the first shot end, where does the second begin?
When thinking about where exactly to cut in the first shot, you always need to take the following shot into account. Plus, you can only decide upon the length of a shot when you know the length of the shots that come before and after it. By matching the lengths of the shots, you can create a cinematic rhythm which can then be used to amp up the drama, or conversely, slow down the action.
Context is king when making these film editing decisions – but we don't want to give such vague advice. Instead, it's best to make the most of solutions that have emerged in the course of movie history. Whether these are general rules, simply recommendations, or totalitarian presumptions is a subject of intense debate among film editors – but we're not even going to go there. The "classic" rules for cutting are the results of long years of work by professional cutters, and their experience has enhanced film techniques for beginners and advanced users alike.
Editing techniques
Where should the camera shots be cut, and what's the best way to reassemble them? These are the essential questions you need to ask yourself when you start film editing.
We'll concentrate on the core principles here:

Cutting on Action
The first principle is to cut on action within a scene. An example of this is where you have create a close-up shot and a wider shot of someone bringing a glass towards their mouth and drinking. You cut from the first shot to the next in the middle of the action, while the arm is being raised.
The idea is to create a seamless transition that is not noticeable – so you cut during the action rather than waiting for a pause. During the movement the viewer can anticipate the climax of the action. They're waiting for the connecting cut and know that the glass will reach the mouth. By cutting on action and matching the action of these shots, the following shot is not as conspicuous as it would be if you waited for the action to finish before cutting a new, unfamiliar story arc or action.
Shots within a scene should be cut before the character leaves the scene or frame, unless there's a specific reason for leaving it empty. These can be used successfully as film transitions – an empty frame can in fact be used to bring the suspense in a scene to a conclusion. But as a rule, within a scene you should avoid empty frames.
These different basic film techniques are essentially variations of the same principle: Scenes are considered as story arcs in themselves, and an empty scene, or an action that has come to an end, indicates the end of the arc.

Shot/reverse shot (or shot/countershot) is the most common, simple and simultaneously effective type of film technique and one that is extremely familiar from film and TV. Imagine a character standing on a street who is about to go into a house. They approach the house door and unlock it. As they enter, the film cuts to a shot of the interior and the same person closes the door from the inside, takes off their coat and hangs it up on a coat hook.
When these two shots are assembled together it creates a natural movement in the action, and for the viewer, there's no doubt that the hallway where the person is taking off their coat is the exact same hallway behind the house door that has been closed by the person in the exterior shot. In reality, it's actually much more likely that a different film studio set is used for the interior.
Alternatively, think about dialog in a film, where you see and hear an actor in a close- or mid-range shot, and while they speak, the film cuts to the face of another person listening. The viewer is watching something completely different that doesn't match with the audio track; a still shot of the face of someone listening. The focus of the viewer is now on the listener's reaction. Without using this cinematic technique, the shot of the listener would just be of a mute face. Using the reverse shot in a dialog turns the other character into a listener. In the context of the dialog, their face may show a certain reaction: Interest, skepticism, perhaps hostility...
Using this basic film technique "cut by cut" to assemble together these mini-sequences creates meaning and enables viewers to understand the storyline. They can more easily place the cut scenes within the context of the entire film. In addition to shot/reverse shot, there are a whole bunch of other film editing techniques that are, in a way, variations of the shot/reverse shot technique.
In this case, the edited shots share a causal relationship. The second shot cannot be understood without the first shot.
Example: Two people are shouting at each other and in the next shot, one person walks out of the doorway, slamming the door shut behind them. Or someone someone aims a revolver and shoots, and in the next shot we see someone falling dead to the ground.

With the technique of the cross-cut, (aka parallel editing), you cut back and forth between two scenes that are shown in parallel. By using increasingly shorter cuts, the suspense is built up to a climax.
An example could be two cars that are speeding towards an intersection from different sides. If you use cross-cuts to shorten the lengths of the cuts, you'll build up tension towards a (potential) crash.
Through the sequence of events, the audience will be reminded of a certain association. The association will not be referred to overtly in dialog, but rather shown.
For instance, a man plays the lottery and in the next scene is shown shopping for an expensive car.
Rather than showing an event, the shot is replaced with an image that has similar thematic meaning.
Example: A child is born, but this is represented by the blossoming of a flower rather than a labor scene in a hospital. Or a couple are rolling around on a bed and the film cuts away to a firework display, to signify passion.

The film uses contrast editing to cut between two very different scenes to force the audience to compare them, or to draw attention to a contradiction.
Example: A tourist is sitting, bored, at a hotel bar and the film cuts to a shot of a beggar.
Contrast editing is used very often after a long, quiet scene to "wake up" viewers and to show that the story is now continuing. For an example, consider a scene with a character lost in thought while looking at a photo that then cuts to a shot of a train roaring into a station.
This technique cuts together two different shots that share similar aspect or subject matter, for e.g. the same visual content, colors, shape or action (red shirt and red car, football and globe, falling out a window and a falling feather).
The most famous match cut of all is the opening sequence of Stanley Kubrick's "2001: A Space Odyssey" where a primitive man throws the bone up into the air, which is then replaced in the next shot with a spaceship floating through space. It's a continuation of the action of the first shot, albeit four million years later.
The two shots initially only have the movement of the central subject in common. The cut is a film technique that suggests a link in the subject matter to the viewer: Here it seamlessly connects the past and the future, with the throwing of the bone depicting the dawning of mankind and linking it through to the space age.

This is another one you definitely are familiar with. It's evening, a person is sitting at a table quietly reading a book, when suddenly loud voices and ringing telephones can be heard. And just as the viewer is about to ask themselves what these sounds have to do with the calm situation on screen, the film cuts to a very different kind of scene in police headquarters, while the audio track continues playing.
This type of film technique is called a "split edit". This is where the audio and video tracks are cut separately. This technique is also known as J cuts & L cuts in reference to the "L" or "J" shapes of the image and audio tracks in the arranger of an video editing program when the audio track overlaps or is played ahead of the corresponding image.

To round things off, we'd like to mention a cinematic technique that aims to break a continuous sequential shot of a film in an abrupt way. The jump cut is jarring for the viewer and grabs their attention, since the film is cut at a seemingly incongruous moment, but then continues to play. It gives the impression that a section of the recording is missing.
This type of movie shot can be created in various ways, but no matter which method is used, the effect is that the film "jumps" forward in time. Jump cuts have gained traction as a modern kind of filming technique for beginners and professionals alike, and have been used universally, not least in video interviews with cuts that jump from one camera angle to the next.
Axis of action or 180-degree rule
In film editing, there's a basic rule regarding shooting a scene. If you see a person in a film who moves through the picture from left to right and after the cut to the next shot moves suddenly from right to left, you know that the camera has jumped the axis of action. The jarring nature of this cut can disorient you as a viewer, as you don't know in what direction the person is moving.

Following the "180-degree rule" or axis of action rule, the camera should always be kept on one side of an imaginary axis. This is an imaginary guideline for directing a scene that splits the frame into two halves. Imagine a line between two characters. The camera is positioned on one side of the semicircle and remains there; the scene takes place on the other side of the axis. Due to the 180 degree angle of the semicircle this rule is known as the "180-degree rule". The 180-degree semicircle – just like with field of vision or a theater stage – establishes orientation for the audience. According to the 180-degree rule, only shots made within this semicircle may be cut one after the other.
For an example: Two actors deliver dialog while looking directly at each other. In this case, the axis of action is the direction they're looking in. The camera can now show the two actors in front profile, from diagonally in front or, in extreme cases, it can move up to the axis of action for shot over the shoulder of one of the actors, while showing the other from the front. (This "over-the-shoulder shot" is one of the most popular types of movie shots because it connects the character's perspective with that of the audience, creating intimacy.)
All these shots can be easily cut in sequence using the axis as a guideline. However the moment that the camera crosses the line, the dialog partners are swapped on screen. The actor that appeared on the left now appears on the right. Here, the camera has broken the rule by "jumping the line".
Jumping the line is a problem that often only becomes obvious during film editing. When the axis of action is crossed in a continuous, uncut shot, this is not crossing the line; The axis has simply been moved and the viewer can still reorient him or herself on account of the visual continuity.
Axes of action are created in particular by the direction in which the actors are walking or looking. New axes of action can be established when actors abruptly look in a new direction, turn around, move towards a new position, or when a new subject enters the frame from the outside. In these cases, the 180-rule can be broken, since there has been a change to the axis of action and therefore to the viewer's orientation.
Film transitions & dissolves
When creating great cinema, the film transitions between scenes should be be given plenty of consideration. Transitions are a way of connecting two shots. The "hard cut" is used as standard in editing and is used for cutting from clip to clip without any film transitions. It's done without any frills or effects, quickly and painlessly.
Dissolves (or crossfades) and video fades (fade in and fade out) are also commonly used as cinematography techniques. When a dissolve is applied, the image from one scene gradually blends into the next scene. Dissolves are used as standard in slideshows, since this are used to display still images. Here, they are a useful way to usher in the next photo in a gentle, gradual way.
Generally, you want to create a sense of continuity in film and therefore keep transitions within a scene as subtle as possible. Transitions are a way of redirecting the viewers' attention and indicating to them that the scene is about to change.

A deeper cut will produce a fade out. In other words, at the end of a scene, the scene fades to black. Only then will the next scene start – usually with a fade in. The fade out transition lets the audience pause for breath and get ready for the next scene. It's comparable to a person closing their eyes for a few seconds, the closing of a chapter in a book or a falling curtain in a theater. The fade out can be used as a way of bringing an entire chain of scenes, or a whole scene, to a close.
There a whole range of other transitions and dissolves that you've seen in films, some of which are used to impressive effect. Sometimes the image of the last scene rotates away wildly, or is slowly carried away from the viewer as if through a tunnel.
Try not to overuse these kinds of transition effects, as they usually distract your audience from what's happening in your movie.
The right film editing software
In order to produce a great film using the cinematography techniques described here, you need powerful video editing software for working with the video footage from your camera. Being able to try out different film editing techniques and undo them if necessary is essential. The video editing program you use should give you the freedom to experiment and should also be intuitive in terms of operation, with options for creative editing only a few clicks away.
We recommend using Video deluxe Plus. This comprehensive video editing solution offers everything you need to dive right in and apply all the film editing techniques mentioned here without needing to familiarize yourself with the program first. The image and audio track are clearly laid out in the arranger and you can cut, compress and stretch at any position you want without affecting your valuable footage on your hard drive – since the program works on a completely virtual level.
This way you can try out different kinds of edits and then undo them. For J & L cuts, go to the place you want to cut with the mouse, press the Alt key and with the mouse button held down, drag the range bar of the image track to the right while keeping the audio track the way it is. Then move the audio track further to the left and both shots merge to create a finished "split edit".
In addition to all the cutting tools you need, Video deluxe offers essential specialist functions such as video stabilization for pans shot without tripod, virtual tracking shots, and powerful image optimization.

Film editing with Video deluxe Plus, the video editor for downright amazing movies:
- Import & export for all relevant formats
- Quick cut & detail cut
- Automatic wizards
- Up to 900 effects & music
- Intuitive templates for intros, outros, subtitles, transitions, opening credits and much more
- Burn videos to DVD & Blu-ray (and design your own menus)


