
Create your own beats on your PC
– here's how it's done.
"How do I make my own beats?" Keep reading to find out how
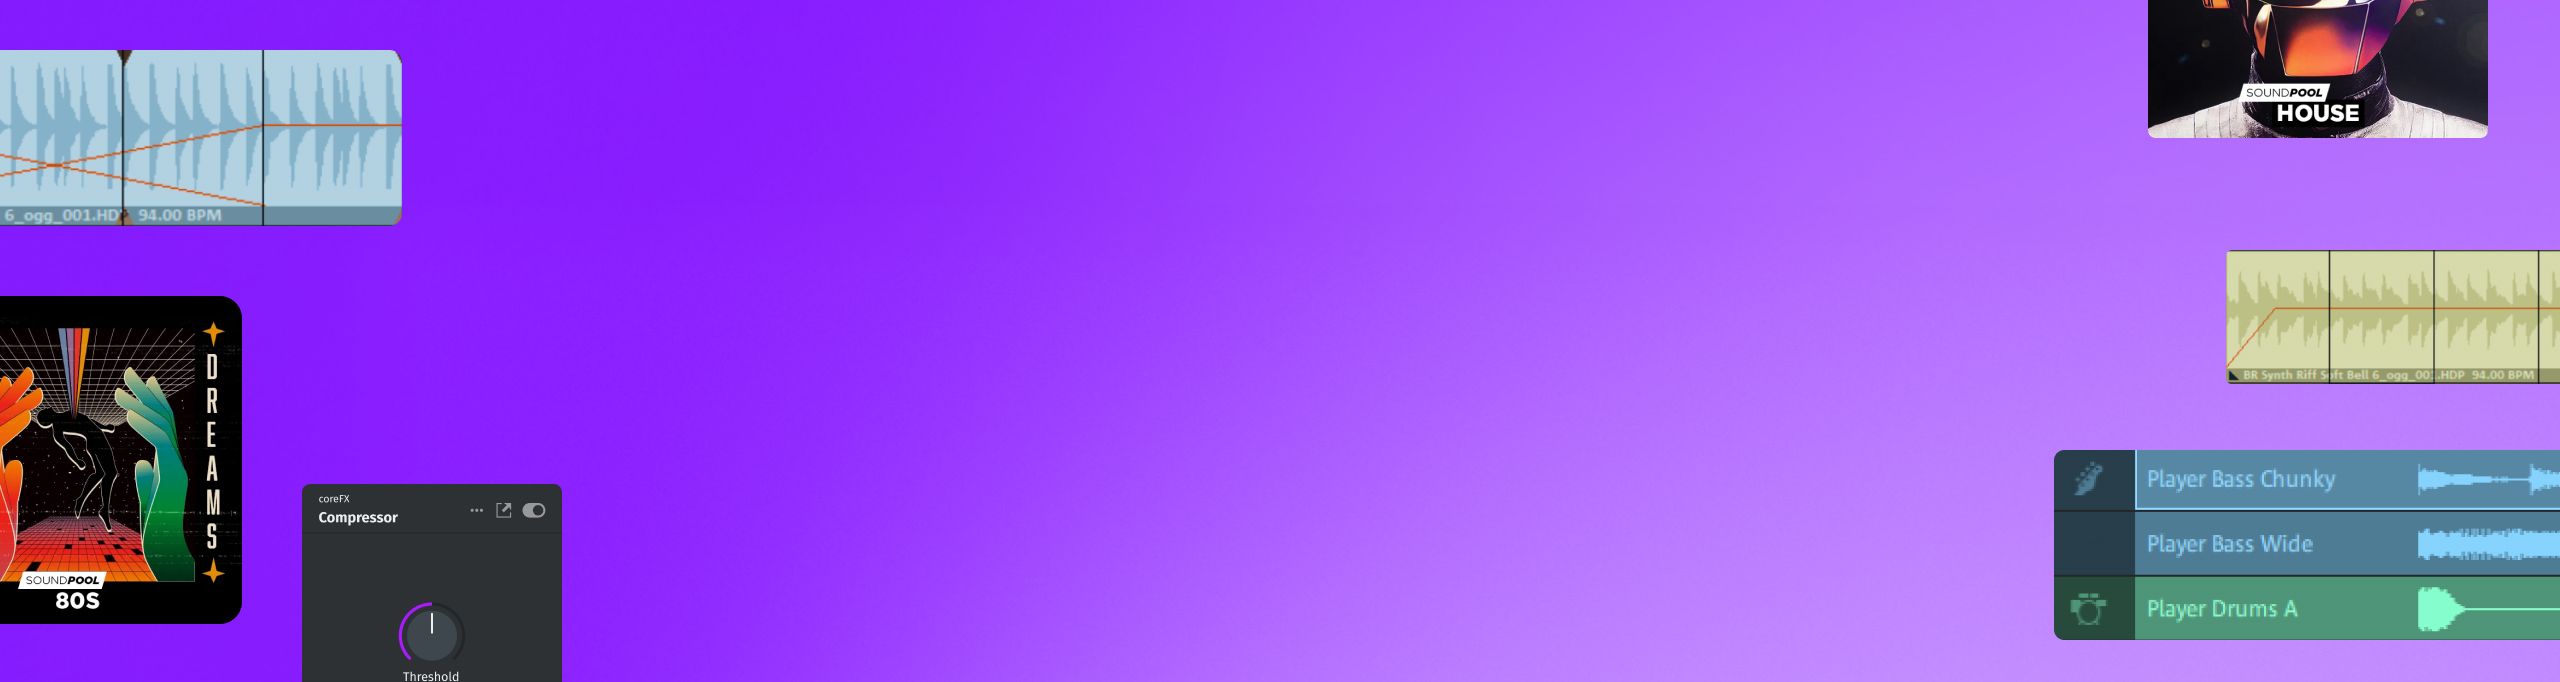
- Download Music Maker Free, install the program and select the "Create beat" option from the start dialog. This will open an empty project with Beatbox ready to use in the lower area.
- Click the arrow in the upper left to play the current beat in Beatbox. Beatbox' matrix is divided into four parts, each part represents one beat of a 4/4 bar. Programming is very easy: Simply click on the fields of the matrix to add new notes or remove existing notes. Use the drop-down menu to load different sound presets. Once you are satisfied with the beat, drag & drop the waveform symbol into track 2, which is set up for Beatbox by default. This converts Beatbox' current pattern into a standard audio object.
- You can easily combine your beat with the MAGIX Soundpool loops. Sounds are automatically synchronized so that all the sounds fit together perfectly when played back. Click the "Loops" button in the toolbar to open the Soundpools on the right side of the interface. On the right, select a drum loop. Drag the loop onto any track. Use the spacebar to start and stop playback. The Soundpool drums work well together with Beatbox objects in track 2.
- Once you have loaded the first loop, set the song's tempo. The proper song tempo depends on the genre, for example hip hop usually calls for about 90 BPM. The default is 120 BPM. To do this, click on the BPM field in the transport console and enter a numeric value.
- Combine your drum sample with other samples from different instrument categories (e.g. a bass). Any object can be easily dragged out (and looped) using its rear handle. This allows you to quickly compose a long beat, for example made up of drums, bass and piano samples, and use it for your personal music recordings.
- As an alternative or complementary to this, you can program your own beats with the MIDI editor. Click on the "VST instruments" button in the upper toolbar and then drag the Vita LE to the left onto an empty track as a sound generator. This will create a MIDI object with a beat example. Delete this object from the track and create a new, empty MIDI object from the "Edit" menu.
- Place the playback range (i.e. the yellow bar located above the first track) so that it is the same length as the MIDI object. This allows you to play back the MIDI object in a loop and program it simultaneously.
- Double-click on the MIDI object to open the MIDI editor. This provides you with a matrix in which you can insert MIDI notes with a mouse click. Use the pencil tool to do this. Place the kick drum in line C1, for example, at the 1:1, 1:2., 1:3 and 1:4 beats, and the snare two lines above it at every other beat. Use the "Play Solo" button to listen to the MIDI object separately from the rest of the arrangement.
- Program more software instruments this way. For example, use the bass in the Revolta synthesizer. Drag the Revolta from the right onto its own track, create an empty MIDI object there and program a bass figure. Complete the first bars of your beat with a piano sound using the Concert Grand. Drums, bass and piano together comprise a complete beat.
- If you are interested in the sounds from legendary drum machines, open the Store on the right in the Media Pool, get the Drum Engine and program the drum patterns with the same procedure.
- Open the mixer from the toolbar and adjust the volume levels of the different tracks. If you want, apply effects such as a compressor or an EQ, which you can reach by clicking the FX buttons in the mixer.
- Lengthen your arrangement either by looping the objects or using Ctrl + Mouse to create duplicates one after the other. Duplicates can be varied or trimmed to create breaks, for example. This allows you develop a long beat step by step from short MIDI objects.
- Finally, export your beat as a WAV or OGG file in the "File" menu.
Produce beats
Produce your own beats on the PC to use in your own, completely new songs and remixes – no previous experience required! Music Maker software offers hundreds of drum and bass loops that can be easily dragged & dropped to create your own beats, as well as software instruments, effects, and tools for mixing and mastering. It's all intuitive in terms of use, and completely free in the basic Edition.
Music Maker enables those who want to make their own music overcome all technical and musical hurdles. Just trust your instincts and make great music. Choose the perfect loops in seven pitches to make beats easy using modular audio design. Or precisely map the kick drum, snare and hi-hat in the MIDI editor with a mouse click and program a matching bass. Get the Drum Engine featuring legendary beats from classic drum computers in the Store. Then, add fine details to the whole thing with mastering effects such as equalizer or compressor, and mix your beats with the built-in high-end mixer to produce a perfect song of your own.
The creative possibilities for music are unlimited With Music Maker Free, you can learn to make beats and everything else you need to know step by step. Below, we'll explain what you need to know to learn to make beats on the PC, produce beats and how to enhance your music-making skills.
Here are the basic steps:
- Download Music Maker Free.
- Double-click the installation file you downloaded to install the software.
- Start Music Maker and create a new project using the start dialog. The "Create beat" option organizes the program interface so that everything set up optimally for production with Beatbox. However, you can also click on "New project" and simply use the default program interface.
Then, you can start to make your beat.
Make your own beats on your PC

Create your own beats using Beatbox
Beatbox is a simple drum machine with an integrated step sequencer and was designed to be as easy to use as possible and produce fast results. Beatbox has its own window in the main interface and is not controlled by MIDI objects, but by its own sequencer.
This means that you don't have to load the Beatbox onto a track first from the track header like the other synthesizers, but simply open the Beatbox window when needed. When you start the program, it will already be open in the lower area.
- Use the Play button in the upper left corner of Beatbox to preview the beat.
- Click the fields in the matrix to add and remove notes.
The matrix represents one entire bar and sounds can be assigned to each 16th note within the bar.
- To add the current beat pattern into an arrangement, drag the waveform icon into the project's Beatbox track.
This converts the Beatbox pattern into a standard audio object that can be played using the transport controls in the project window. Don't forget to stop Beatbox' playback afterwards so that there aren't two beats playing back at the same time.

Create your own beats using drum loops
You can combine the Beatbox with the included Soundpool loops to create extra rich, fat beats or beats with bass and instrumental samples.
- Access the Soundpool selection window from the toolbar by clicking the "Loops" button.
The majority of beat producers start with drums. Music Maker Free features several hundred samples including various drum loops with entire drum figures containing kick, snare and hi-hat.
- For example, drag the drum loop "Kitty Compress A" from the loop list in the lower right into track 1.
After loading the first sample, you can adjust the project tempo. This is displayed in the transport control. The default is 120 BPM.
- Click the BPM field and enter the desired BPM ("beats per minute") value.
Of course, the BPM depends on what kind of beat you want to produce. For a calm hip hop feel, choose a tempo of about 90 BPM. For trap beats, ease it back even more to 75-80 BPM.<br/>
This matches the loop to the project tempo. So if you change the project tempo to 90 BPM, for example, the loop is automatically slowed down to that tempo. The tempo decrease gives the "Kitty Compress A" loop a nice, "old-school" touch.<br/>
"Kitty Compress A" "Kitty Compress A" sticks to the classic "boom bap" formula comprised of kick, snare, kick, kick, snare. This figure is accompanied by a straightforward hi-hat.

If you use the mouse to drag the right edge of the audio object in the track, you can lengthen the beat as much as you like – or "loop" it. The samples in Music Maker are designed so that there are no awkward pauses or unevenness in the beat when "looping". This means you can create complete tracks quickly and easily with beat from a few drum loops by simply dragging the loops out.
Making beats with included samples is quite simple: Open the instrument folder, preview & choose samples, drag the loops onto tracks and lengthen them to desired length. You can easily combine any of the available sounds as you like it.
If you don't want to stick to pre-made samples, there's second way to create your own beats. This involves getting deeper into beat production.

Create music beats using MIDI
Using MIDI data protocol, you have the possibility to program your own beats note by note and play them back with a software instrument. The beat is programmed into a MIDI file, which can then be played by any MIDI-compatible synthesizer. The same beat can be played back, for example, on a sampler with an acoustic drum set or on a drum machine. This makes it sound completely different, without losing its rhythmic structure.
This production method lets you determine everything manually, because you place every hi-hat sound, kick drum and cymbal hit.
To get started, it's best to use the "Vita" sampler included in Music Maker Free with its free "Acoustic Drum Kit".
- Click on the "VST instruments" button in the toolbar. This will open the included software instruments on the right side of the interface.
- Drag & drop the Vita onto the timeline onto an empty track.
If you keep the drum sample and the Beatbox audio object in the tracks and drag the Vita to another track, all three sounds will be mixed together. This process is called "layering": Multiple layers are played at the same time and together create a fatter beat. This is how professionals create individual tracks for each element (for example, the kick) and "layer" the sounds on top of each other. At the end, the real challenge is to fine-tune all the layers so that the the final mix doesn't sound muddy.
For starters, however, it is probably best to delete all the samples in the tracks and concentrate entirely on the Vita sampler.

When you load a software instrument, a MIDI object will be created by default so that you can preview the sound and configure the instrument.
- Delete the MIDI object that was automatically created from the track to be start making your own beat.
- Open the "Edit" menu and choose "Object" > "Create new object" > "Create new MIDI object".
- Select "Empty (1 bar)".
- Drag the MIDI object onto the track with the Vita (i.e. track 2).
- Specify the playback area so that it covers the range of the empty MIDI object exactly .
The type of playback is always based on the yellow playback bar.
- Drag the end of the yellow bar above the first track to the left until it is directly over the edge of the MIDI object.
This enables you to play back the MIDI object looped.
Now, you have a "blank canvas" in front of you, so to speak, that you can freely arrange. Later, when you have finished the one-bar beat, simply loop the object to the desired length of bars or copy it as often as you like to make variations in the copies.
The Vita can be played and recorded (like any other software instrument) directly with the computer keyboard or using a USB keyboard. We cover that below (with the piano). Programming drum beats is easiest note by note.
This offers you the most control when you create beats.
- Double-click on the empty MIDI object to open the MIDI editor.

The MIDI Editor is a custom user interface for all software instruments. This is where you program your beats, melodies and chords.
On the Vita, you'll find the kick drum on the left side of the piano keyboard in the "C1". The snare is two rows above that.
- At the top of the MIDI editor, switch to the pencil tool.
- Click in the rows of the matrix to create MIDI notes.
The simplest rhythm is a beat with four beats: Boom, boom, boom, boom. To make this beat, simply click four times next to each other in the table row C1 and in the fields 1:1, 1:2, 1:3 and 1:4. These fields indicate the main beats of the beat: One, two, three, four.
- Press the spacebar to preview your work.
The bar will loop, so you can listen to what you have drawn in an endless loop. Press the spacebar again to stop playback.

To add a snare into the beat as well, simply move every other note up two lines. This also functions during live playback. Now, you will hear a beat with "Boom, tack, boom, tack".
Compare the illustration and the sound example:

This may sound relatively unspectacular now, but it will become more interesting as soon as you use two beats instead of one on the count of "three". Like this: Kick, snare, kick-kick, snare.
To do this, simply place another note behind the third note in the fifth column of the third beat.

Next, add some driving beats on the "ride" in an offbeat rhythm. The offbeat positions are the unstressed beats in a bar. If you count "one and two and three and four and...", the offbeats are on the "and".
If you've come this far – congratulations! You've programmed your own beat note by note for the first time.
Now that you know the principle, everything else is entirely up to your musical imagination. Naturally, your beat can be altered or extended as desired. For a driving "Boom, tack, boom-boom, tack, boom-boom", for example, simply add an additional note on the kick drum to the fourth part of the beat – and you're done.
Or you move the horizontal position of the second snare a little backward....


Make your own beats: Now for the bass
For the bass, you can use the free synthesizer "Revolta 2", which includes many presets out of the box, but also offers a lot of options in terms of sound.
- Drag the "Revolta" from the Instruments tab on the right to its own track, e.g. track 3.
- Delete the MIDI object of the Revolta's demo example.
- Insert a new, empty MIDI object.
To allow for a little more variety in the bass line, choose "Empty (2 bars)".
- Move the MIDI object onto the Revolta's track.
The two-bar MIDI object is twice as long as the one-bar object for the drums in track 2, so you need to elongate the drums to two bars.
- Loop the drum loop so that it spans both bars as well. Drag the lower-right edge of the MIDI object until it's also two bars long.
- Extend the playback range to two bars.
Now, everything is in place to produce a two-bar bass loop to accompany the drums.
Next, setup the sound that you want for the Revolta. There are a wide range of options here. Preview the preset "Bass - Scorpio Funker". It's got a nice, pumping west coast sound, which just right for a hip hop beat.
Like the Vita, the Revolta 2 can be controlled using the MIDI editor. This means you can use the mouse to easily draw in the bass tones you want.
Most hip hop beats have relatively straightforward bass figures. In this example, we remain on D2 as the root note most of the time, only switching down one note to C2 at the very end.

Create beats using MIDI recording
The essence of classic rap beats can basically be reduced to three essential elements: Drums, bass and a piano sample. For the piano, you can use the free Concert Grand LE included in Music Maker Free. It only has one preset, but it still sounds really good. With the knobs and effects for delay, chorus, pitch, reverb and EQs, the default piano preset can be "tweaked" in a number of ways.
- Drag the Concert Grand LE to an empty track and delete the MIDI object that is automatically created.
- Insert a new, empty MIDI object and drag it onto the piano track.
- Open the MIDI editor by double-clicking on the MIDI object.
Now, you can draw in the notes with the mouse like before with the Revolta. For more dynamic melodies and loose chord patterns, however, a live recording might be more suitable. Let's try that out now.
- First, experiment with a few melodies as well as the interplay between the existing beat of the drum & bass by playing the two bars looped and "dropping" a few melodies or chords on the computer keyboard or MIDI keyboard.
The Revolta bass plays the root note D and changes to C at the end of the two-bar loop. Likewise, on the piano, you could play the note D3 and perhaps the minor third F3 above it. On the computer keyboard, these would be the "W" and "Q" keys. At the end, the bass changes to a C. At this point, you also move the second interval down one step, to C3 + E3 (or by pressing the computer keys "Q" and "E").
Of course, this is only a suggestion. You can press any keys that sound good to you. Again, we played the notes offbeat, that is, on the unstressed beats "and". The result can be seen in the illustration.
To record the whole section, click the "REC" button in the MIDI Editor and start playing. The other two tracks containing the Vita and the Revolta will be played back as well.
Pay attention to the recording mode. The default mode is "Overdub". This will record everything you play. This means that new, additional notes are added with each repeat of the loop. This is not always desirable. If you deactivate overdub mode, the notes from the previous take will be replaced with new notes. This way you can repeat your recording uninterrupted until you're happy with it.

When you are satisfied with your recording, click "Stop" in the MIDI Editor and then correct your recording to your liking in the MIDI Editor. To do this, switch to the Selector tool to delete unnecessary notes or move them to rhythmically (horizontally) or melodically (vertically) appropriate positions.

Add a drum machine
Finally, we will show you a feature that is not included in the free version Music Maker Free, but would considerably enhance your beat production. That is, provided you are interested in classic drum machines. The Drum Engine delivers legendary drum machine sounds and can be purchased from the in-app Store.
- Open the "Store" on the right side of the interface. If there is no Store tab displayed, you can activate the Store via the toolbar.
- Select "VST instruments" from the drop-down menu.
- Enter "Drum" in the search field.
Now, you will see a list of all the instruments that have "Drum" in their title.
- Move the mouse over the Drum Engine and click the large arrow.
This will trigger the preview feature. This allows you to check out the basic sound of each instrument. Click the mouse again to stop the preview function.
- Click on the Drum Engine icon.

This will take you to an informational page where the specific item is described in more detail. You may also buy it here. After purchase, a download occurs and then the Drum Engine is available in Music Maker.
Tip: If you are interested in several instruments and Soundpools, consider purchasing MUSIC MAKER Premium instead of individual add-ons. Premium edition unlocks a bundle of additional features, Soundpools or instruments.
After downloading and installing the program module, the Drum Engine will be displayed in the "Instruments" tab next to the Concert Grand, the Vita LE and the Revolta as an additional software instrument.
The Drum Engine can be operated in the usual manner. If you drag the Drum Engine onto a separate track, a MIDI object containing notes is created as usual. Play back the new MIDI object together with the other arrangement once. You will notice that the new beat from the Drum Engine fits well into the existing beat from Vita, Revolta and Concert Grand.
Now, you can replace the MIDI object with a new, empty MIDI object as described above, or you can modify it in the MIDI Editor. This allows you to use the "demo" MIDI objects from the software instruments for starting on your own beat productions.
When playing the arrangement back, you may notice that the piano can only be heard softly in the background, whereas the drums from the Vita and from the Drum Engine dominate the overall sound. That means it's necessary to mix the volume of the tracks.

Beat production: Mix instruments and layers
At the latest by the end of beat production, it is essential to employ the mixer in order to balance the volume levels of the individual tracks and prevent a muddy sound.
- Open the mixer by clicking on the mixer button (or simply pressing the M key).
There are volume controls for each channel and a stereo panorama knob to shift the respective track to the left or right.
- The FX buttons allow you to access the track and master effects, which can be used to shape the sound of the instruments significantly.
In our two-bar arrangement, it is important to bring the piano sound back into the mix a bit. It's been pushed into the background a little by the two beat generators, the Vita and Drum Engine. This can be done most effectively by lowering all other faders except the piano channel. The opposite approach could result in clipping in the mix.
Another way to accentuate a particular instrument in the mix is by using a compressor, which can be activated using the FX buttons.

Duplicate beat objects and export files
Where do we go from here? That depends entirely on how you want to use your beats. You can keep experimenting within Music Maker and build a song from the first two beats. In addition to looping, duplicates are helpful here. Every duplicate contains the original beat, but can be varied in any way, unlike a looped passage.
- Hold down the Ctrl key, click on an object in your two-bar MIDI arrangement and drag the duplicate to the right to an empty area.
The duplicate is completely independent of the original, i.e. you can edit it in any way, for example shorten it to create a break.
A second important technique is grouping. You can combine as many objects as you like into a group. The group can then also be duplicated and modified with a mouse click, just like an individual object. This allows you to quickly create more complex song structures like verses or choruses.
- Select all objects that should belong to a group. Click on the objects that are grouped together while holding down the Ctrl key, or use the mouse to draw a rectangle that encloses all the objects.
- From the menu, choose "Edit" > "Object" > "Group" > "Group objects" or simply press the keyboard shortcut Ctrl + G.
This enables you to quickly develop a short beat into a larger idea of the desired length. As you continue, you can add to the beat, for example with vocal recordings, melodies using software instruments or Soundpool loops.
Once you've finished producing your beat or song, you can export it directly as a WAV file or in the compressed format OGG.
- Choose "File" > "Export" and the format you want.
- To export only the current playback range under the yellow bar, select the "Only export the area between the start and end markers" option in the export dialog.
During export, all tracks in the arranger are mixed down together with all effects and mixer settings into one "proper" audio file. The final result will sound exactly the same as when played back in Music Maker.


Start your music
journey today
Create songs with loops, experiment with effects, and push
your creativity – all in MUSIC MAKER Free.