Producing DJ Music on Your PC
– Here's how!
How can you make your own DJ remix? Keep reading to find out how.
- Download Music Maker Free, install the free program and start a new project.
- To use your own MP3 songs or audio CD tracks to create your own DJ mix, select the "File manager" view on the right. Browse for song files and drag & drop them into the track window. Audio CD tracks must first be converted before they can be used by the file system. To do this, select the function "File" > "Import" > "Import audio CD track(s)" from the menu.
- Use the spacebar to start and stop playback. Sort the songs one by one and use different tracks to crossfade between songs. Adjust the fades using the fade handles at the upper object edges. For example, if you want to skip an intro, drag the left object edge at the beginning of the song to the right until the beat starts.
- To make your own DJ music, use the included samples and combine them to produce your own beats. On the right, switch to the "Loops" view and then select a drum loop. Combine the drum sample with a bass and other samples from different instrument categories (e.g. a bass).
- To program your own beat, open the Beatbox tab under the track window. Click the arrow in the upper left to play the current beat in Beatbox. Beatbox' matrix is divided into four parts, each part represents one beat of a 4/4 bar. Programming is very easy: Simply click on the fields of the matrix to add new notes or remove existing notes. Use the drop-down menu to load different sound presets. Then drag & drop the waveform symbol into track 2, which is set up for Beatbox by default. This converts Beatbox' current programming into a standard audio object.
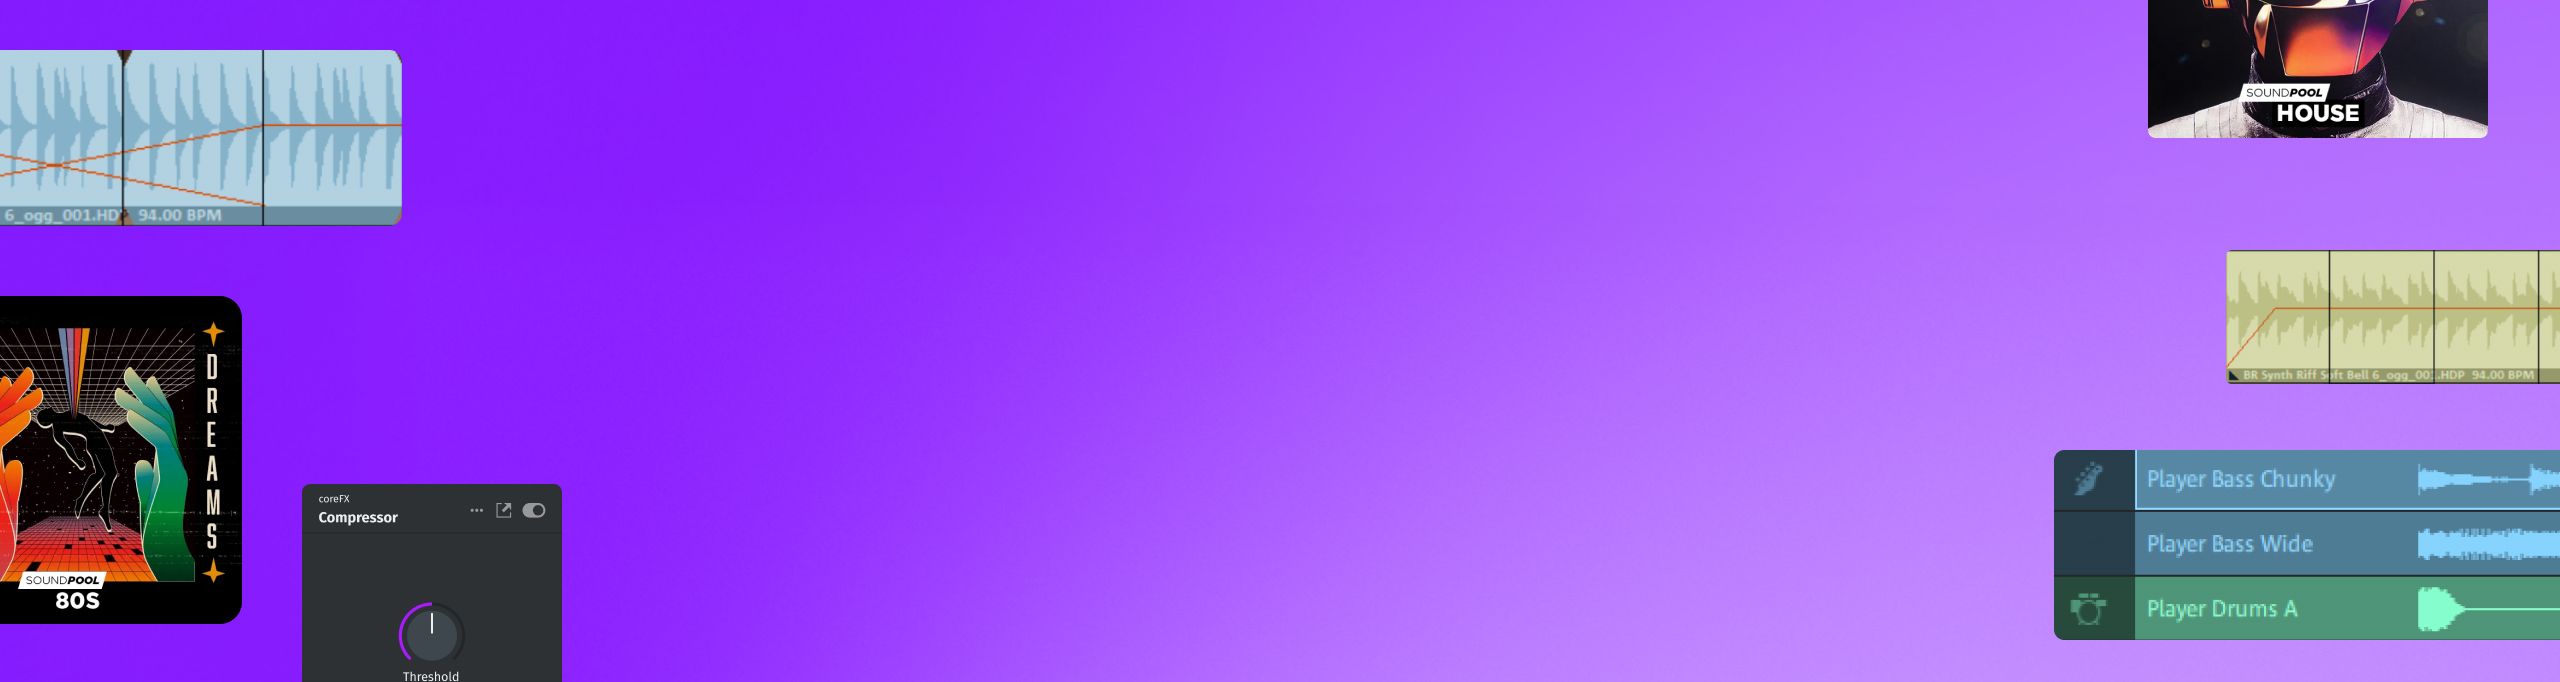
- You can also program VST instruments and mix the different sounds together. Sounds are automatically synchronized so that all the sounds fit together perfectly when played back. Open the "Instruments" category in the upper right and drag Vita LE onto an empty track on the left for drum sounds. This will create a MIDI object with an audio example. Delete this object from the track and create a new, empty MIDI object from the "Edit" menu. Adjust the playback range (i.e. the yellow bar located above the first track) so that it is the same length as the MIDI object. Double-click on the MIDI object to open the MIDI editor. Select the pencil tool and place the kick drum in line C1, for example, at the 1:1, 1:2., 1:3 and 1:4 beats, and the snare two lines above it at every other beat. Combine this beat with other software instruments like the Robota or the piano, Soundpool samples or professional songs and mix all the sources of audio in the mixer (key "M"). Here, you can adjust the volume levels of the tracks and apply DJ effects like a compressor or EQ to blend the sounds together.
- Finally, export your DJ set as a WAV or OGG file in the "File" menu.
Producing Your Own DJ Music
How can you get your guests to start dancing without anyone taking on the task of the DJ? It's simple: You produce an audio file with your favorite songs beforehand, perfectly mixed together with an even transitions in song tempo, seamless fades and made up of your favorite genres – it's the perfect solution for a party where everyone wants to party and no one wants to DJ.
Or maybe you want to get creative and combine your own beats with samples out of your collection of music to make your own remix? Whatever your idea of DJ music is, with Music Maker you can make it a reality – for free and without any previous experience.
Music Maker enables those who want to make their own music overcome all technical and musical hurdles. Just trust your instincts and make great music. Drag the songs you want to use from the File manager onto the tracks and blend them into a homogeneous remix. Synchronize their playback speed by time stretching and add crossfades between songs. Produce your own beats, slice up songs into samples and remix them using the included loops. You can then add the final touches to the whole thing with mastering effects such as equalizer or compressor, and mix your tracks with the built-in mixer to produce a perfect DJ mix.
With Music Maker Free, there's no limit to the creative possibilities when making music and you can learn everything you need to know step by step. In this guide, learn everything you need to know about how to make DJ music on your PC.
Here are the basic steps:
- Download Music Maker Free.
- Double-click the installation file you downloaded to install the software.
- Start Music Maker and create a new project using the start dialog.
Then, you can start to make a DJ remix.

Creating Playlists
A "classic" DJ performs his playlist live during a party using two turntables or CD players, artfully and subtly mixing the songs together. It is also possible to prepare this list in advance and then let it play back automatically at a party. To do this, first load all the songs you want to mix into a project in Music Maker. On the right-hand side you'll find the Media Pool. When you first start the program, it is in the "Loops" setting. To start to make your own DJ mix, switch to the File manager view in the Media Pool.
- Click the "File manager" button in the upper toolbar.
- Go to a folder containing the songs that you would like to use.
- If you want to load songs from an audio CD, use the "Import" > "Import audio CD track(s)" option in the "File" menu. Audio CD tracks cannot be processed directly with the File manager like MP3 tracks, because they have to be "ripped" first.
- Drag & drop the song on the left onto the tracks.
You can move any song around freely. It is best to start by arranging the songs in one shared track one after the other.

For a long project with lots of songs, it will be important to use the Zoom function, which can be used to change the display as needed.
- Click the Zoom buttons in the lower right of the track window to enlarge or reduce the visible area in your project.
You can zoom horizontally and vertically. When zooming vertically, the waveform display becomes wider.
- To play or pause the project, press the spacebar.
During the playback, the playback marker moves across the track range from left to right and shows the position that is being played back. You can move the playback marker in the bar ruler above the first track at any time by clicking.
- Each song's volume can be adjusted individually. The volume handle in the middle of an audio object can be used for this.
By default, the units of measurement in the timeline are bars. This setting is ideal for music production, however units of time are more useful for playlists.
- Right-click above on the bar ruler and change the units to milliseconds.
Now, you can tell how long your audio files are in the bar ruler and at which exact time the playback marker is positioned.

Mixing songs
Once the songs are arranged in the desired order, start working on the transitions. Ordinarily, all the songs should blend into each other smoothly. A good DJ ensures that the flow of the music never stops.
- To blend two songs into each other, drag the rear song onto the track below the other.
- Move the back song a little forward on the lower track so that it begins overlaps a little (about 5 seconds) at the end of the song before.
Then, try to synchronize the rhythms of the two songs as best you can. Use the waveform display to do this.
- If the first song ends with an outro that you don't want to use, shorten the end by moving the right object edge inward.
- If the second song has an intro that you want to cut, move the front object edge to the right until the beat kicks in.
- Move the songs so that the end of the first song and the beginning of the second song are slightly overlapping each other. Pay attention to the peaks of the beats in the waveforms, they should be aligned as much as possible.

- Move the songs so that the end of the first song and the beginning of the second song are slightly overlapping each other. Pay attention to the peaks of the beats in the waveforms, they should be aligned as much as possible.

Mixing several songs together works best if the songs have the same tempo (BPM or beats per minute). This is rarely the case even for songs from the same genre. In that case, the song's BPM need to be changed with a timestretching effect. For this, you need the "PLUS FX" add-on module, which you can purchase from the Store.
- Select the song whose BPM you want to change.
- Click on the FX button in the upper toolbar to open the "Object effects". The selection window will open in the lower area.
- Select "Tempo pitch/resample".
- Play the song back and use the sliding dots in the interactive visual to change the playback speed without changing the pitch.
This will add more uniformity to your mix.

When you're finish, you should have a smooth transition. To do this, adjust a fade:
- Make a fade-out at the upper back edge of the leading song by dragging the object handle inward to the left.
- Create a fade-in at the upper front edge of the following song by dragging the object handle inward to the right.
Now, both songs should blend into each other smoothly during playback without any interruption in the music.
If you want, you can also edit the sound of each song, which can be made more uniform with typical DJ effects.
- Use object effects, notably the equalizer or a compressor, to modify the sound of a selected song.
- You can apply a uniform sound to an entire track using the mixer. Open the mixer by pressing the "M" key and click on the corresponding "FX" button above the channel strips.. On the right the mastering section, you'll find additional effects for controlling the overall sound.

Making Your Own DJ Music
Contemporary DJs do not only play records, but are music artists who perform their own creative musical ideas as well. They employ their own beats and samples. If you want to get into the "high art" of DJ music, you will need one or even better several beats, which you can loop and mix with samples and songs.
In other words, you will become a beat producer. The majority of beat producers start with drums. Music Maker Free features several hundred samples including various drum loops with entire drum figures containing kick, snare and hi-hat.
- On the right, switch to the "Loops" view in the Media Pool.
- For example, drag the drum loop "Kitty Compress A" from the loop list in the lower right into track 1.
After loading the first sample, you can adjust the project tempo. This is displayed in the transport control. The default is 120 BPM.
- Click the BPM field and enter the desired BPM value.
Of course, the BPM depends on what kind of beat you want to produce. For a calm feel, choose a tempo of about 90 BPM.
This matches the loop to the project tempo. So if you change the project tempo to 90 BPM, for example, the loop is automatically slowed down to that tempo. The tempo decrease gives the "Kitty Compress A" loop a nice, "old-school" touch.
"Kitty Compress A" sticks to the classic "boom bap" formula comprising kick, snare, kick, kick, snare. This figure is accompanied by a straightforward hi-hat.

If you use the mouse to drag the right edge of the audio object in the track, you can lengthen the beat as much as you like – or "loop" it. The samples in Music Maker are designed so that there are no awkward pauses or unevenness in the beat when "looping". This means you can quickly create complete tracks with beat from a few drum loops by simply dragging the loops out.
Making beats with included samples is quite simple: Open the instrument folder, preview & choose samples, drag the loops onto tracks and lengthen them to desired length. You can easily combine any of the available sounds as you like it. Additional Soundpools with samples from almost any genre imaginable can be purchased from in-app Store.
If you mix your own beats and samples with existing songs, it is essential to employ the virtual mixer in order to balance the volume levels of the individual tracks and prevent a muddy sound.
- Open the mixer by clicking on the mixer button (or simply pressing the M key).
There are volume controls for each channel and a stereo panorama knob to shift the respective track to the left or right.
- The FX buttons allow you to access the track and master effects, which can be used to shape the sound of the instruments significantly.


Producing Your Own DJ Beats Using Beatbox
If you don't want to stick to pre-made songs & samples, there are other ways to create your own remix.
Beatbox provides you with a particularly easy-to-use module for your own DJ music production. It lets you create your own drum beats and play them in sync with different loops.
- Click the play button in the Beatbox' upper left corner to play (and stop) the current pattern.
- Click the fields in the matrix to add and remove notes.
- You can load new sound settings from the drop-down menu.
The matrix represents one entire bar and sounds can be assigned to each 16th note within the bar.
- To add the current beat pattern into an arrangement, drag the waveform icon into the project's Beatbox track.
This will convert the Beatbox pattern into a standard audio object that can be looped or cut like any other object.

Programming Your Own DJ Beats Using MIDI
The included VST instruments offer even more creative possibilities to make DJ music. To get started, it's best to use the "Vita" sampler included in Music Maker Free with its free "Acoustic Drum Kit".
- Open the "VST instruments" from the upper toolbar.
- Drag and drop the Vita onto the timeline, for example onto track 2.
If you leave the drum sample on track 1 and drag the Vita to a track below it, the "Acoustic Drum Kit" will be combined with the sound from the Vita. This process is called "layering": Multiple layers are played at the same time and together create a fatter beat. This is how professionals create individual tracks for each element (for example, the kick) and "layer" the sounds on top of each other. At the end, the real challenge is to fine-tune all the layers so that the the final mix doesn't sound muddy.

When you load a software instrument, a MIDI object will be created by default so that you can preview the sound and configure the instrument.
- Delete the MIDI object that was automatically created from the track to be start making your own beat.
- Open the Edit menu and choose "Object" > "Create new object" > "Create new MIDI object".
- Select "Empty (1 bar)".
- Drag the MIDI object onto the track with the Vita (i.e. track 2).
- Set the timeline's units to "Bars" (by right-clicking above the top track) and the playback range so that it is exactly over the MIDI object.
This enables you to play back the MIDI object looped.

Now, you have a "blank canvas" in front of you, so to speak, that you can freely arrange. Later, when you have finished the one-bar beat, simply loop the object to the desired length of bars or copy it as often as you like to make variations in the copies.
The Vita can be played and recorded (like any other software instrument) with the computer keyboard or using a USB keyboard. The keys on the on-screen piano keyboard below tell you which keys are on your computer keyboard that you need to press to make the associated notes.
However, programming drum beats is easiest note by note. This approach gives you the most control over the result and is recommended for creating drum sounds.
- Double-click on the empty MIDI object to open the MIDI editor.
- On the Vita, you'll find the kick drum on the left side of the piano keyboard in the "C1" row. The snare is two rows above that.
- At the top of the MIDI editor, switch to the pencil tool.
- Click in the rows of the matrix to create MIDI notes.
The simplest rhythm is a beat with four beats: Boom, boom, boom, boom. To make this beat, simply click four times next to each other in the table row C1 and in the fields 1:1, 1:2, 1:3 and 1:4. These fields indicate the main beats of the beat: One, two, three, four.
- Press the spacebar to preview your work.
The bar will loop, so you can listen to what you have drawn in an endless loop. Press the spacebar again to stop playback.
To add a snare into the beat as well, simply move every other note up two lines. This also functions during live playback. Now, you will hear a beat with "Boom, tack, boom, tack".
This may sound relatively unspectacular now, but it will become more interesting as soon as you use two beats instead of one on the count of "three". Like this: Kick, snare, kick-kick, snare.
To do this, simply place another note behind the third note in the fifth column of the third beat.
Next, add some driving beats on the "ride" in an offbeat rhythm. The offbeat positions are the unstressed beats in a bar. If you count "one and two and three and four and...", the offbeats are on the "and".
If you've come this far – congratulations! You've programmed your own beat note by note for the first time.
Now that you know the principle, everything else is entirely up to your musical imagination. Naturally, your beat can be altered or extended as desired. For a driving "Boom, tack, boom-boom, tack, boom-boom", for example, simply add an additional note on the kick drum to the fourth part of the beat – and you're done.
Or you move the horizontal position of the second snare a little backward....

Drum Sounds for Producing DJ Beats
Finally, we will show you a feature that is not included in the free version Music Maker Free, but would considerably enhance your DJ music production. The "Drum Engine" delivers legendary drum machine sounds and can be purchased from the in-app Store.
- In the upper right, click on the "Store" tab in the Media Pool.
- Select "Instruments" from the dropdown menu.
- Enter "Drum" in the search field.
- Now, you will see a list of all the instruments that have "Drum" in their title.
- Move the mouse over the Drum Engine and click the large arrow.
- This will trigger the preview feature. This allows you to check out the basic sound of each instrument. Click the mouse again to stop the preview function.
- Click on the Drum Engine icon.
This will take you to an informational page where the specific item is described in more detail. You may also buy it here. After purchase, a download occurs and then the Drum Engine is available in Music Maker.
Tip: If you are interested in several instruments and Soundpools, consider purchasing MUSIC MAKER Premium instead of individual add-ons. Premium edition unlocks a bundle of additional features, Soundpools or instruments.

Exporting DJ Music
Once you've finished producing your playlist or DJ music, you can export it directly as a WAV file or in the compressed format OGG.
- Choose "File" > "Export" and the format you want.
- To export only the current playback range, select the "Only export the area between the start and end markers" option in the export dialog.
During export, all tracks in the arranger are mixed down together with all effects and mixer settings into one "proper" audio file. The final result will sound exactly the same as when played back in Music Maker.
And when the party gets started, play back your WAV file with all the pre-produced songs and party with your guests.


Start your music
journey today
Create songs with loops, experiment with effects, and push
your creativity – all in MUSIC MAKER Free.