Recording Instruments on Your PC
– Here’s How!
Would you like to record an instrument with your PC? Keep reading to find out.
- Download the free version of Music Maker, install the program, and start a new project.
- If you need musical accompaniment for an instrumental recording, you can use your own audio files with background music or included the Soundpool samples. To load your own audio files, switch to the "File manager" view in the upper right, select the folder with the audio file and use drag & drop to move the file to the left into the track window. Start and stop playback using the spacebar. The yellow playback range above the tracks will be played. For accompaniment using soundpool samples, switch to the "Loops" view. Then, select an instrument category (e.g. drums, bass or keys) and drag the desired loops onto any track in the arranger. You can freely combine loops until you have the right background music for your recording.
- Connect a microphone to the audio input jack of your computer or use the internal microphone. Click the red button on the left in the track header of any empty track until it says "AUDIO REC". This indicates that this track is now in recording mode for microphone recordings. It is best to use headphones so that you can hear the accompanying tracks while recording.
- Click on the red button in the transport control to begin an audio recording and play your instrument. At the end of the recording, click the stop button.
- There are several ways to edit your recordings. You can edit and add effects to all your recordings to enhance the sound. To place a cut, move the playback marker to the desired position and use the keyboard shortcut "T". Simply delete unnecessary passages from the track. You can create crossfades using the top object edges by dragging the handles inward. If you want to apply and edit effects, open the object effects, which can be accessed via the FX button in the toolbar, or by using the track and master effects in the mixer (M key).
- Finally, export your recording via the "File" menu as an audio file. In the export dialog, you can define whether the complete project or only the current playback range should be exported.
How to Optimally Record Instruments
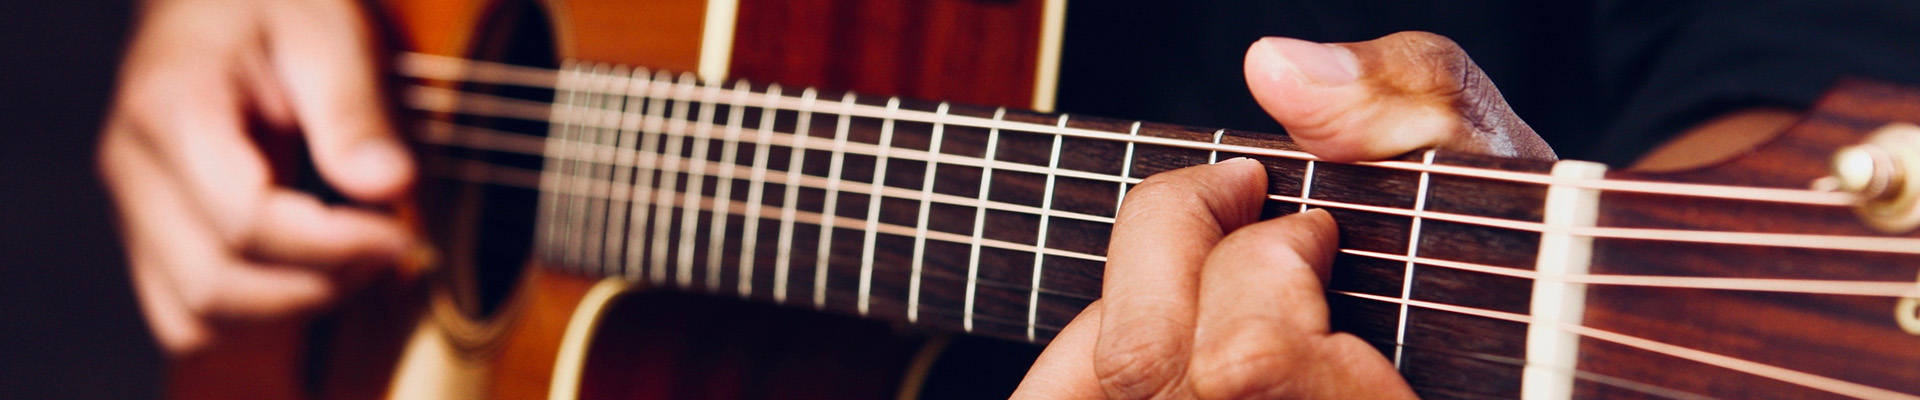
Instrumental recordings at home are possible without any problem, you don't need to go to an expensive studio. A PC or laptop is all you need as a recording device. If you aren't satisfied with the sound quality of the computer microphone, buy or borrow a higher quality microphone. Cardioid condenser microphones are well-suited for most acoustic instruments. For a bass-heavier instrument, a small-diaphragm condenser microphone is recommended – or better yet, two, which would enable you to make a stereo recording. Dynamic microphones are best for particularly loud instruments such as drums or electric guitars.
But no matter which microphone you use, the tone will always sound slightly thinner and drier in a small home studio than on a big stage. That isn't necessarily a disadvantage though. If you want to create an atmospheric room sound, you can simply add it later. Conversely, however, it isn't possible to filter out the reverb from a recording. That's why it's preferable to produce your instrumental recordings in a small room that produces as little reverb as possible. The recording can still be freely changed later during post production on the PC, for example, with reverb algorithms that can vividly recreate the sound of a large stage at a concert venue, or cathedral. To get the best possible source material, it is better to record instruments in a "dry", close and natural environment as possible.
To give the best instrumental performance, a musician should also be relaxed and comfortable. So always try to create the right atmosphere. Do a few tests with the microphone in advance to find out which distance from the microphone is appropriate. This will vary considerably depending on the instrument and the individual style of playing. But try not to think that much about your equipment. The performance is more important. A bad-quality recording of a great performance is still significantly better than perfect recording quality of a boring instrumental performance.
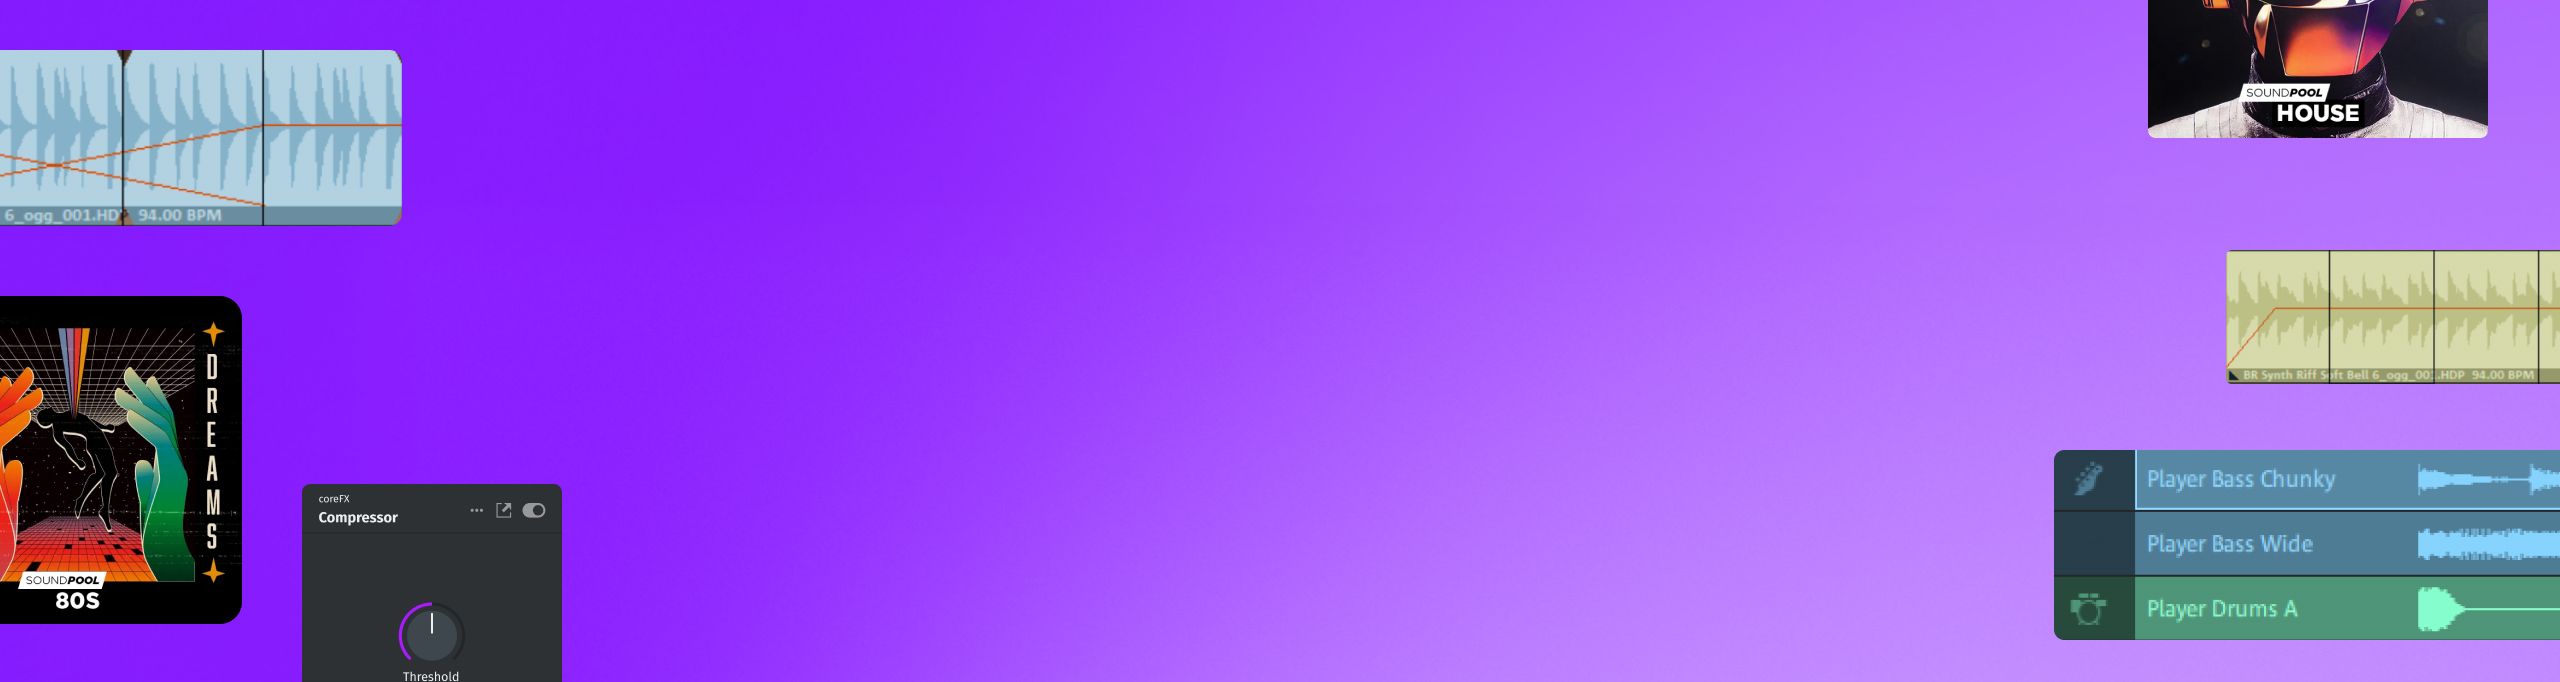
You can use your PC or laptop as a recording device with the appropriate audio recording software. We recommend Music Maker Free, the free, basic version of the popular music software, Music Maker. This not only allows you to record, but also can provide quick musical background accompaniment, if needed: The included samples can simply be dragged & dropped to create simple background beats or complete song structures. Or you can use the included VST instruments: For example, a realistic-sounding piano, a synthesizer that offers punchy, electronic bass sounds ("Revolta"), or an acoustic drum set ("Vita"). The VST instruments can be played directly using the computer keyboard or a MIDI keyboard and simultaneously recorded.
A special feature of Music Maker is that it is a modular system that can be expanded into a complete virtual studio environment, for example, with additional sample collections ("Soundpools") from a wide variety of genres; high-quality effects like flanger and chorus; and even additional VST instruments, such as guitars, basses, wind instruments and drum machines.
Or you can just use the free version. It is fully capable of making perfect instrumental recordings.
In this guide, learn how to record singing on a PC in Music Maker, how to edit your instrument recordings and how to enhance your music-making skills. Here are the basic steps:
- Download Music Maker Free and install the software by double-clicking the installation file.
- Start Music Maker and create a new project using the start dialog.
You can then start to make a DJ remix.
Record Yourself Playing an Instrument with Music Maker Free

Add musical accompaniment or create your own backing track
To record an instrument without any accompaniment, skip ahead to the nextsection. If you need musical accompaniment for your instrumental performance,find out how to create that here.
- Do you already have an instrumental recording that you would like to use as a backing track, for example a karaoke version of a song? Then, open the file manager located in the upper right of the toolbar, navigate to the folder with the music file and drag and drop it onto any track.

- Drag the yellow bar above the first track over the complete object. This defines the playback range.
- Play back the recording by pressing the spacebar. Press it a second time to stop playback.

You can also compose your own accompaniment. The free version of Music Maker comes packed with hundreds of samples, which can be purchased as additional Soundpools samples in virtually every genre possible from the Store. You can use the Soundpool loops to produce your own songs or simply create a basic framework for your own recordings.
- In the upper right, open the "Loops" view. This is the view for the Soundpool loops.
In the beginning, only the free Soundpool "Feel good" will be shown in the Soundpool list. To the right, the instrument categories can be found: "Bass", "Brass", "Drums", "FX", etc.
In the list below, you can choose the loops. In the "Bass" category, for example, the choices include "Right Bass" (in the variations A-C), "Right Sub Bass" (in the variations A and B), etc.
- Click on a sample to begin listening to a preview.
- To use the sample, drag & drop it onto the arranger.
- Adjust the playback range (i.e. the yellow bar above the tracks) to the appropriate length for the arrangement.
The principle is like a musical puzzle: You can combine different loops on separate tracks to produce your background music. You can place loops directly one after the other without any breaks or clicks.
If you move the mouse to the back edge, the mouse pointer will turn into a double arrow. You can now click and hold the double arrow to drag out the section on the track. This will play the recording back as a loop. Using the same approach, you can also cut away the beginning to add some variation.
It's probably best to start with a drum track. Select a drum sample on the right and drag & drop it to the arranger on the left. In general, a sample can be placed anywhere. In general, however, it makes the most sense to put different instruments on separate tracks. Create a drum track for the drum loops and then create a separate bass track. Select a bass sample from the right and drag it onto another track. You can add additional tracks using the transport control via the button on the left.
Tonally-based samples can be set to seven different pitches.
- You can change the pitch by clicking one of the seven pitch buttons for the loop on the right before loading it into your project.
This is not possible with drum loops, since drum sounds don't have a pitch.
The playback speed can be easily changed as well.
- Click on the "BPM" (beats per minute) field in the transport control and enter a different BPM value.
Particularly with Soundpool loops, you can often achieve an interesting effect by lowering the BPM value from 125 to 90, for example. Experiment with it and find your own groove!
And one more tip: If you need a background arrangement for your recordings, don't use too many different instruments in order to keep the sound from becoming too crowded. After all, your solo instrument should be in the forefront of the sound. Often, drums and bass (and in some cases even a third instrument) are enough.

Recording an instrument
To record your instrument, proceed as follows:
- Connect a microphone to the microphone input of your computer. You can also use the built-in microphone on your computer, however, it will not provide particularly high-quality recordings.
- Switch an empty track to the mode for microphone recording. Click on the red recording button on the left side of the interface in the track header until "AUDIO REC" appears.
- Put on headphones when playing with accompaniment so that the backing track isn't played back through the speakers and rerecorded through the microphone.
- Start the audio recording by clicking on the red record button in the transport control.
During the recording, an audio object will be created in the recording track that will become increasingly longer as the recording continues.
- When you've finished, click the "Stop" button in the transport control.
If something went wrong while recording the first time, simply click the red record button again. The recording will start again and the previous, flawed take will be overwritten.

After recording, listen to everything carefully and cut out any unnecessary parts. You can also cut out any unwanted noise, for example, if you accidentally bumped into the microphone.
- The easiest way to cut away the beginning and end of a recording is to simply push the object's edge inward. To do this, move the mouse pointer to the object edge until it turns into a double arrow. Now, click and drag the object edge to the right, until just before the beginning of the recording. Use the waveform display as a guide. Do the same for the end.
- You can create fades (fade-ins and fade-outs) using the upper object handles on the edges.
- The handle in the center can be used to adjust the volume of the recording.
- To place cuts in the middle of a recording, position the playback marker at the desired position and press the "T" key. This will cut the object in the track into two separate objects. To remove an undesirable passage, cut once at the front and once at the end of the passage you want to remove and delete the middle using the Del key. If there is crackling, add two small fade-outs to the remaining parts.

Recording VST instruments
If you don't have a "real" instrument, you can also record using the included VST instruments. This works best with a connected MIDI keyboard. If you don't have one, it's also possible to use your computer keyboard.
- Click the "Keyboard" button at the bottom of the interface to open the virtual keyboard.
This allows you to control all the VST instruments. The default instrument sound is a concert grand piano.
- Click once on the keyboard to activate it.
Letters and symbols will now appear on some of the keys. These keys correspond with the indicated notes on the computer keyboard. If you press several keys at once, you will play a chord.
- You can play the normal C major scale using the top row of your computer's keyboard (starting on the left with the letter "Q" and ending on the right with the "[" symbol).
It is the easiest to use this row of keys to play melodies when starting out. Through trial and error as well as a little practice, you'll learn to play instruments dynamically and accurately on the computer keyboard.

To record a VST instrument, you need an "armed" MIDI track, on which you wish to record. Track 1 is set up for a piano recording by default.
- Click on the red recording button on the left side of the interface in the track header of the track until MIDI REC appears.
- Click on the red "Record" button in the transport controls.
Now, a MIDI recording will start. This recording process works the same way as recording audio, as described above.
Along with the piano sound of "Concert Grand", two other additional instruments are included Music Maker Free: "Revolta" and "Vita LE". The Revolta is a synthesizer with many setting options for electronic basses and sounds, whereas Vita LE provides sounds for an acoustic drum set.
The easiest way to play the Revolta is to click on the instrument icon on the left in an empty track and select the Revolta. A large Revolta user interface with a number of creative possibilities to modify the sound will appear.
- Press a few keys to preview the sound.
- Open the Revolta drop-down menu and select another sound preset.
Instead of soft atmospheric sounds, you might now hear a snarling synth bass. Any number of experimental sounds are possible using Revolta. To record the Revolta, switch the Revolta's track to MIDI recording mode as described above and begin recording.

Enhancing instrumental recordings with an EQ, compressor and reverb
Finally, you might want to add a few high-quality effects to your instrumental recording. To do this, open the object effects that can be accessed using the FX button in the toolbar. Keep in mind that you can only apply these effects to audio recordings. These cannot be used to process MIDI recordings of VST instruments (for that purpose you need to use the mixer, see below).
- Use the equalizer to emphasize specific frequency ranges. For melodic instruments, it is often recommended to slightly boost the treble.

- The compressor levels volume peaks and adds more presence and loudness. This is especially useful for recordings of drums, electric guitars and basses.
Expert tip: For instruments with particularly dynamic phrasing, such as violin or saxophone, the compressor should be used with caution (or not used at all). Of course, you do whatever sounds best to you, so try out different settings. Here are a few "basic parameters" as a starting point: For drum recordings, a long attack time is important (approx. 30 ms) with a short release and a ratio of 4:1 or 8:1. For an electric guitar, try 5 ms attack, 80 ms release and a ratio of 4:1. For bass, start with an attack time of 10 ms and then adjust this value to as low as possible, with a release time of 300 ms and a ratio of 2:1 or 4:1. As a general rule, a high attack time (over 20 ms) should be used for any instruments that require a dynamic performance.
- The reverb features several presets for specific room sounds. You should generally use little or no reverb on a bass, otherwise the sound will become overcrowded and muddy. All other instruments work well with reverb.

Mixing the solo instrument and accompaniment
By the end of production, it is necessary to mix the volume levels of all the tracks and master the project. The mixer is used for this purpose.
- Open the mixer by clicking on the mixer button in the toolbar (or simply pressing the M key).
- Here, you can find a volume control and a pan control available for each track.
- The FX buttons give you access to additional track and master effects including another compressor, two different equalizers, stereo processor, reverb and echo. These effects can also be applied to MIDI recordings of VST instruments.
Tip: If you want to accentuate a track in the mix a bit more, it is most effective to do this indirectly by lowering all other faders. The opposite approach could result in clipping in the mix.

Add-ons for the program
Now, you've learned about the essential functions for recording musical instruments and editing your own recordings. But there's much more to discover in Music Maker. The basic version, Music Maker Free, can be expanded with numerous add-on modules from the in-app Store.
As well as many Soundpools and VST instruments, you'll also find professional effects and additional program functions that you can purchase and immediately start using in Music Maker. This will help you to develop your music skills over time.
- In the upper right, click on the "Store" button.
- Sort the items using the drop-down menu.
- Browse through the products offered. Click on an item's icon for more information.
- Click on the price and follow the instructions.
Tip: Sort the list of products by price to have the free items display at the very top. To get free items, all you have to do is register as a MAGIX customer.

Export music
Once you've finished working with your instrumental performance, you can export it directly as a WAV file or in the compressed formats OGG or WMA. The FNAC and MP3 formats require the add-on pack "More tracks and formats" or a Music Maker Edition.
- Choose "File" > "Export" and the format you want.
- To export only the current playback range under the yellow bar, select the "Only export the area between the start and end markers" option in the export dialog.
During export, all tracks in the arranger are mixed down together with all effects and mixer settings into one "proper" audio file. The final result will sound exactly the same as when played back in Music Maker.


Start your music
journey today
Create songs with loops, experiment with effects, and push
your creativity – all in MUSIC MAKER Free.