What’s post production?
Post production is the stage of film production in which the produced audio and visual content is edited, combined, and supplemented so as to create a film. The recorded camera footage is assembled in the desired sequence, optimized in terms of quality, and accompanied by background music, titles, and special effects. All elements are blended together to create the multimedia experience called a movie.
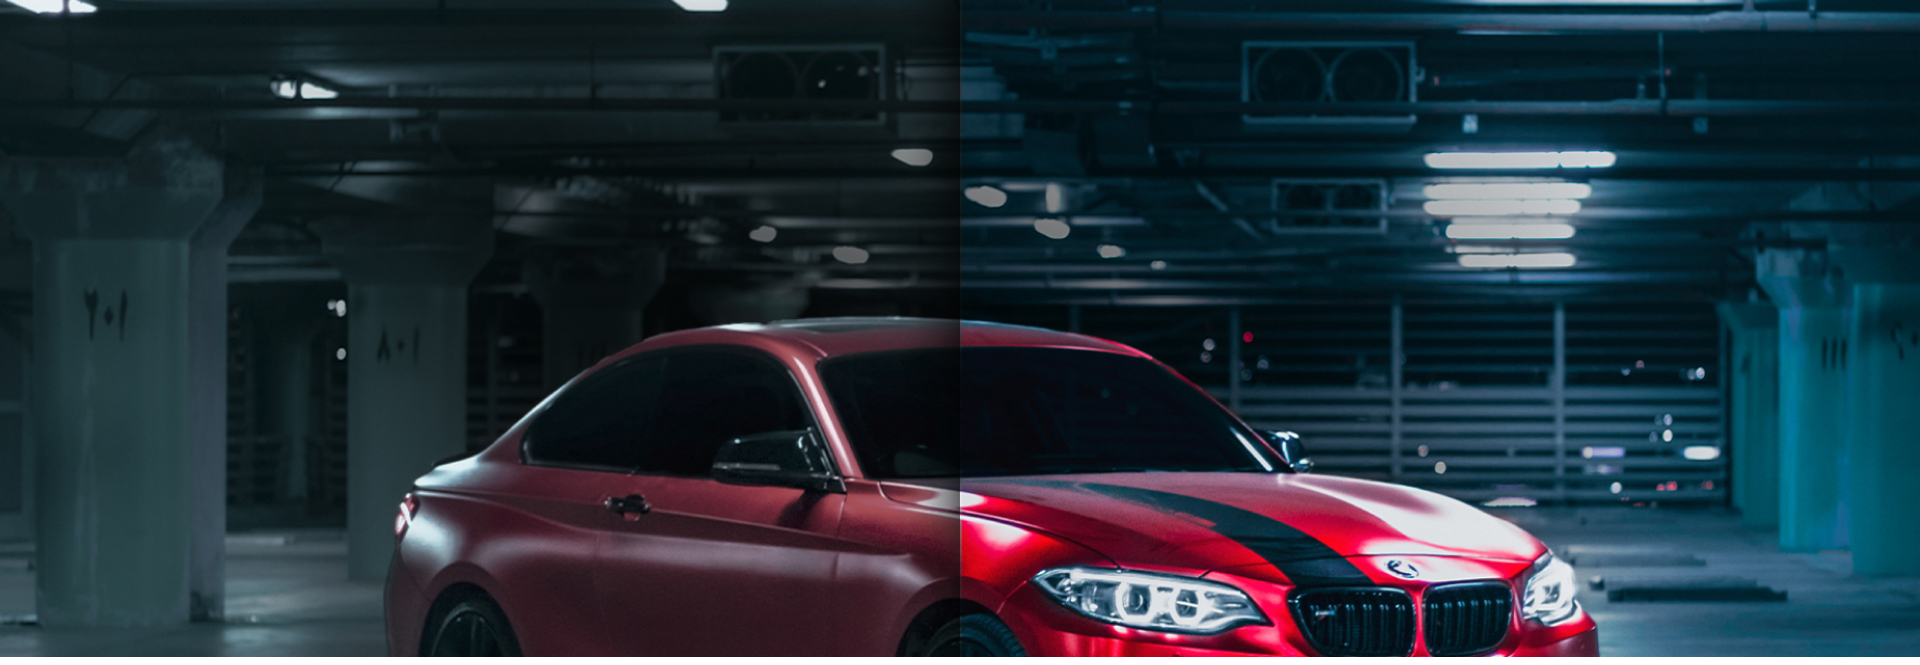
Post production used to be a manual process of physically cutting and gluing together strips of film. Today, most films are edited on digital editing systems. These software programs gained prominence in the early 1990s and revolutionized post production by making all the editing steps faster and easier.
The captured camera frames are imported directly into the computer, where they are saved as digital files. The later film is created by combining the elements of the film – video, music, and sound effects – on several tracks within the post production software.
This guide explains everything you need to know about post production, so you can easily turn your camera footage into professional-level videos and movies worth watching.
The three stages of film production
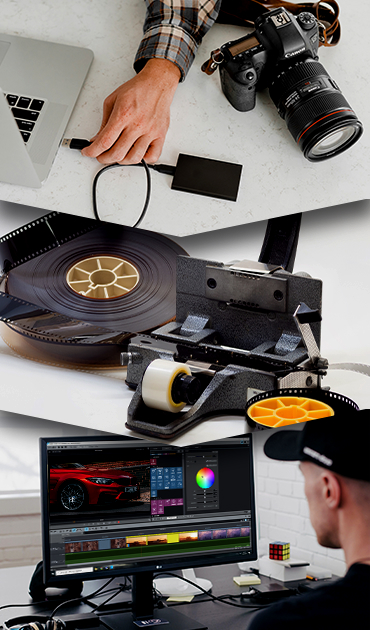
There are three main stages in the production of a film, video or television piece: Pre-production (planning), production ("the shoot"), and post production (editing and post production).
Pre-production
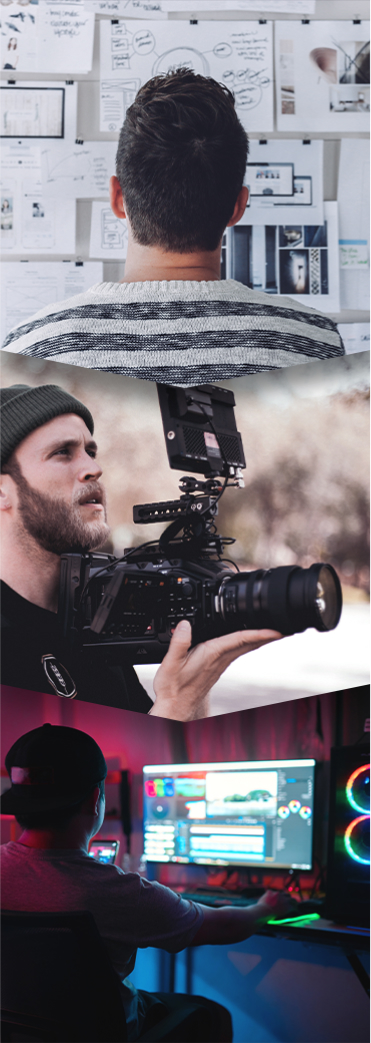
Pre-production includes everything that concerns planning: First, determining the film's title (which can also be a preliminary working title).Which genre should the production be – a documentary, a feature film, or a stop-motion film? Then, the target group. Who will your audience be? Will it be a big production for cinema or television, or a promotional film for the general public?
Or will it be a private production that will only be shared with friends or family? How large is the budget for the production? Once you have clarified these questions, think about who should be involved in the process. Then, put together your film team, unless you want to do everything on your own.
After that, it's time for the concrete planning: When should the shoot take place? How many shooting days are required? Create a schedule with dates. Think about what exactly is to be filmed. What motifs or storylines should the film have? Prepare a script or at least a shot list (a short list of all the shots to be filmed). And then, scout out suitable locations where the shot list can be completed. In professional film productions, a dedicated location scout is provided for this purpose as part of the production team.
Production
Production refers to the actual shoot. Production is about following the planned steps from pre-production as closely as possible. Depending on the complexity, this involves checking the lighting conditions and installing spotlights, preparing the camera movements and instructing everyone involved.
Then, filming can begin – depending on the type of film, with scenes, exterior and interior shots, interviews, and other shots. Particularly in the case of film scenes, the first shots must be viewed directly, and reshot, as necessary. In the case of inaudible recordings of dialogue, voiceovers – i.e. audio recordings made afterwards – may be necessary.
Post production
Finally, in the third phase, it's time to sit at a computer – and post production begins. First, all the recordings are imported to the computer. It may be possible to make an initial selection during this process so that only footage that is really needed ends up on the hard drive.
Then, the imported film and sound clips are imported into the post production software and put in the right order. The most important thing here is to make cuts at the right places. This is a demanding task that, in the case of more elaborate productions, can require a complete team of editors. But the picture and sound quality must also be optimized and additional media content such as subtitles, background music, and special effects must be created and added.
In the end, the finished film is made, for example as a video file export, as a DVD or via upload to the Internet.
Pre-production
- Genre/title/topic
- Target group/audience
- Budget
- Production team
- Shoot time
- Storyline
- Shotlist/screenplay
- Locations
Production
- Setting up sound/light equipment
- Performing interviews
- Recording voiceovers
- Making camera recordings
Post production
- Import recordings
- Optimize video & audio
- Cutting scenes
- Composing scenes
- Importing, positioning, and mixing soundtracks, special effects, and other additional content
- Exporting the finished film (e.g. as a video file, DVD, or upload to the Internet)
The steps in post production

Step 1: Preparing and importing footage
For larger video projects, it makes sense to organize the shot footage in a way that makes any subsequent video editing as easy as possible. Above all, this includes copying the video files into appropriately named folders. This is especially important for large film projects with numerous scenes from different shooting days and locations.
Make sure you have a well-organized folder arrangement on your hard drive and sort the footage from the camera into these folders, for example, by shooting day or subject. This is also a good time to give the individual video files descriptive names. This will save you a lot of time when it comes to finding the right scenes and editing them one after another.
Then, open your post production software and import your footage from the footage folders you've prepared.

Here's how – with Movie Studio:
We use MAGIX Movie Studio as the post production software in this guide. But most of the work steps can be performed with any other post production program in the same way.
When you first start MAGIX Movie Studio, the Storyboard mode will open. In this view, you can import, select, and combine individual video files to create a movie.
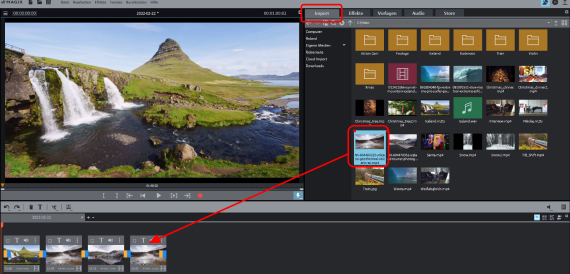
In the upper right, the Media Pool can be used for importing. It clearly displays all files available for import from the storage device or hard disk.
- Simply drag & drop the files you want to use into the storyboard.

Step 2: Making a rough cut
A rough cut is, so to speak, the first draft of the film you will produce. Here, it's not yet time to focus on the fine details. Import all the scenes you want to use in your movie from your folders of footage and arrange them in the right order. While doing this, sift through the unusable footage – e.g. shaky shots, redundancies , accidental takes, etc. – and cut them out.
In the end, you should only have usable footage in your project.
Then, save this rough cut under a suitable name (e.g. MyProject_rough_cut). This way, you can always use this first stage of work later, for example, to make fundamental changes to the structure of the film.

Here's how – with Movie Studio:
In the Movie Studio storyboard, a thumbnail for each imported video file helps maintain an overview of the scenes. Simply drag an object to change the position of a clip in the video.
In Storyboard mode, only the basic editing features are available. Here, you can quickly place your imported material in the right order by rearranging or even deleting the scenes in the storyboard.
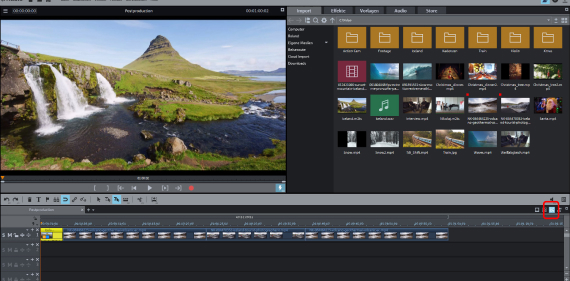
For more advanced editing work, switch to Timeline mode using the button on the right. Here, you have access to several tracks on which you can later arrange your video footage together with supplementary music, titles, and other media to create your film.
This is also where you perform all editing.Editing is the most important step in post production. For the rough cut, first remove all unusable passages by cutting at the appropriate points and deleting all unnecessary content from the track.
- To do this, simply click to place the playback marker at the beginning of the part you want to cut and press "T" on your keyboard. The unusable passages cut at the front and back will be deleted from the track.

Step 3: Optimizing picture and sound
After the rough cut, it should be clear which image and sound media can be used in the film. Now, you can optimize this material. First of all, this includes the following editing tasks:
- Video stabilization (for shaky shots)
- Image optimization (brightness, contrast, and color correction)
- Sound optimization (audio cleaning, increasing speech clarity using an equalizer and compressor)
The first step is to optimize the footage's quality. This step is especially important if video scenes were recorded at different times of day and under different lighting conditions. This might be the case, for example, with videos taken on vacation or during a trip.
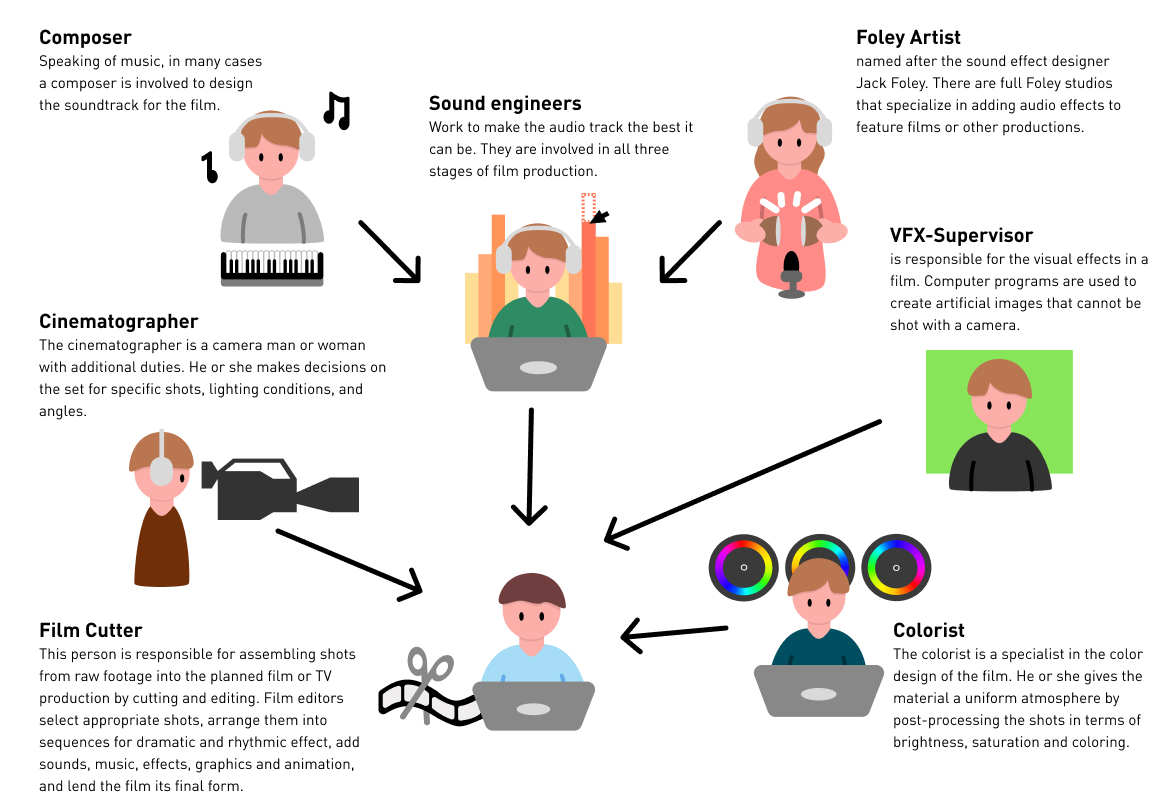
In general, with the exception of special effects, the rule of imperceptibility applies: Effects should remain unnoticeable. Your audience should concentrate on the plot without being distracted by effects. Of course, this principle is particularly true for image optimizations. This step is important for removing all anomalies in images such as underexposure, abnormal tint, and blurry focus. These can be optimized using the effect options in the video editing program. The most important elements are white balance, hue and saturation, as well as brightness and contrast.
Afterwards, you can still apply an individual style to your film using additional effects and film looks.
Sound is also a big part of the post production process. We start by removing any noise from the existing audio. Then we balance the volume to account for different microphone positions in each sequence of video.This step is especially important if your video is made up of footage from different sources.
Whether due to strong winds, a misplaced tripod, or animated movements during shooting, it's easy to get shaky footage. But thanks to integrated video stabilization from VEGAS, you can quickly and effectively reduce shaky footage.
Does your video look too dark or washed out? Modify brightness, contrast and color fully automatically or manually – the Plus and Premium versions even allow you to work selectively on individual color ranges.
Secondary color correction exclusively in Platinum | Suite
Want to recreate the look of your favorite movie or balance the exposure of individual clips? With just a few clicks, you can match color, brightness and contrast levels against a reference video.
Exclusively in Platinum | Suite

Here's how – with Movie Studio:
- The options for image optimization can be found in the Effects tab of the Media Pool. First, click the video in the track, and then apply the optimization effect. The default effects Brightness, Contrast, and Color can be easily adjusted using 1-click optimization. Color correction allows you to edit foreground and background separately. The integrated video stabilization in the professional software VEGAS enables you to stabilize shaky footage. Moreover, there are also a lot of special effects for creative video editing.
- To optimize the audio track, Movie Studio provides special effects such as DeNoiser, DeClipper, and DeHisser, which can be used to filter out different types of noise from the audio track. These effects can be found in the effects tab in the Media Pool under "Audio effects". In Movie Studio's audio mixer, you can find further tools for audio enhancement, such as equalizer, compressor, reverb, and stereo processing. In the extended program version, Movie Studio PLATINUM, you also have access to professional mastering tools that include a multiband compressor, 1-click auto-mastering, and a sound cloner that lets you apply the sound properties of any audio file to your own media – perfect for music videos.

Step 4: Performing detailed editing
Once the film footage has been optimized, you will make a detailed edit, i.e. the final version of the film. This is where your qualities as an editor come into play. Because it's an art in itself to estimate the ideal length of each shot and to set different shots one after the other in rhythm, so that a scene is created that's interesting, and then to sequence the scenes in such a way that a viable, suspenseful arc and, ultimately, a good film are the result.
The transitions from scene to scene are especially important. At which points should cuts be placed? How long should a shot be? A little instinct and experience in video editing is helpful in this area.

Here's how – with Movie Studio:
Movie Studio includes many helpful tools and intuitive workflows that make your life as a film editor much easier. A few examples:
- Remove passage: The easiest and fastest way to edit. Place the playback marker at the desired position and press the "T" key. To remove a passage, cut once at the front and once at the end. Then, click on the cut passage in the middle and delete it from the track with the "Del" key.
- Shorten scenes: You can slide any video forward and backward in the project window as desired. This will remove the beginning or end of a scene. If you drag the cut and shortened object back again, the removed passages will be restored.
- Split and trim: In the "Split and trim" mouse mode, you can move your mouse over the video object in the project window and see the corresponding footage in the preview monitor. Once you have found a position to place a cut, click and hold the mouse button. Drag the mouse to the left to trim the end of the front object or to the right to trim the beginning of the following object.
- Cut and object trimmer: If you want to cut with great precision, there are two powerful cut editors that let you define the boundaries of each scene and the scene transitions down to the frame.
- J and L cuts: Editing video and audio tracks of a video is done independently from one another with J-L cuts. This creates an acoustic bracket, so to say, that allows another video image to be seen while the audio track from the first video continues to play. First, right-click on the video to switch the view so that the image and sound are shown as two independent objects. Then, hold down the Alt key and move the mouse pointer to the beginning or end of the footage or audio object. Now you can trim video and audio individually. If you hold down the Shift key together with the Alt key, you can fix the horizontal position of the object on the track. This protects the objects against accidental movement.
- Move object contents: Occasionally, the cut scene structure is actually perfect, but the starting frame of a shot, for example, is not correct. The "Move object content" mouse mode allows you to retain the framework, but you can still change the content within the objects afterwards. The length and position will remain the same, but the initial and final frames will change.
- Close gaps: Sometimes unintended gaps can occur while editing video. Additionally, there is the handy Close gaps tool that you can use at the end of the fine editing process. In timeline mode, right-click on an empty area of the project window and select "Find and close gaps".
By the way, all cutting processes and other edits in Movie Studio are "non-destructive". This means that nothing can happen to your footage on the hard disk, and you can try out all the program features as you like without fear that your original footage will be permanently changed or deleted.

Step 5: Inserting additional elements (e.g. title inserts, sound effects, opening and closing credits)
After your film has taken on a final shape in the fine cut, additional elements come into play. These include, for example, sound effects for the audio track, voiceover dubbing, title fade-ins, and opening and closing credits.Background music is good for creating a certain atmosphere and making lengthy scenes more interesting. Make sure when you select your music that you have the appropriate rights for usage.

Here's how – with Movie Studio:
Adding background music in Video deluxe is as easy as can be: You control the music file in the Media Pool and simply drag the music of your choice onto an empty track, directly below the scene that is to be accompanied. Then, adjust the ends of the audio object so that the desired excerpt from the music file sounds in the right places. In order for the music to fade out at the end to match the end of the scene, set a fade by dragging the fade handle on the right edge of the object inwards.
Sound effects are a powerful element of the post production process and are especially popular for YouTube videos. You can purchase additional sound collections in the program's In-App Store and use them directly in Movie Studio.
With a voiceover, you can also embed narration or other microphone recordings:
- To do this, simply click on the red recording button below the preview monitor and speak into your microphone while the current movie in Movie Studio plays back to it.
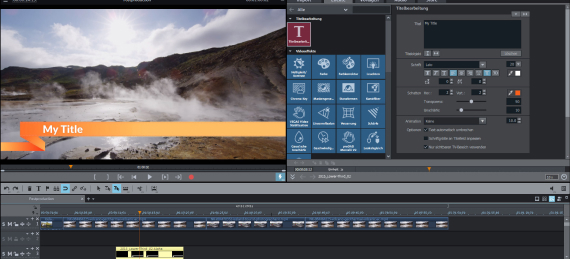
Movie Studio comes with an extensive template library of title graphics. Simply drag a template from the Media Pool's template folder into the project window and change the default text. Or create your own title objects, write text, and choose the font properties in the Title Editor. Additionally, an intro and an outro are often necessary. While the intro overlay informs a viewer what the video is about, an outro lists the people involved in the video production. For the intro and outro, you can also use clips from the movie to give a little preview. In the Media Pool template folder, you can find many included intro/outro animations that can be used with your own scenes.

Step 6: Exporting a film
Last, but not least, when all the scenes look and sound good in the video editing program, it's time to put the film to good use. Do you want to share it on a DVD? Then, burn it to a disc with a burning program and create a stylish selection menu beforehand. Or do you want to publish it on your YouTube channel? Then, export it in a compatible format and upload it to your YouTube account.

Here's how – with Movie Studio:
Movie Studio has a built-in burning program, so you can burn a DVD directly from post production.
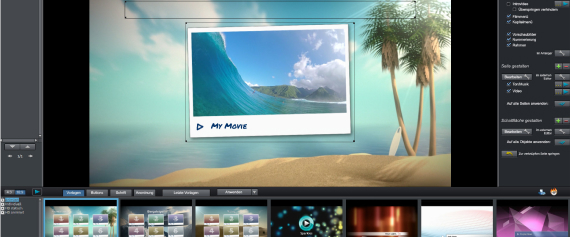
- Switch to the DVD burner interface in the upper right corner. Here, you can create a DVD menu with corresponding chapter inserts, thumbnails, and looped video sequences before burning.
Movie Studio also has its own export wizard that optimizes the resolution and size of the video for the target format. All export formats can be selected manually in the File menu. Here, you can specify the picture quality and size of the file.
The Export Wizard offers the following presets for different purposes:
- Export as video file: Saves the video to your hard drive
- Export to mobile device: Saves the film to a connected smartphone or tablet.
- Upload to the Internet: Uploads the video to Vimeo or YouTube.
Who is involved in post production?
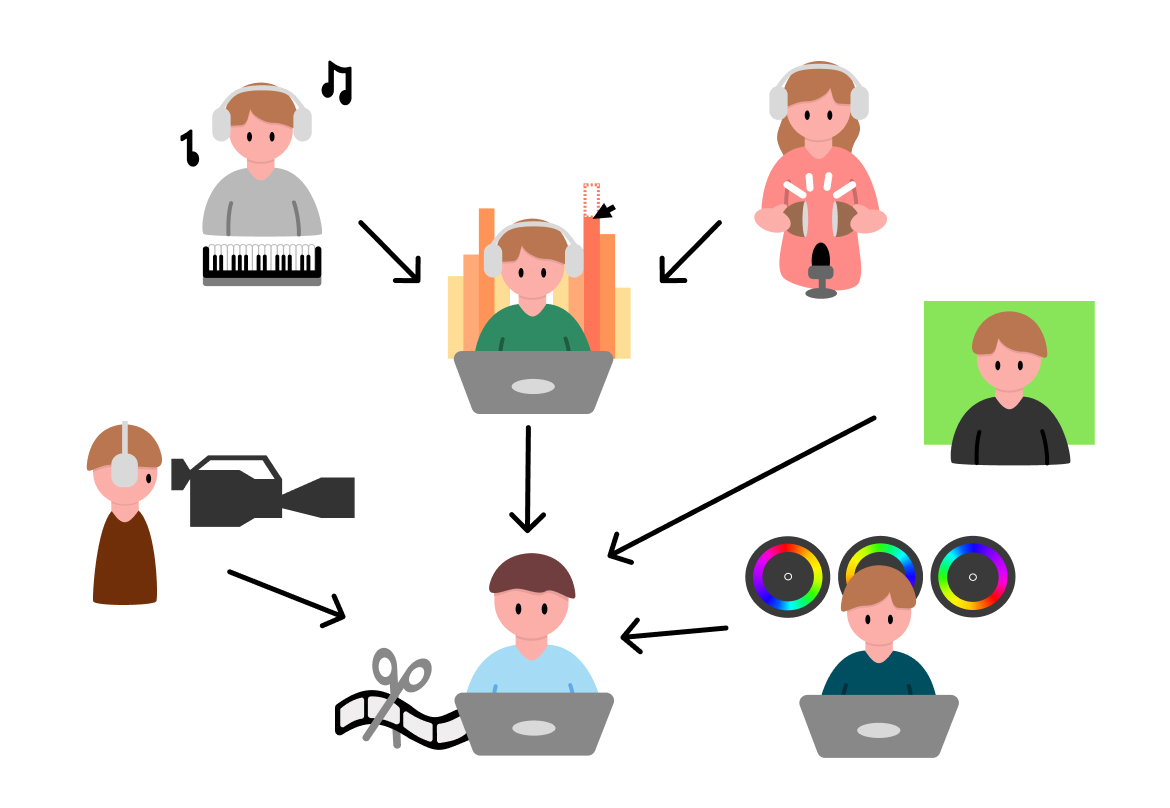
Professional post production involves a whole team of specialists:
- The central figure behind post production is the Film editor or Film cutter. This person is responsible for assembling shots from raw footage into the planned film or TV production by cutting and editing. Film editors select appropriate shots, arrange them into sequences for dramatic and rhythmic effect, add sounds, music, effects, graphics and animation, and lend the film its final form.
- Sound effects are created by the so-called Foley artist, named after the sound effect designer Jack Foley. There are full Foley studios that specialize in adding audio effects to feature films or other productions.
- Sound engineers and Sound technicians work to make the audio track the best it can be. They are involved in all three stages of film production. Post production is all about mixing dialogue, background noise, and music as perfectly as possible. But alongside the technical implementation, sound engineers also work to balance the supplementary sounds needed with the visual content. This calls for creativity.
- The VFX supervisor is responsible for the visual effects in a film. Computer programs are used to create artificial images that cannot be shot with a camera (e.g. imaginary creatures, places that are not real, or catastrophes). These visual effects must look as real as possible, so that they appear convincing in the film. The VFX supervisor's tasks include the conception and design of these types of visual effects. Often, they don't produce the effects on the computer themselves, but instead commission specialized companies or employees for this purpose in order to guarantee the necessary visual quality.
- Speaking of music, in many cases a Composer is involved to design the soundtrack for the film.
- The Cinematographer is a camera man or woman with additional duties. He or she makes decisions on the set for specific shots, lighting conditions, and angles.
- The Colorist is a specialist in the color design of the film. He or she gives the material a uniform atmosphere by post-processing the shots in terms of brightness, saturation and coloring.
Sound engineer
Sound engineers and Sound technicians work to make the audio track the best it can be. They are involved in all three stages of film production. Post production is all about mixing dialogue, background noise, and music as perfectly as possible. But alongside the technical implementation, sound engineers also work to balance the supplementary sounds needed with the visual content. This calls for creativity.
Composer
Speaking of music, in many cases a Composer is involved to design the soundtrack for the film.
Foley Artist
Sound effects are created by the so-called Foley artist, named after the sound effect designer Jack Foley. There are full Foley studios that specialize in adding audio effects to feature films or other productions.
Cinematographer
The Cinematographer is a camera man or woman with additional duties. He or she makes decisions on the set for specific shots, lighting conditions, and angles.
VFX-Supervisor
The VFX supervisor is responsible for the visual effects in a film. Computer programs are used to create artificial images that cannot be shot with a camera (e.g. imaginary creatures, places that are not real, or catastrophes). These visual effects must look as real as possible, so that they appear convincing in the film. The VFX supervisor's tasks include the conception and design of these types of visual effects. Often, they don't produce the effects on the computer themselves, but instead commission specialized companies or employees for this purpose in order to guarantee the necessary visual quality.
Film editor
The central figure behind post production is the Film editor or Film cutter. This person is responsible for assembling shots from raw footage into the planned film or TV production by cutting and editing. Film editors select appropriate shots, arrange them into sequences for dramatic and rhythmic effect, add sounds, music, effects, graphics and animation, and lend the film its final form.
Colorist
The Colorist is a specialist in the color design of the film. He or she gives the material a uniform atmosphere by post-processing the shots in terms of brightness, saturation and coloring.

How long does post production last?
How long a film's post production takes primarily depends on what kind of film is being produced. An elaborate feature film with hundreds of actors and extras, as well as tons of camera settings and special effects requires several months if not years for post-production alone, while the post production of a short film or TV feature can be completed in just a few days of work.
As a general rule, the more people involved in post production, the greater the effort a director or producer must make to manage and coordinate everyone involved to achieve the intended result. Modern video software makes it possible for everything involved in post production for many productions to be done by a single party. This helps you save ton of time during production.
Examples of post production software
There are many different video editing programs on the market that you can use to perform all the stages of post production. They differ depending on the amount of required knowledge and project demands. Here are some popular tools:
- Adobe Premiere Pro is a nonlinear editor (NLE), which means that the edits can be performed in any order. The program has features for editing video, audio, and graphics, as well as color correction tools.
- Final Cut Pro is another NLE and may be more intuitive for those familiar with Apple operating systems and apps. This program also supports image and audio editing.
- DaVinci Resolve is a popular tool for color correction editing. Additionally, this tool is available free of charge.
- VEGAS is a feature-loaded NLE for professional video and film production. VEGAS includes all the features for video editing, motion graphics, image composition, live streaming, and sound design.Seamless workflows enable you to focus on storytelling.
- Movie Studio is an intuitive video editor that is particularly well-suited for beginners. It brings together efficient cutting tools, extensive options for video and audio optimization and up to 1,500 included effects and titles. The audio editing options in Video deluxe are particularly noteworthy, featuring integrated audio cleaning, high-quality effects, sound cloner, auto-mastering, and a virtual multitrack mixer.
Which video software should you use? It depends on what your needs are. For beginners and amateur video creators, we recommend Movie Studio. This fully-featured video editing program lets you accomplish everything you need to produce home videos and movies with professional demands. It's also very easy-to-use and intuitive.
For high-end video production, VEGAS is the ideal video editing and post production solution. It provides cutting-edge editing for high-quality movies, TV, and web projects right from the start, and VEGAS Post helps you take your movies one step further by enabling important post production tips.

Post production – checklist
Post production is not one, single task, but rather an entire collection of tasks. It can be easy to forget some of the steps, especially if you're in a hurry. Here are all the important editing steps after shooting a video in one, easy-to-read checklist. By following this post production checklist, you'll ensure that your videos and movies will be better.
- Cuts: Make sure the cuts in your video are in an appropriate tempo – the rhythm should not be too fast or too slow.
- Sound: Have you chosen the right music for the feel of the video? Does the ambiance match? Make sure all the volume levels are on point and the sound effects are in the right places.
- Visual effects: Make sure all scene transitions look natural. The image should not "jump" too much. Every effect should blend well into the film – don't make anything too garish or obtrusive.
- Film aesthetics and color: Use color correction or supplied style templates to make all the shots look consistent and tasteful.
- Titles: Check the spelling of all titles and subtitles. Make sure all text panels are in the right places.
Post production - infographic
